DIY Colorful Abstract Artwork

Nothing makes a house a home quite like artwork. It really completes the look and helps to show some personality. Unfortunately, I've got a whooooole lot of empty space on my walls, and I really want to change that! Or, I guess fortunately... since now I get to have some fun with artwork! For starters, I made this super easy abstract artwork using a spare canvas I had and some paint. It was basically free! The best part about this type of art is that you can really get creative and free by painting any way you like! For those that want a similar look to mine, here are the steps that I took.

Create easy abstract art with just a flick of your paintbrush! Click for the full how-to.

You will need:

Canvas Panels (here)
Paints (similar here)
Metallic gold paint (here)
Brushes (similar here)
Newspaper or similar to cover workspace

Directions:

Abstract Art Painting Collage.jpg


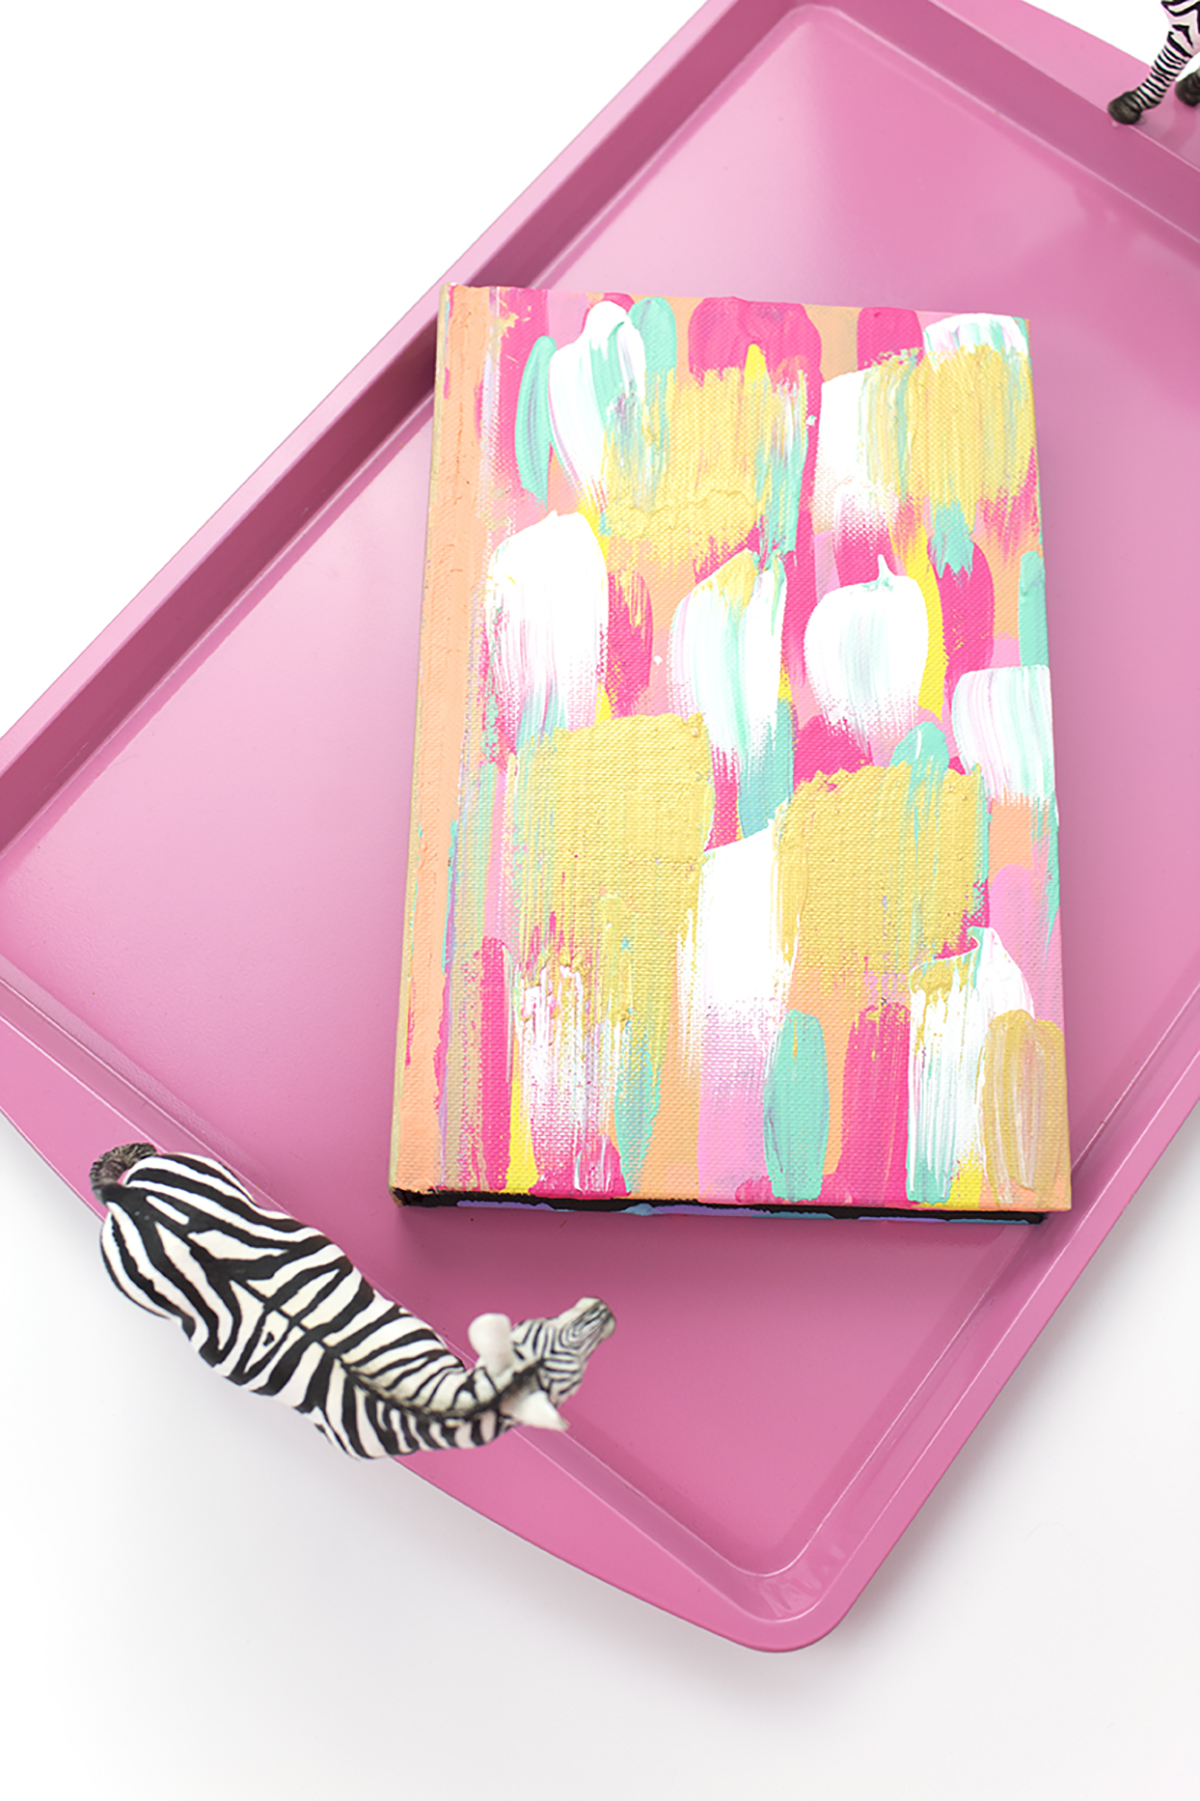
  1. Using a large paintbrush, start painting thick lines of your first color. I went from light to dark, since it covered better. I tried to cover as much of the canvas as I could the first time around.
  2. Using a thinner paintbrush, paint smaller strokes of all the colors once again. This is a good time to try to cover any blank spots.
  3. Once I painted all the thinner lines, I went over them again lightly with a dry brush to “blend” the colors and make it less streaky. 
  4. Using a medium thickness brush, paint on some white paint to lighten up the whole look. Be sure to have enough on the brush so that you’re adding some white, not just smearing around the paint already on there.
  5. Add more thin strokes of color to reduce the giant white streaks, then grab a wide brush for your gold accent.
  6. Paint on your gold strokes, then add more white if you want it to be a little lighter once again. And you’re done!

To hang up your canvas, add a hanging string using glue or purchase some inexpensive 3M Velcro. You can also put it in a frame!

DIY Painted Notebook

This weekend I went to Michael’s to grab a few items for upcoming projects, and I had a sketch book on my list. I realized that I didn’t really have anywhere that I could keep all my project ideas together, so I usually scribbled on a sheet of white paper that ended up who-knows-where when it came time to actually create the project. One of my New Year’s Resolutions is to be more organized, so I knew I had to take care of this! However, when I went to Michael’s I didn’t love the selection of sketchbooks available. I grabbed this one because it was the most affordable at $5, and figured if it couldn’t be cute, at least it was cheap. WELL… while creating another paint project, I realized that this notebook (with its canvas-like surface!) was wishing for a new look. Lo and behold- here it is! I love this sketchbook now, and I can’t wait to use it for my project sketches, room upgrades, and any ideas that pop into my head! Best of all, it’s so easy and cheap to make with products you probably have on hand!

Give your ho-hum notebook a new look with just a coat of paint! Add a metallic accent and you're golden! Click for the DIY.


You will need:

Notebook (from Michael’s, or here)
Paints (similar here)
Metallic gold paint (here)
Brushes (similar here)
Newspaper or similar to cover workspace

Give your ho-hum notebook a new look with just a coat of paint! Add a metallic accent and you're golden! Click for the DIY.


  1. Open your notebook to the center and place it pages-down on your workspace. Paint on thick strips with your first paint color. I wanted to do a rainbow palette, so I decided to do half the rainbow on one side, and the other half of the colors on the other side.
  2. Paint your whole notebook cover as much as you can, and let dry just a little. I thought it looked kinda mehhh without a pop of color, so I went back and took 1 color from each side to add a jolt to each side. 
  3. Using your white paint, add some thick stripes to your notebook cover. I found that the white ended up with a cool rainbow effect, so I used it to paint the spine.
  4. Add your pop of gold to the notebook and spine if you’d like. Let dry fully, then go back and do any necessary touch-up.

You can spray it with a finishing spray to seal it, or just be careful with it. You can also get a small pouch for it so it doesn’t chip paint everywhere.

Give your ho-hum notebook a new look with just a coat of paint! Add a metallic accent and you're golden! Click for the DIY.

Related: DIY No Sew Embellished T-Shirt

I'm really loving this sketchbook now! It's so cheery and fancy. It really encourages me to create more, and I love taking a sketch break to think up new ideas, spruce up a room, or just brainstorm! How will you use your notebook? Let me know in the comments below!