ORC Fall 21 REVEAL- Attic Playroom & Movie Theater

It’s here - reveal day! Well, technically, reveal day was on Thursday. I got an email from One Room Challenge that if we needed a few more days to finish up that we should use them, and it came at just the right time. I definitely needed a couple of extra days, and I really think it made all the difference! This room has been a labor of love. 

*All sources are listed at the bottom. If anything is missing, let me know and I’ll add it! This post contains affiliate links.

As you may remember, this room was previously my office space. It never quite felt right, so when I thought about how to fix up the house it just made sense for this room to become a family space instead of being just for me. I was always trying to get people to hang out up there with me, so I guess that was sort of a sign that I wanted to create a space that the whole family could enjoy. 

I think the biggest change for this room is the new floors! I have been (impatiently) waiting to replace this floor since we purchased the house five or six years ago. I was giddy on Halloween as we ripped up the old carpet. We replaced the carpet with this Beaumont Eco Resilient Flooring. So far, it’s been holding up great to our various kids and pets. Did I mention that for some reason Hailey decided to pee on it one day? Yea… she did. It cleaned up perfectly! I think these floors are my favorite design element of my whole house, hah! This was the first real renovations we did on this house (and any house I’ve ever lived in!) so it was really exciting to make the decision and see my vision come to life. My husband installed the floors himself (with a little bit of help from me- I’m mostly the designer in this duo) and it took him 3 tries to get it right! It’s beyond perfect though. I love these floors.

Let’s talk about this amazing sofa that I got from Bob’s Furniture. I wanted to replace the old grey futon that we had for our makeshift den, which honestly reminded me of the seat of a car. First, we were thinking a sleeper so that it would be a good guest space. Then, since it’s a movie theater room, I thought it would be great to have recliners. I wanted somewhere that we can get comfy and watch a movie and truly relax. Finally, we landed on these two loveseat sleepers (a left and right side) which means that we have a large sleeper bed for when guests come over, as well as four chaise lounges! Although the shape of the sofa is pretty traditional (I was going for something a little more Art Deco up here) the sofa really is perfect for the space. I love that the chaise goes back in and folds down, which means that the sofa takes up less space when we’re not using the foot rests. It’s perfect that we get to host guests up here too. This sofa is the Playroom model in blue (perfect name!), and the configuration was recommended by the sales rep. It was available to be delivered super fast- we took some time because we were getting the floors done, but I think it could’ve been here within a week!

Now let’s talk rugs. Picking out rugs caused me so much stress. I wanted a washable rug that was large, affordable, and matched my style. I was pretty much set on this Target Opalhouse outdoor rug from the start, but it didn’t seem like it would hold up well to two kids, two cats, and a dog. I decided to put it up here anyway and I loved the way it looked. I kind of threw logic out the window, and within a few days a cat had already scratched it and ruined a large part of it. So, this rug will probably be going outdoors where it belongs and I’ll find a new rug for the space. 


As for the playroom rug, I ended up using the yellow rug from the original playroom downstairs and placed a smaller rug on top that my sister had given to me. I love the layered look since it ties in all the main colors of the room, even though the combo of leopard print and boho is atypical. I also keep a play mat for Travis handy, since he loves tummy time and I want to make sure he’s on something fairly clean. These rugs get furry with all out pets and he’s been known to grab tufts of lint/fur from the floor and put it in his mouth. Kids, amiright?

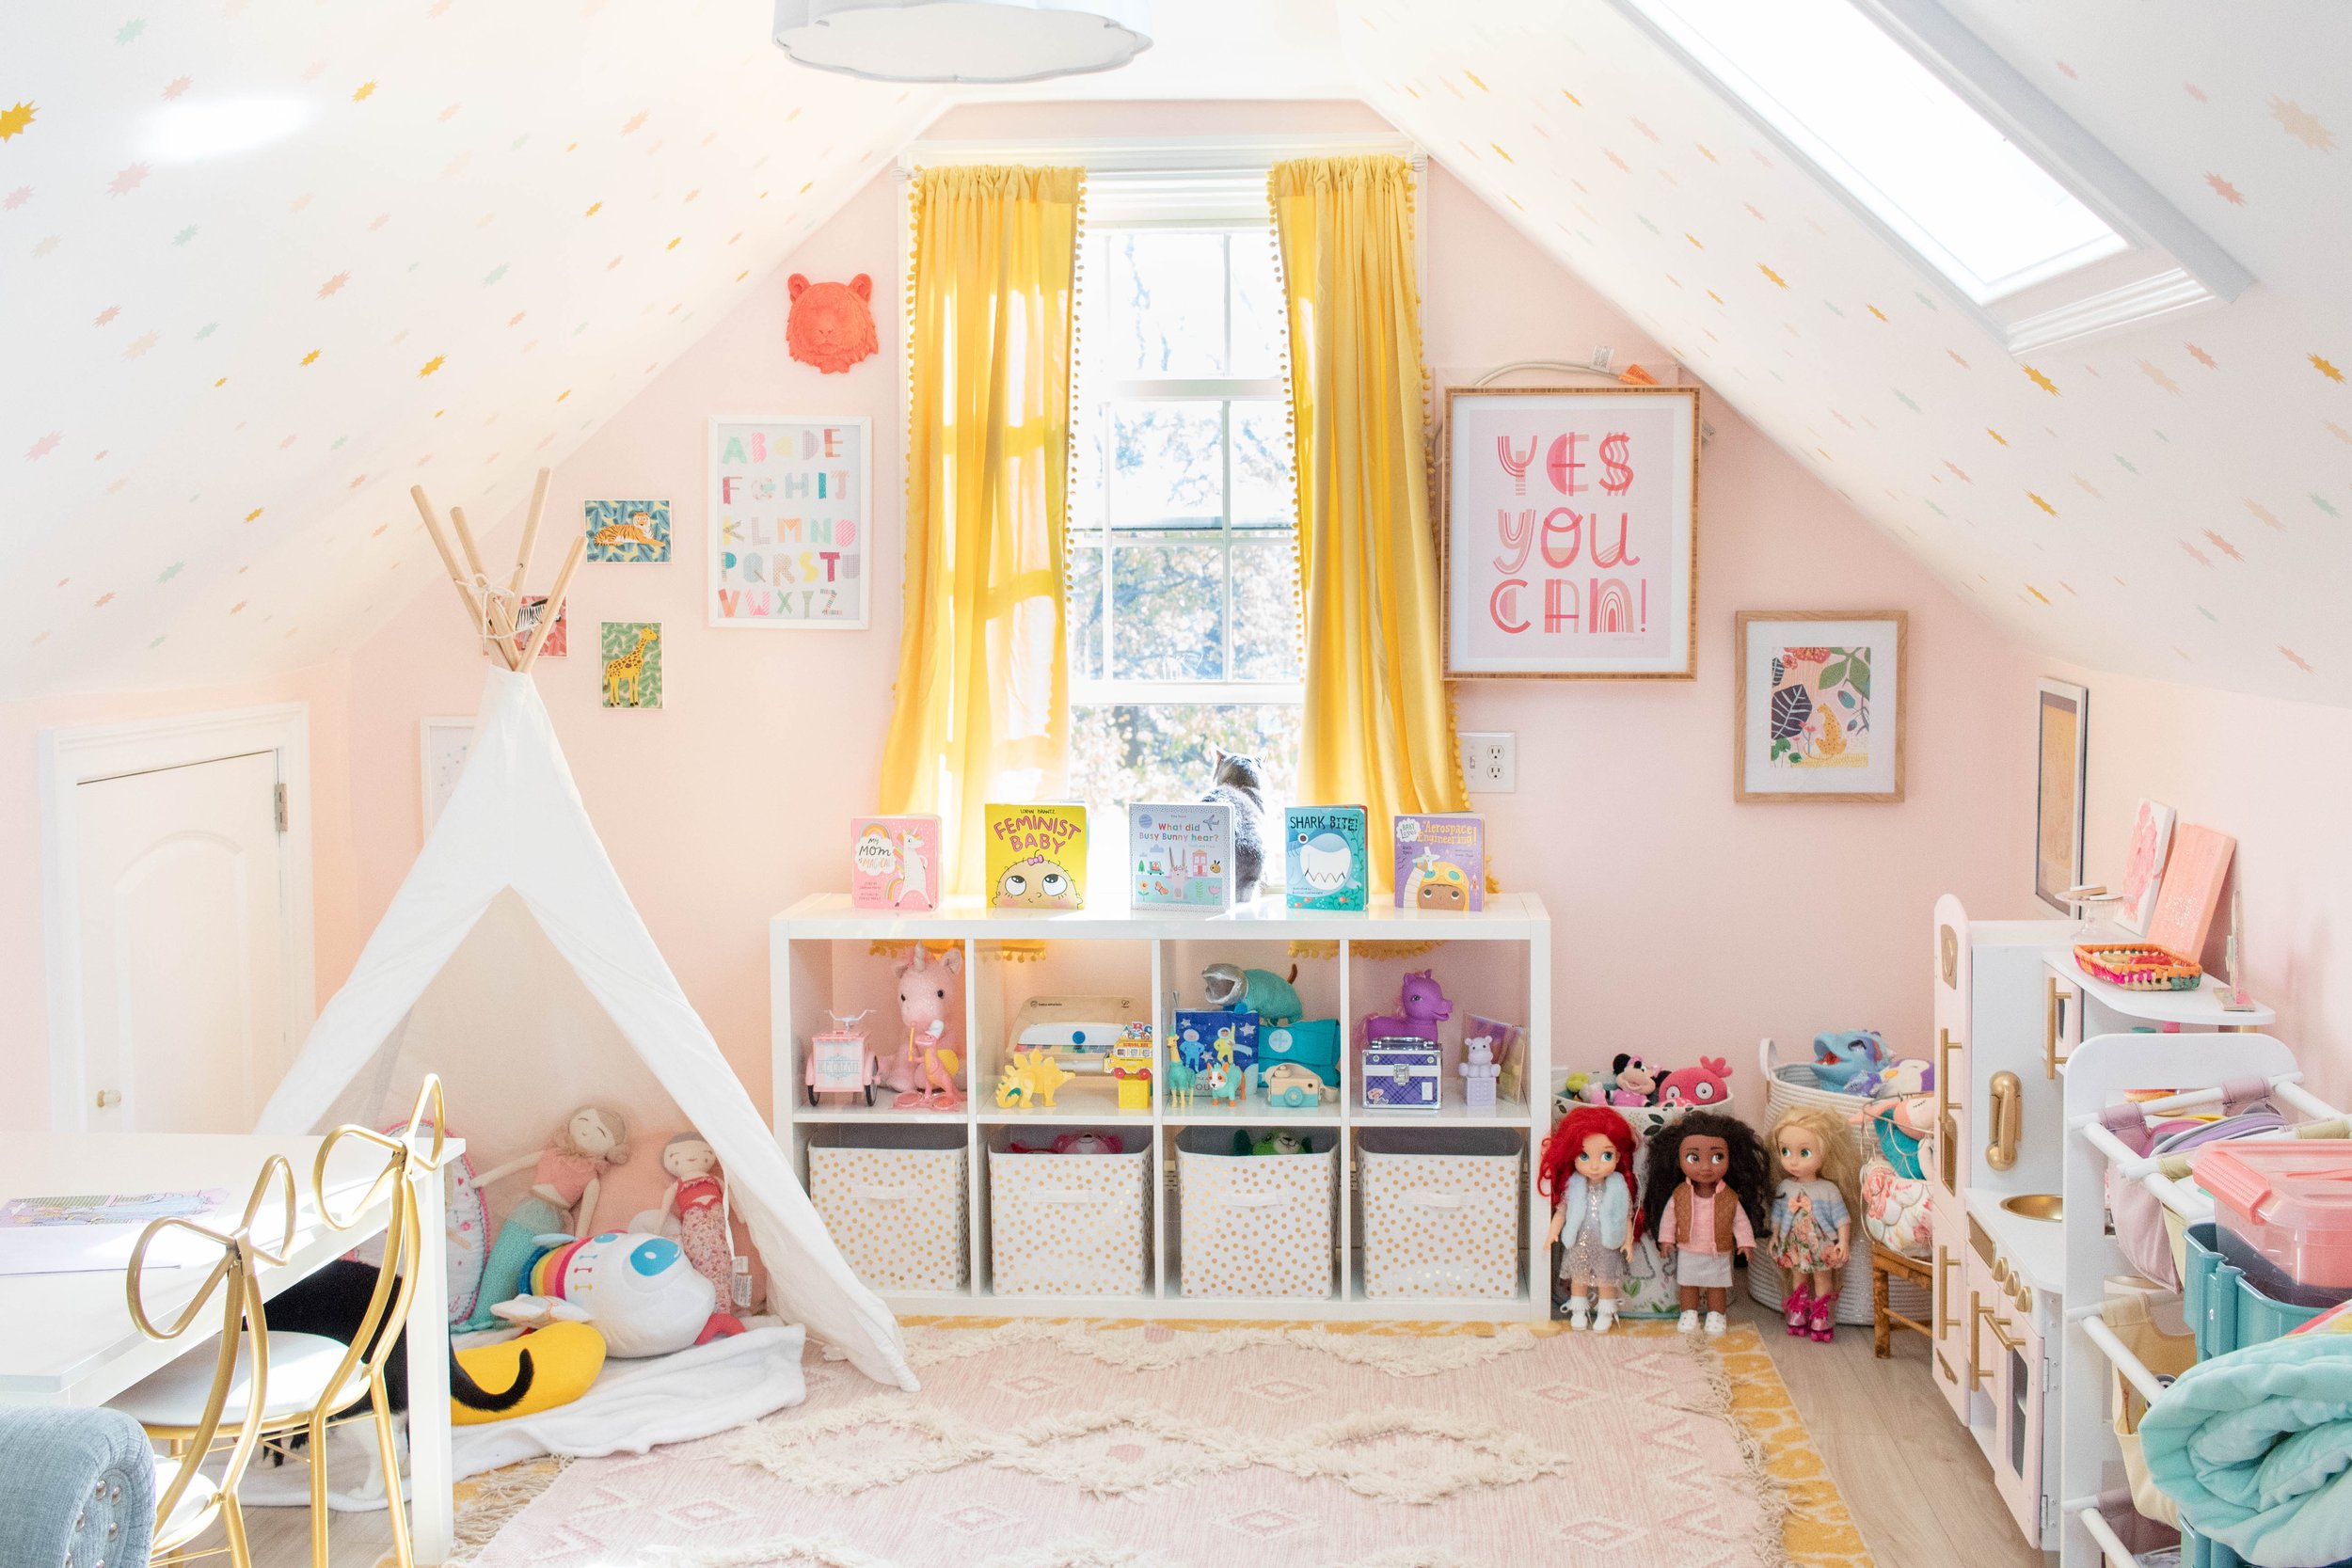
Most of the artwork in here was things I already had. I tend to buy things I like without really knowing where they will go, so I have a stash of items that I love that are homeless… within my home. Hah! Most of this artwork came from the playroom downstairs (like all the animal prints) and then I added a vintage Carters ad that I had gotten from the thrift store. I LOVED it and intended to put it in the kids shared room, but it didn’t quite have a spot. I passed by it when grabbing things and realized it would be perfect up here, appropriately next to the baby care center.

The large Yes You Can! sign is from Home Goods. I had gotten it for my craft space up here to cover the AC unit. I’m so glad that it works so perfectly for the playroom too! I attached it with 3M velcro strips for now, but I plan to put it on more permanently with the cable hidden. I hate the eyesores of the house (like old AC units- ugh) and my goal is to try and hide them or disguise them.

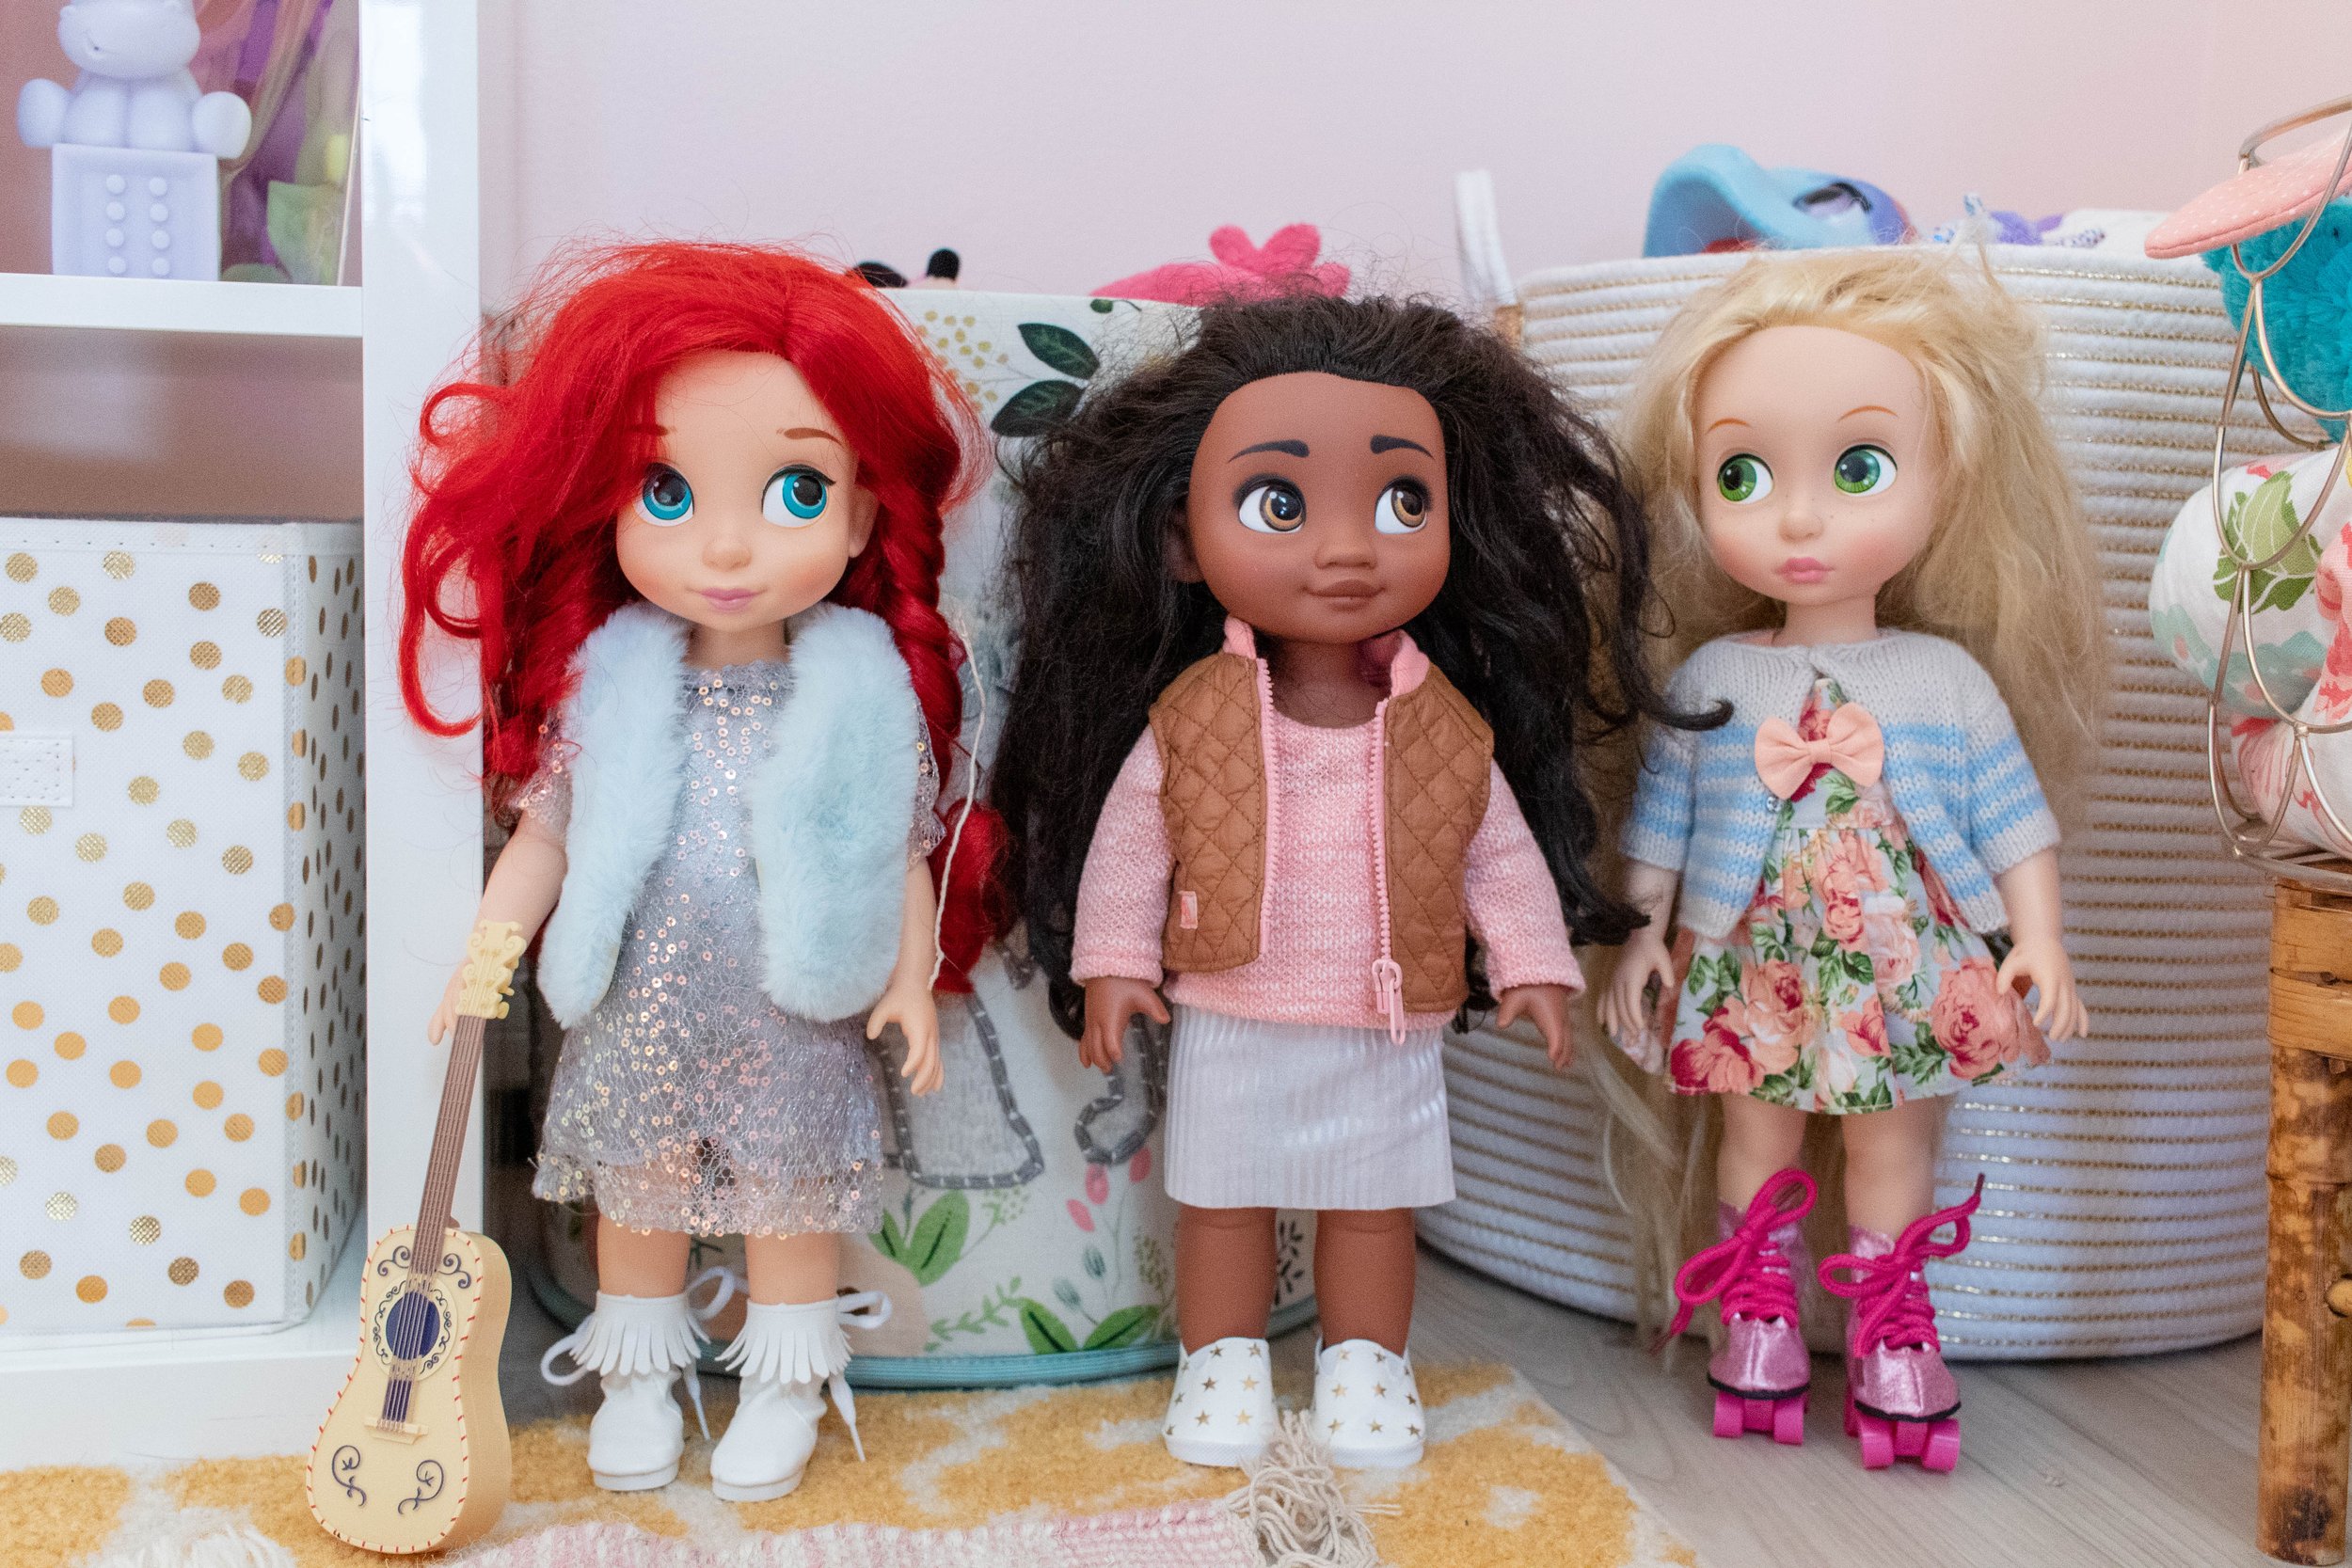
The original playroom downstairs was always a mess of toys, so I decided that this one would have limited toys and a toy rotation. I have a few bins in this Ikea cube unit and picked out a few toys and sorted them by color. While I love how clean this looks, I’ll probably be more practical in the future and display toys with their relevant parts and pieces instead of by color. I’ve also got 2 baskets of toys for Travis. I didn’t know what to place on top of the cube units, so I took a cue from the library and placed some upright books. This allows Hailey to grab books on her own, while ensuring that the top of the cube unit doesn’t become a dump zone. Next to all of this, we’ve got her tent & reading nook filled with cute pillows.

And Hailey’s favorite toy- her play kitchen! This was another FB marketplace find for only $15 and it was practically brand new! I gave it a makeover with white and pink chalk paint, plus some gold spray paint. I also plan to add some cane accents and a backsplash but that’s a project for another day!

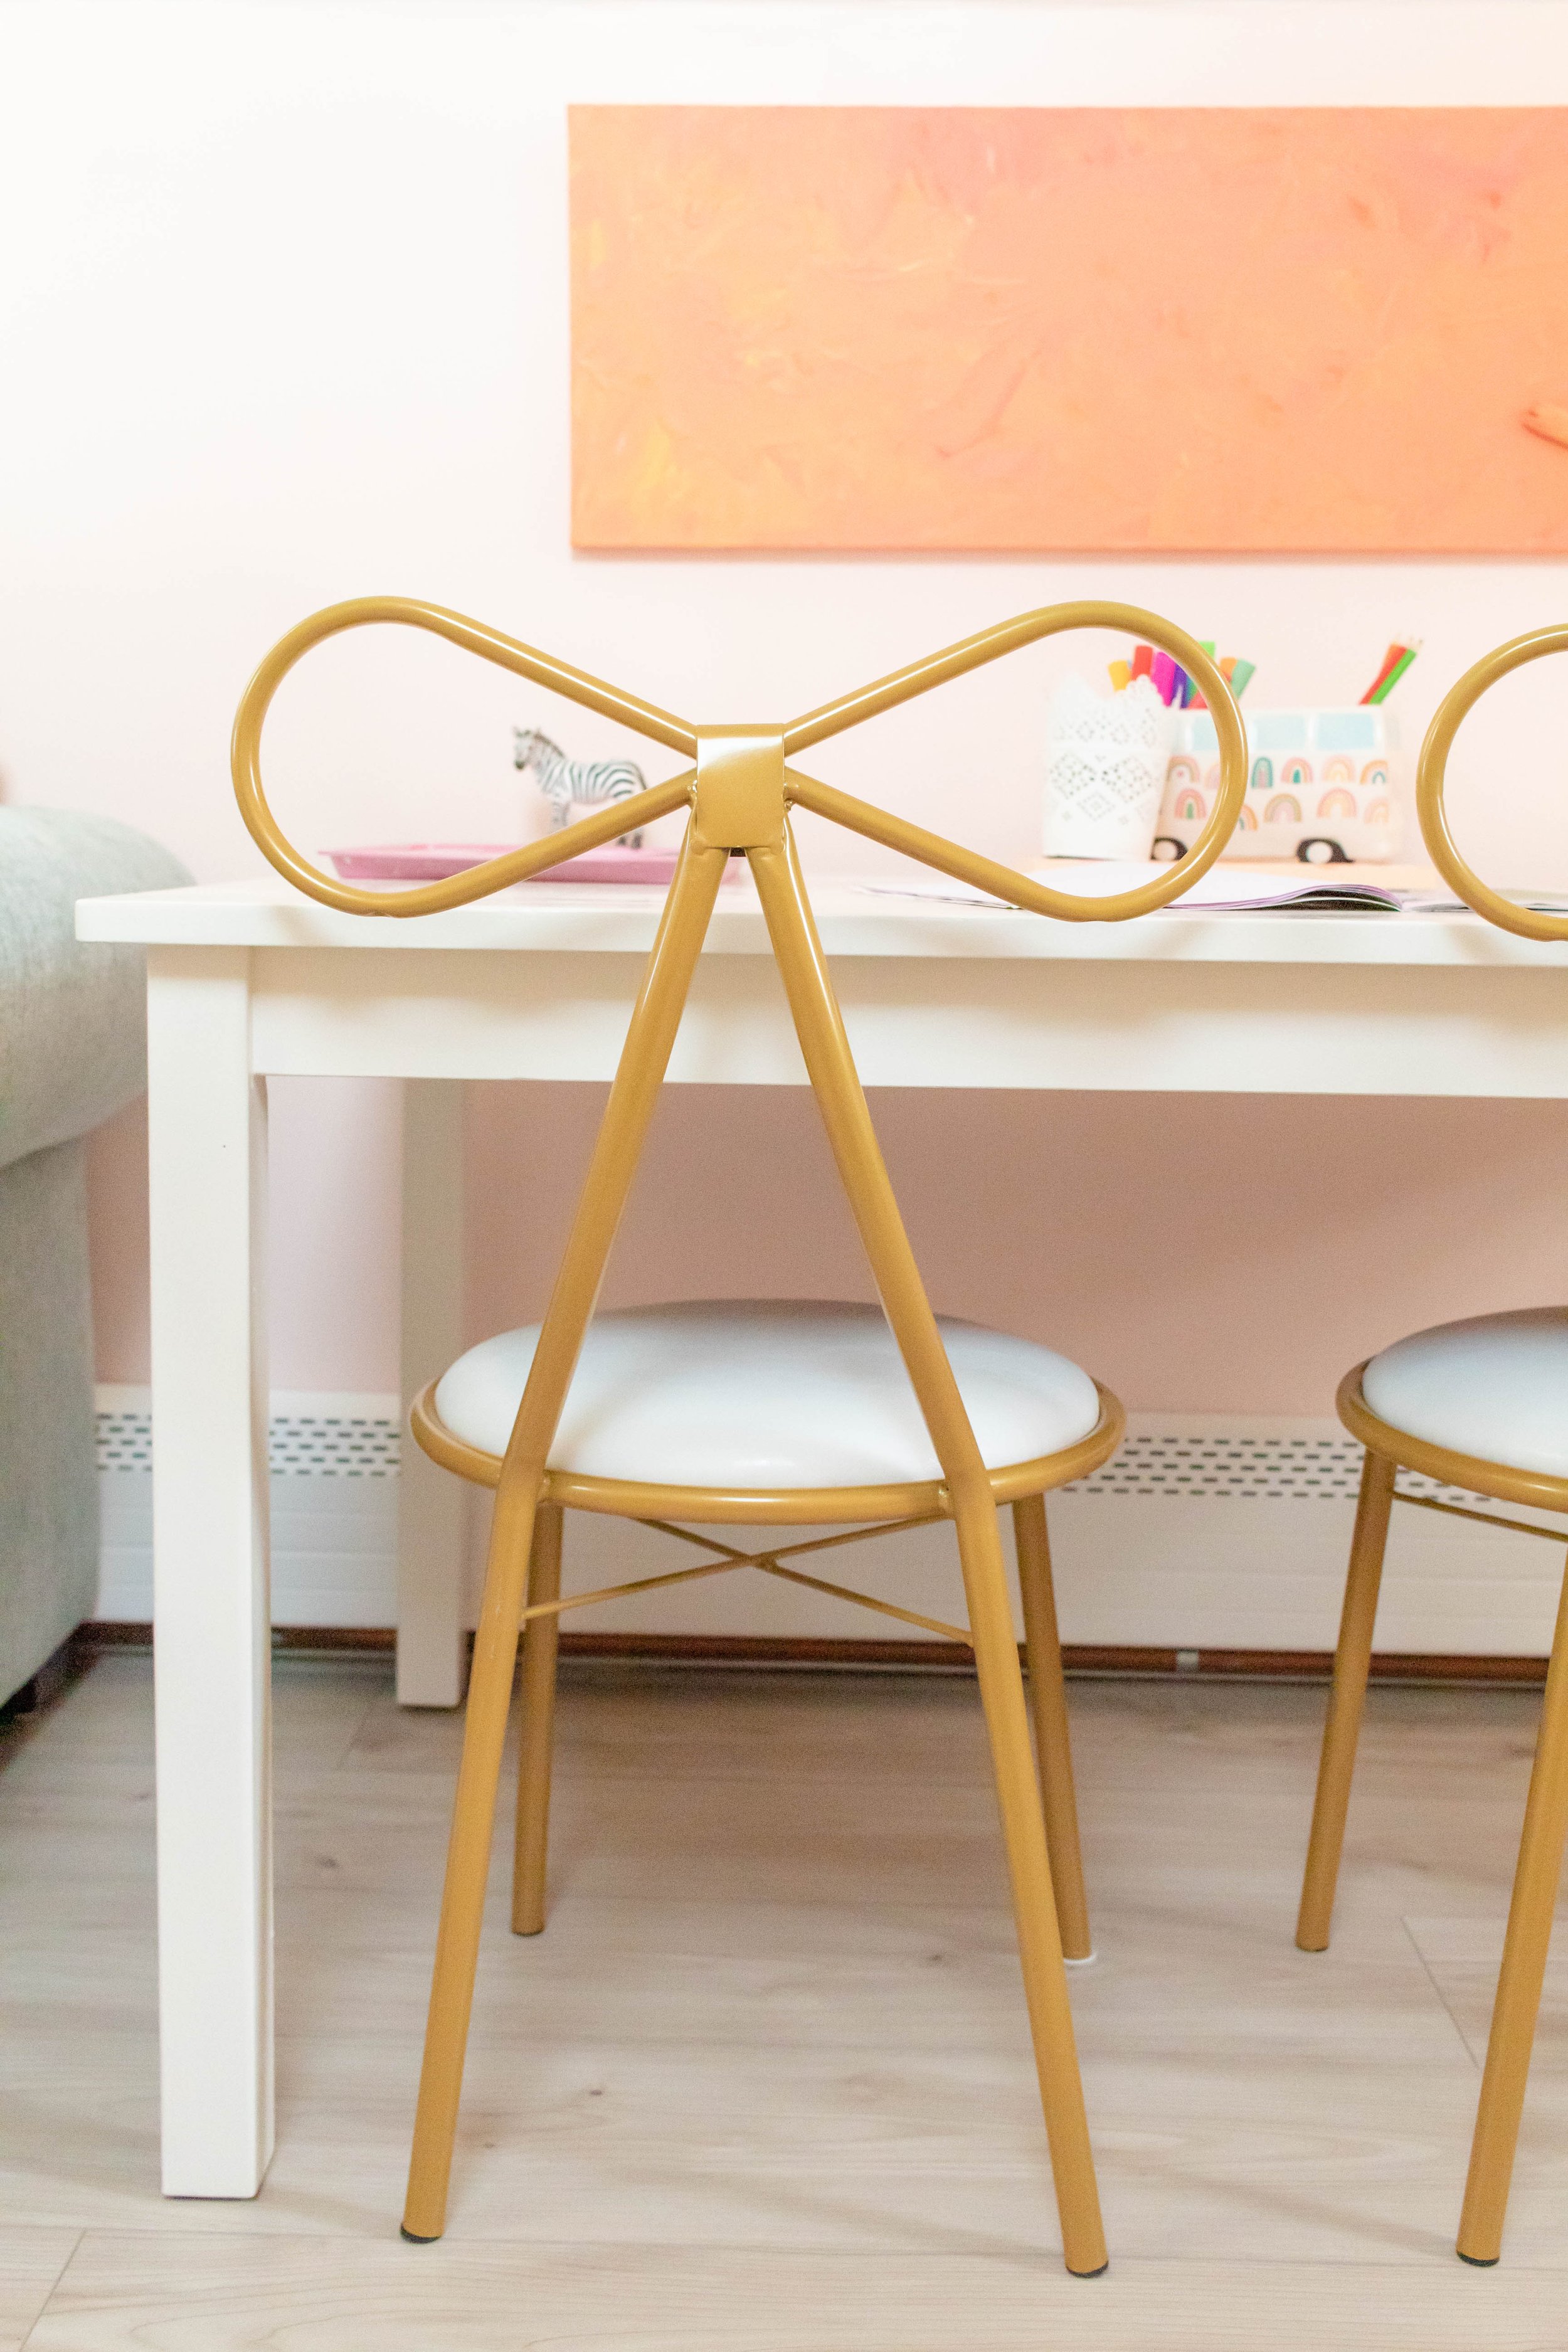
I knew I wanted to have an art table up here, since Hailey and I love to do crafts together. I wanted this pottery barn table but I felt hesitant spending so much on a kids’ table that would probably get destroyed. So, I went to FB Marketplace and found both tables that I wanted (in brown) for only $40! Can you believe it?! One can of Sherwin Williams Pro Classic in Creamy and I was able to give these a new look (plus my tv stand) with plenty to spare for future projects. I hung Hailey’s painting that we made together above the table. I loved the way she placed down her paintbrush when she finished, so I made it part of the artwork permanently. The “tray” is one of my paintings, while the zebra tray is a DIY that I did way back. These bow chairs were the perfect addition. I literally could not put them into the cart fast enough at Home Goods! They ended up being a little too tall, so my husband cut them down to size and they’re perfect now. The don’t even wobble. I don’t know how he does it.

I’ve always loved the idea of a home theater, but I definitely don’t love the colors they usually have. Black and red? No thanks! So I decided on this pastel Art Deco theme. There are a few elements that I didn’t quite get to finish in time for the reveal, but I am so excited with how it came out so far! 

Now, let’s talk stars! One difficult design element up here is the sloped ceilings. I never knew what to do with them because they always looked so bare. I knew I wanted to do a half painted wall up here (though I did want to do a scallop shape too!) so I needed something for the upper part of the wall. When I saw the post that Laura made for A Beautiful Mess, a lightbulb went off. It was perfect! I spent entirely too long trying to find a shape that was similar and colors that matched, then had to figure out the sizing and cut it on my Cricut. But the end result is amazing and one of my favorite parts up here. The best part is that it cost less than $50 and I still have plenty of vinyl left over!

I handpainted the accent wall using Frog Tape and a sample of paint I had left over from the kids’ room mural (more on that soon!) The yellow stripes are varying widths while the white ones are all the width of the tape, which helps it to look whimsical but consistent. I also wanted it to be imperfect so I only did one coat and eyeballed the lines to try and get them straight. In the end I think it looks perfectly vintage! I added these amazing movie-themed sign language flash cards that I framed with a mat. We have a deaf family member so as soon as I saw them, I knew they were meant to be in this space. The play sign is a “play” on words (no pun intended- seriously) since this is a PLAYroom but you also PLAY a movie. Pretty clever, eh? The arrows I’ve had for a long time- I think they were from Target for Valentine’s Day. I’m glad they now have a permanent spot!

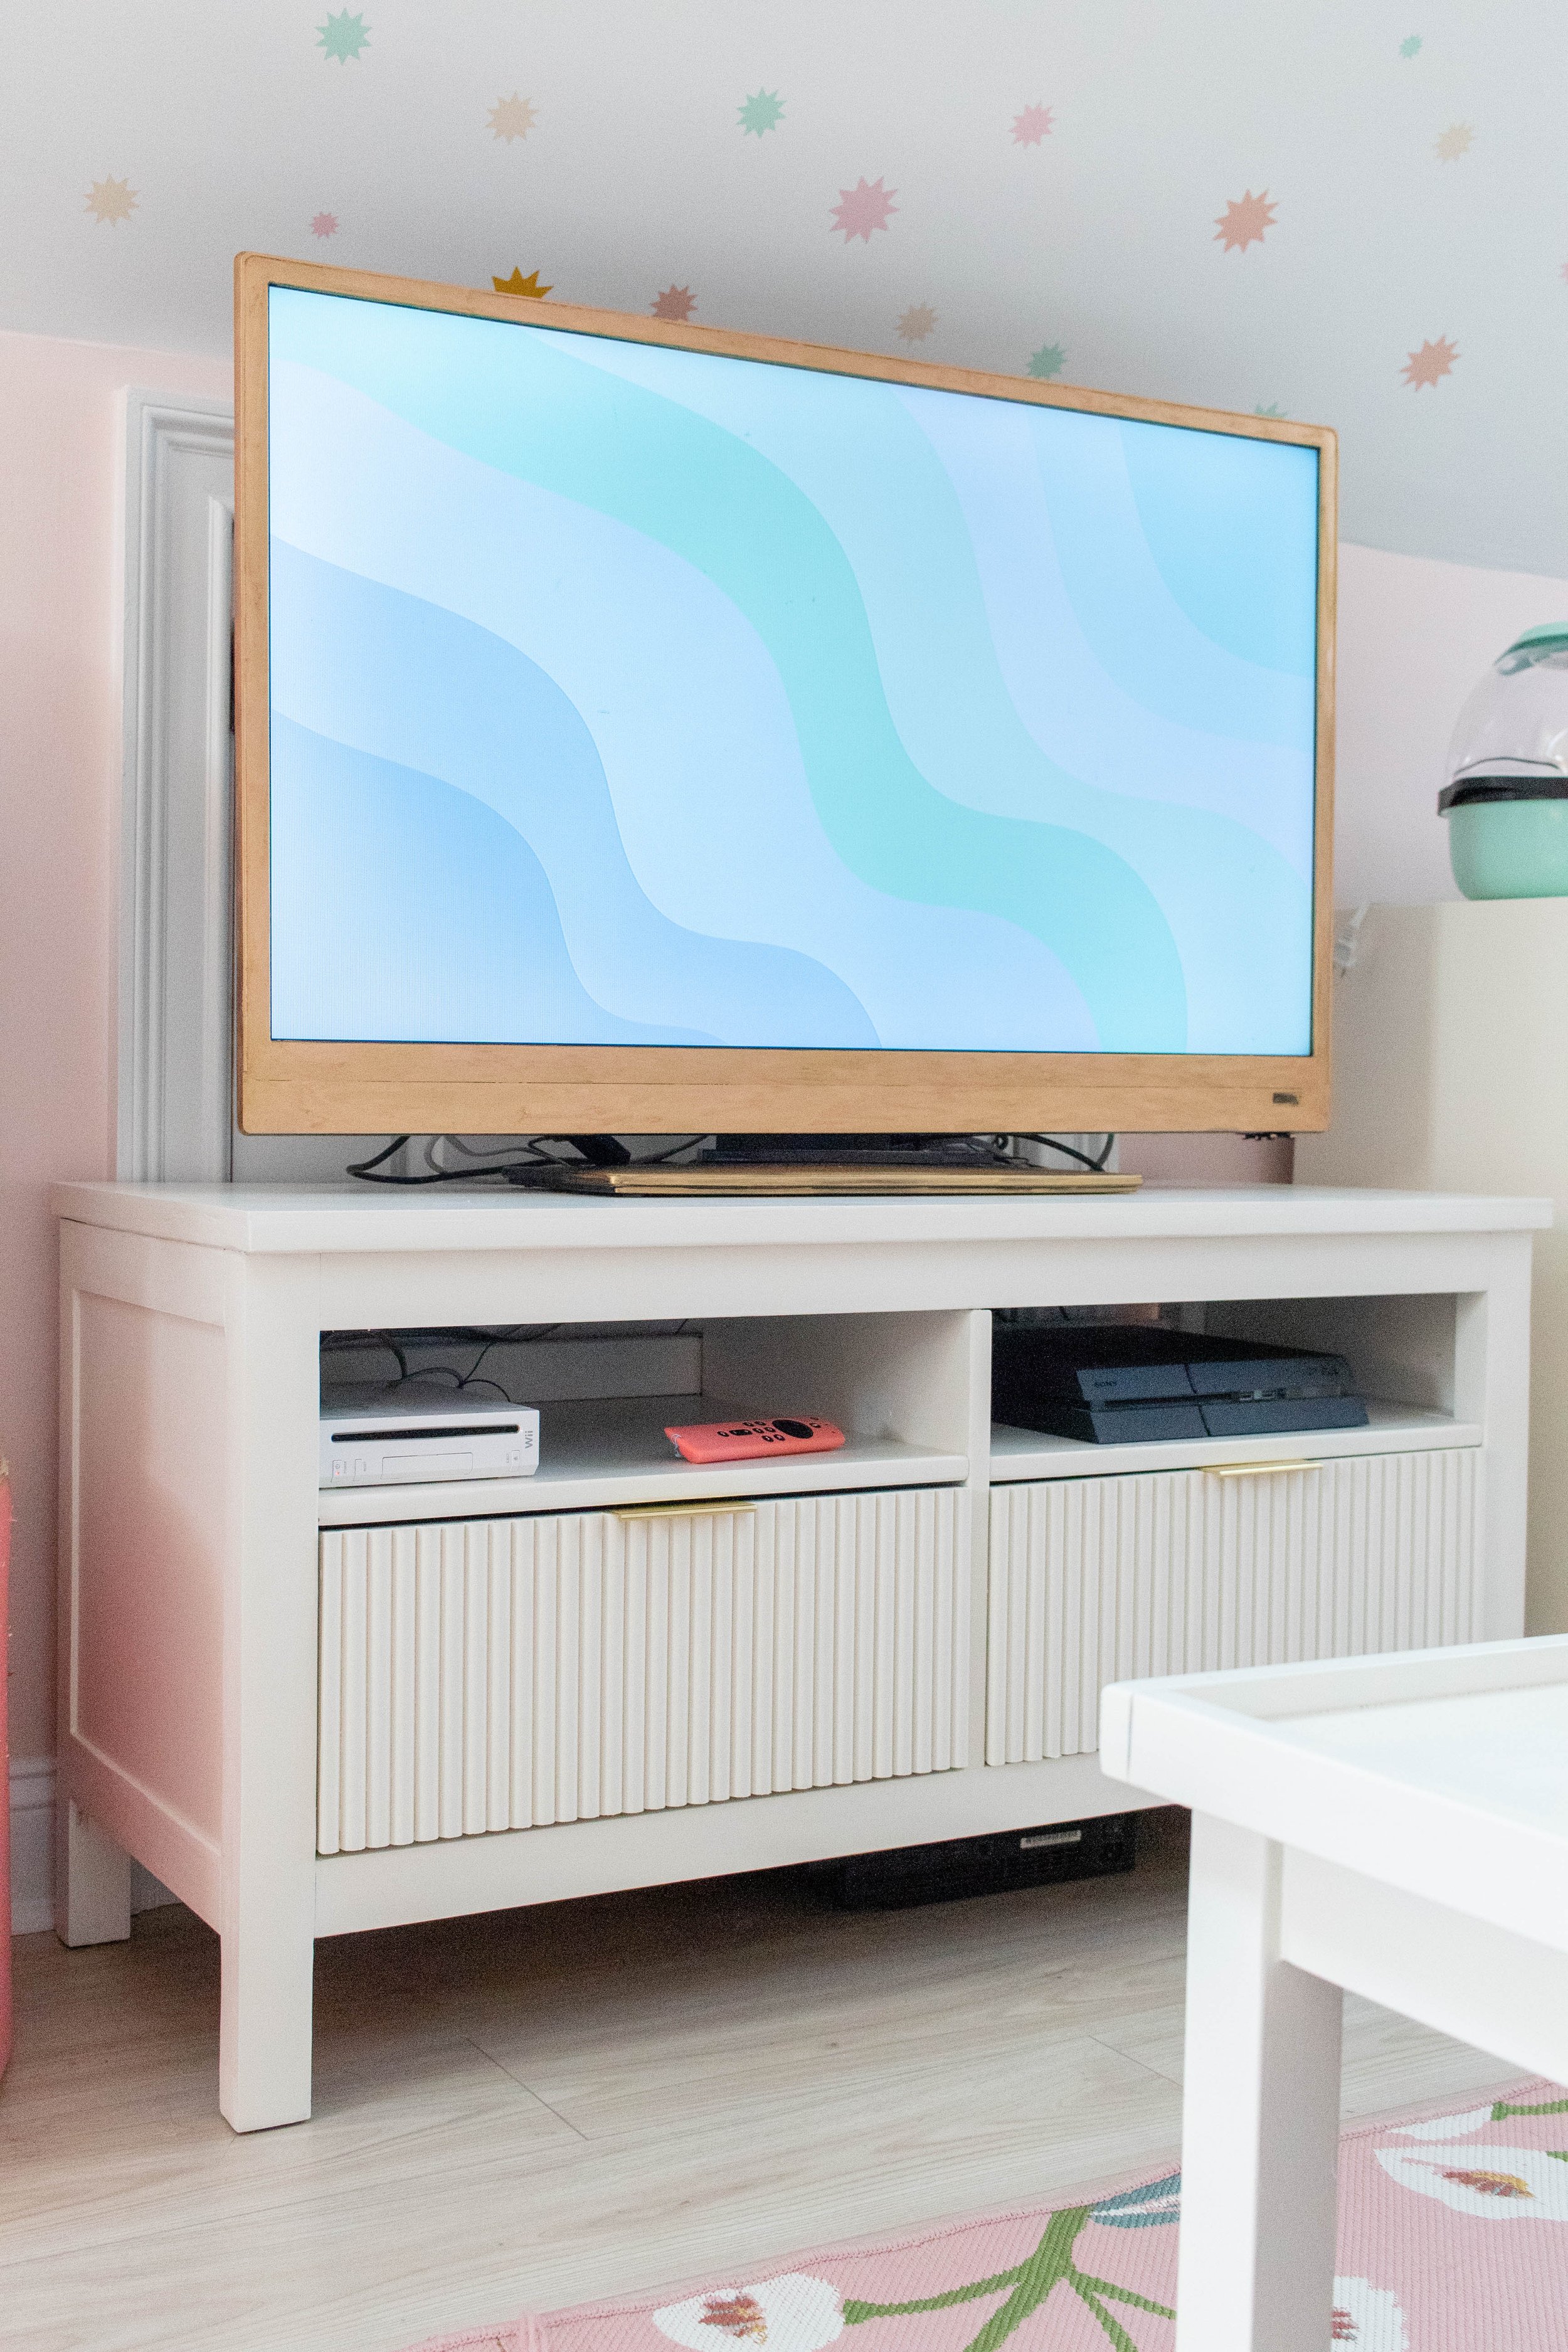
The tv unit was purchased in our apartment probably 8 years ago. It came with us to the house and sat in our den for a while, then kinda ended up homeless, then came up to my attic craft room. It was black so I ended up adding wallpaper to the drawers, then sanded it down to wood, then we painted it white. I had my husband add the half-rounds to the drawer fronts which then got a fresh coat of Creamy by Sherwin Williams to match the rest of the unit. The pulls look so modern and minimal which allows the half rounds to take center stage. I gave the tv a makeover using Tasha’s tutorial and mine definitely did not come out as well as hers did. Rub n Buff is harder to work with than I thought! I added artwork as a screensaver and now the tv is a Frame TV’s ugly cousin. 

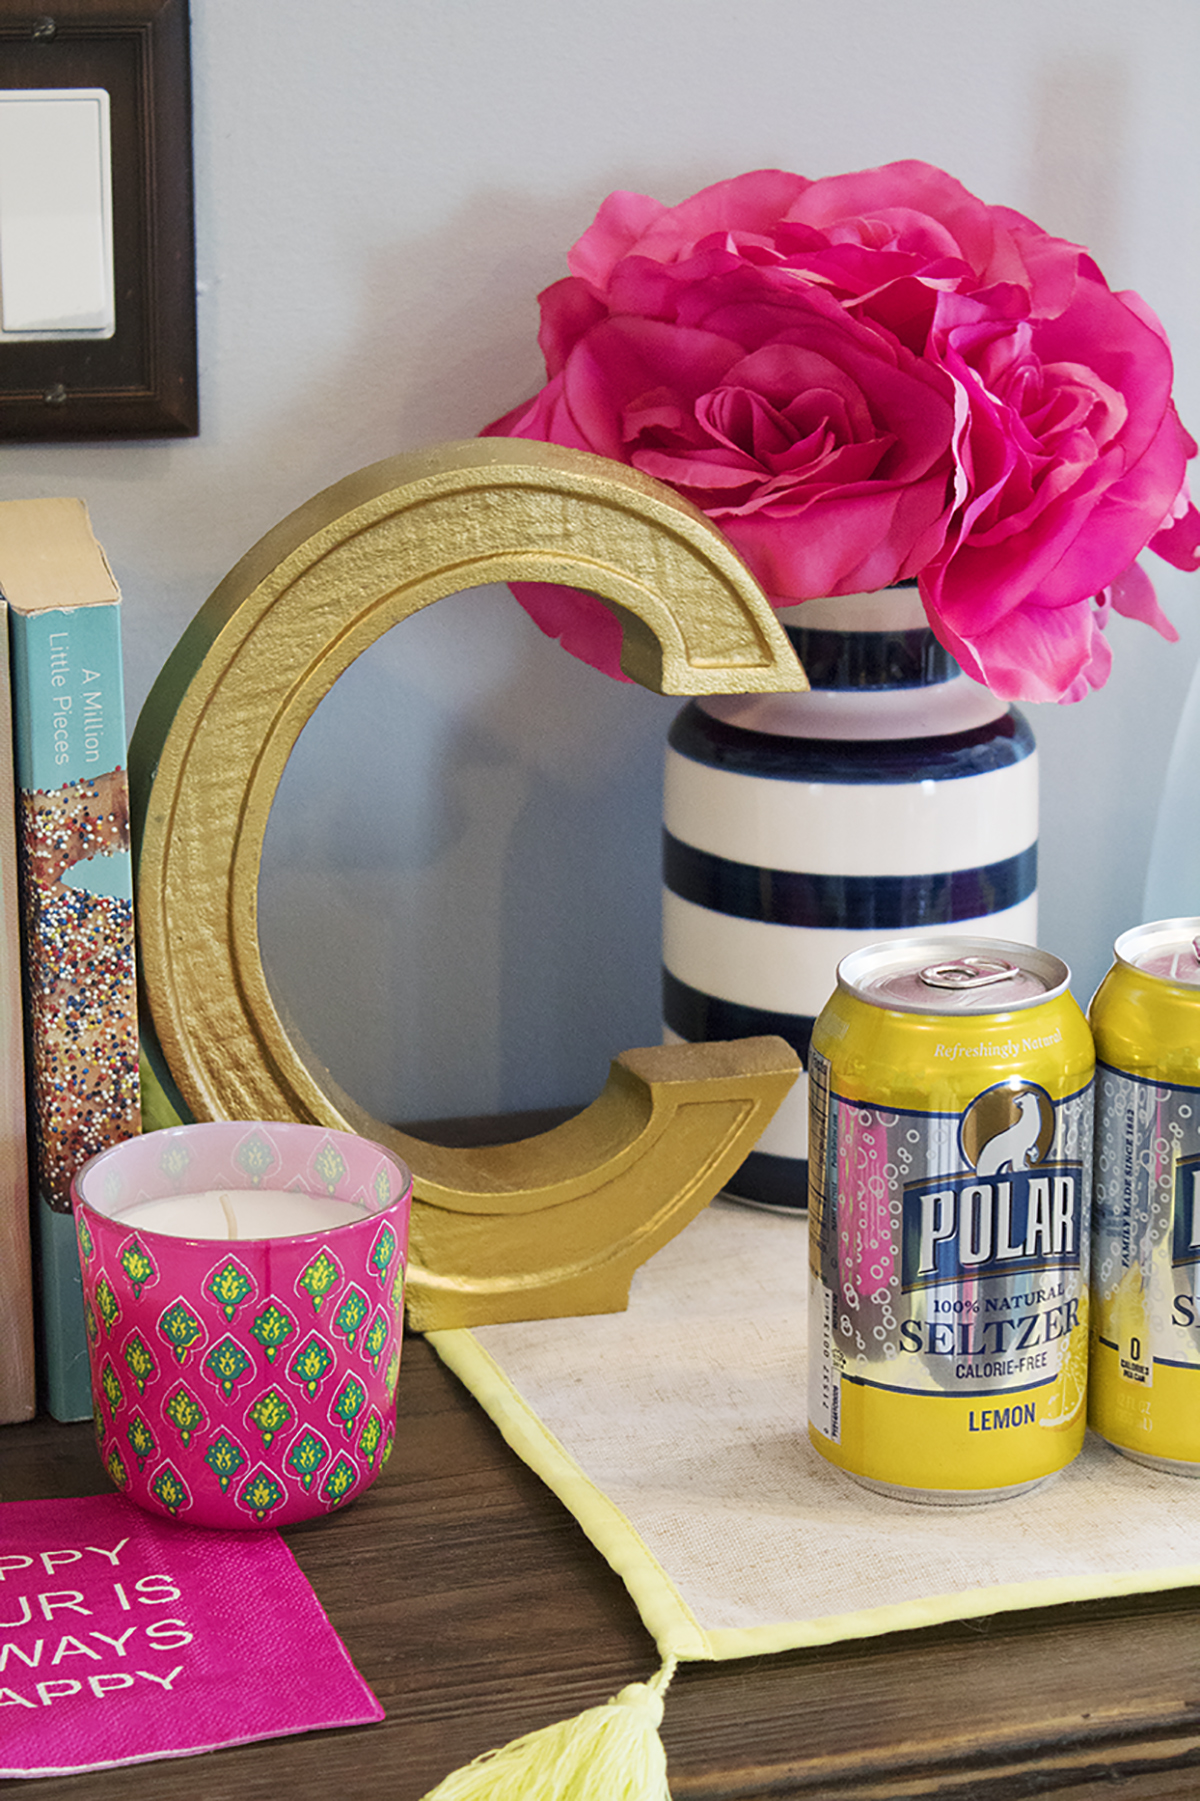
I knew I wanted a mini fridge up here for snacks and drinks, so I got this gorgeous retro-inspired one! It also comes in blue which would have been more fun, but I thought this cream one would work better for the space. I had to get some seltzers- rainbow colored La Croix, of course! A popcorn maker, gumball machine containers, and cute bowls add the finishing touches.

The lesson I learned in all of this is that we think that people’s rooms are “done “after doing a challenge like this, or any kind of renovations. The truth is that all spaces are a work in progress. There are many things that I love about the space, and a few things that I probably will still tweak as time goes on and we use the space in a new way and adapt. I think that was my favorite lesson of all. I tend to be such a perfectionist and spend so much time looking for just the right thing, and the truth is that sometimes the right thing comes along when you least expect it. So, I love that I have a little bit of room to play with what’s up here and to switch around some of the items that don’t work out for us in the end.


That concludes the tour! Be sure to follow me on instagram while I share more DIY projects for this space and more budget-friendly home renos and reveals!


Sources:


Playroom:

Cube Unit- Ikea

Cubes- Amazon

Tent- Amazon

Curtains- Amazon

Pillows: Mermaids- Home Goods, Circle- Walmart, Ice Cream- Target, Rocket, Moon & Mouse- Amazon

Yellow Rug- Target Opalhouse,

Pink Rug- NuLoom

Baskets- Home Goods

Kitchen- KidCraft with a makeover; Hardware- Amazon

Rainbow Baskets- DIY project

Heart Ottoman- Oh Joy! For Target (discontinued)

Tulip Basket- Target

Sequin Pillow- KailoChic

Table- Pottery Barn (Purchased second hand on FB Marketplace)

Bow Chairs- Home Goods

Zebra Tray- DIY Project

Camper Pen Cup- Home Goods

Decals- handmade with the Cricut (vinyl from Hobby Lobby)


Art:

Alphabet- DIY

Tiger Head- Amazon then spray painted

Tiger/Zebra/Giraffe - DIY

Disney Castle- Etsy

Yes You Can- Home Goods

Cheetah- Hobby Lobby

Babies- Carter vintage ad (thrifted)


Movie Room


Couch- Bob’s Playroom

Rug- Opalhouse by Target

Coffee Table- Pottery Barn (Purchased second hand on FB Marketplace)

TV Unit- Ikea Hemnes

Mini Fridge- Best Buy

Media/Snack Cabinet- Home Goods

Popcorn Machine- Dash SmartStore

Gumball Containers- Hobby Lobby

Bowls- Striped Popcorn, Pink & Stars- Target 

Blanket- Home Goods (Novogratz brand)

Pillowcovers- Amazon Blue and Orange

Shell Pillows- Target


Art: 

Play Sign- Hobby Lobby

Frames- Target

Sign Language Art- Vintage flash cards from Maliasmark on Etsy


Light Fixtures- Target (discontinued) & Amazon

Flooring- Floor & Decor

See the other participants here: www.oneroomchallenge.com/orc-blog


The Simple Solution For Ruined Chairs

When we first purchased our house, I was going through a very gray phase. I had seen some cool homes that were very monotone and I liked the idea of purchasing neutral furniture so that I could add any color through my decorating. I figured, if I had gray furniture, I could add some colorful rugs, throws, pillows, etc. and swap them out for the seasons. But I mean… everything I got was gray. And I mean EVERYTHING. Couches, chairs, curtains, even the wall colors! It was never-ending and earned my home the nickname “50 Shades of Gray”. I couldn’t even be mad at that nickname… I’d earned it and within just a couple of months, I started to hate all the gray in my home. 

I sat there for 3 years, dreaming of a day when we could re-decorate. Getting all new furniture wasn’t in the plans so I just had to wait. In the meantime, I loathed my home and my furniture, especially my dining chairs. You see, we have 3 cats who were very well behaved in our apartment. They never scratched anything. However, as soon as we moved into our home, they decided they loved to scratch. Their top choice? My brand new (very grey) dining chairs. Within a few months, they went from pretty, fancy-ish chairs to destructed Western chic. My cats had shredded the edges which looked like bad fringe. Some of the chairs even had the foam sticking out! 

Looking to fix your upholstered chairs? I’ve got the perfect solution for you! Whether you need to pet proof your home or protect dining room chairs from kids, you’ll be able to do it in style. Click to see how I transformed my dining room for less …

Once again, I planned for a day when I could replace the chairs I had JUST spent several hundred dollars buying. And every time I would walk by that table, I would think about it. One day, I was perusing Amazon for a couch cover since our dog Lexie had been getting our (gray) couch super stinky, and that’s when I stumbled upon these awesome chair covers. I was so excited- I could get new chairs, without having to buy new chairs?! WHAT?!! The price was right, the style was perfect, and now I just needed to pick a color. 

Looking to fix your upholstered chairs? I’ve got the perfect solution for you! Whether you need to pet proof your home or protect dining room chairs from kids, you’ll be able to do it in style. Click to see how I transformed my dining room for less …

Oh, I forgot to mention the reason why my house was gray. You see, I went through a period where I was afraid I’d regret picking something in a specific color. I vividly remember it starting one time in college. I was trying to figure out which awesome iPod nano color I wanted, only to settle on the gray one because I was too afraid I’d end up regretting the blue. It only got worse from there, as I always picked a neutral color from then on. It was almost a way that I hid myself and my childish nature. The truth was that I loved colors, I just lacked the confidence to pick one.

Fast forward to the chair covers. I didn’t know which way to go. Did I choose gray again? But ugh… how about aqua blue, like the rest of our home? Meh. White? Taupe? Nothing in my house is taupe. So, I bookmarked it and put it aside for later. Here’s the thing- these chair covers are easily removable and affordable. So you know what I did? I BOUGHT THE FREAKIN PINK ONES. I thought they were so pretty and I imagined my husband being annoyed but I did it anyway. I figured, worst case, I can buy another set later to replace it with. I thought the pink would be SO cute with all my holiday decor!

Looking to fix your upholstered chairs? I’ve got the perfect solution for you! Whether you need to pet proof your home or protect dining room chairs from kids, you’ll be able to do it in style. Click to see how I transformed my dining room for less …

When the covers first arrived my husband was a little confused by the pink. But, once they were on, he said that it already looked so much better than before. No longer did we have shredded chairs that informed everyone that came to our door that we had 3 naughty cats. Instead, we were classy folks again.

These chair covers are machine washable, easy to put on, and come in so many colors. They’re really affordable (about $8/chair) and so soft! I no longer have to worry about guests coming over and dripping on the chairs, or having Hailey wandering around with her sticky fingers. If a cat lays down on the chair and covers it in fur? Eh, that’s ok too! I feel like I not only got a new look for my dining room, but I got some peace of mind too. If one cover gets horribly ruined, I can replace it. Much cheaper than if a chair gets ruined!

Looking to fix your upholstered chairs? I’ve got the perfect solution for you! Whether you need to pet proof your home or protect dining room chairs from kids, you’ll be able to do it in style. Click to see how I transformed my dining room for less …

I love our “new” dining room now. I’ve been covering our black Ikea table (that I also hate!) with a sequin tablecloth which is breaking up some of the darkness over there too. Slowly but surely, I am making changes to our home with a small budget. Although I may dream of having my amazing, Pinterest-worthy home some day, I can make small steps to improving the one I have. I guess from seeing everyone overhauling their furniture regularly, it made me feel like that was the only way to get a new look. Turns out, I could find my own way. A much more affordable way ;)

PS- You can find the DIY table runner here and the floral pumpkin DIY here!

I do plan to go back and smooth out some of those wrinkles, since I think I pulled them down a little too much which left a bunch of excess at the bottom. But overall, I’m SO happy with how they look! And, I love that I can give my living room a new look with ease.

So what do you think of these chair covers? Will you be getting a set for your chairs? They’re honestly great for cat owners and parents!

Hailey's Nursery Organization Tour (Ideas On A Budget!)

I’m so excited to finally be sharing some sneak peeks of Hailey’s room! It only took 9+ months but hey, better late than never! I want to start by talking about how I organized Hailey’s room. My goal for her room was to be girly but pretty- something she could grow up with, instead of needing a total refresh as soon as she wasn’t a baby anymore. And, I wanted it to be fully functional, organized and GORGEOUS. I wanted everything to have a place and I wanted that place to be pretty. It definitely seemed silly at the time, and my husband thought it was ridiculous. However, every person that comes into her room comments on how pretty it is, including her closet. I leave the door open- it’s THAT nice! I even open up the drawers to show people how nicely everything is folded. My husband, who thought I was taking way too long to fold her clothes, recently said he wanted me to teach him how I fold her clothes because they definitely fit better when I do it. It’s the small victories.

Looking for some nursery organization ideas? Check out this colorful and affordable nursery tour! From the closet to the dressers, I’ll show you where to store all of baby’s essentials. #nurseyorganizationideas #nurseryorganizationhacks #nurseryorga…

I mean….. LOOK AT THAT CLOSET. It’s been several months and I still swoon over it. It’s gotten fuller since I took these photos a few months ago, but it still looks great. My favorite part of her whole room is those closet doors. I wanted to add a pop of color to her room without painting everything a bright hue. Originally, we were thinking to paint an accent wall but I couldn’t figure out which wall it should be. Mostly because I didn’t think any of them would be good for it! I remembered how much I loved the beautiful doors back in Greece and I decided to gather up some courage and ask my husband if we could paint the doors. Surprisingly, he agreed! I honestly think it was the best decision I could have made, because these doors make a statement without being cheesy.

Baby Closet Storage

Let’s venture inside the closet now. Hailey received a bunch of cozy blankets, so I decided to display them on the left side by hanging them in her closet. This area was pretty high up for anything other than blankets, since everything looked comically small in that corner. I folded the blankets in thirds to make them thin, then in half so they hung nicely off the hanger. Below all the blankets, I put this amazingly adorable pom pom basket (similar here) that I couldn’t resist getting! It holds miscellaneous breastfeeding items- nursing pads, my breast pump, etc. along with the chalk markers for her monthly updates. It’s essentially a catchall basket, which helps to keep the room tidy.

Looking for some nursery organization ideas? Check out this colorful and affordable nursery tour! From the closet to the dressers, I’ll show you where to store all of baby’s essentials. #nurseyorganizationideas #nurseryorganizationhacks #nurseryorga…

See those polka dot baskets there? Those are smack dab in the middle, and they hold all of Hailey’s clothes in bigger sizes. I put her 0-3 & 3-6 month clothes in her drawers, then made one cube of 6-9 and another of 9-12. Anything over 12 months was put into a giant storage bin for later and stored in the attic. These bins made it really easy to access new clothes as Hailey got bigger. I washed everything while I was pregnant and I’m sooooo glad I did. Those tiny clothes have more little plastic attachment pieces than should be legal. Plus, I can grab things from the bins without having to wash them, which is amazing now that I have a tiny human to care for. She makes more than enough laundry as it is!

Looking for some nursery organization ideas? Check out this colorful and affordable nursery tour! From the closet to the dressers, I’ll show you where to store all of baby’s essentials. #nurseyorganizationideas #nurseryorganizationhacks #nurseryorga…

At the top right, I have some transitional pieces. We plan to put some shelves up, so right now her decor and jewelry box are up there. The piggy bank was from her Oma (grandma) and belonged to her mom before that. When you put a coin in, it plays an Irish song! The jewelry box was a gift from my sister to me. I didn’t need it anymore, so instead of tossing it I decided it would be fun for Hailey to use. I can just imagine her storing her little plastic rings in there someday, and looking into the little mirror with lipstick smeared all over her face like a beauty queen.

Looking for some nursery organization ideas? Check out this colorful and affordable nursery tour! From the closet to the dressers, I’ll show you where to store all of baby’s essentials. #nurseyorganizationideas #nurseryorganizationhacks #nurseryorga…

Below those items is her fancy clothes- dresses, little coats, and tutus. All my favorite frilly things which are gorgeous! I couldn’t resist snapping a photo of just these little dressy items, because they’re that pretty! Everything is hung on tiny pink velvet hangers.

Looking for some nursery organization ideas? Check out this colorful and affordable nursery tour! From the closet to the dressers, I’ll show you where to store all of baby’s essentials. #nurseyorganizationideas #nurseryorganizationhacks #nurseryorga…

Let’s go down to the bottom of the closet. I used a structured bin or hamper (similar here, here and here) to hold even more of Hailey’s blankets. I had 2 comforters from her bedding set, plus her muslin swaddles and handmade blankets from family members. I folded everything up nicely and placed it in this bin for safekeeping. Above it, I have some of her extra hangers ready to go.

Looking for some nursery organization ideas? Check out this colorful and affordable nursery tour! From the closet to the dressers, I’ll show you where to store all of baby’s essentials. #nurseyorganizationideas #nurseryorganizationhacks #nurseryorga…

I knew we’d have to store Hailey’s bathtub in her room, since our bathroom is extremely small. I didn't want to remove it every time I wanted to shower, so it just made sense to keep it in her room. But again, I wanted everything to be pretty and this was no exception! So, I bought this oversize fabric hamper (similar here and here) to hold it when it’s not in use. After Hailey’s bath at night, I leave it in the tub to dry. Then, I put it back in the hamper until its next use. From the front, you can barely even tell what’s in there!

Looking for some nursery organization ideas? Check out this colorful and affordable nursery tour! From the closet to the dressers, I’ll show you where to store all of baby’s essentials. #nurseyorganizationideas #nurseryorganizationhacks #nurseryorga…

Now I’ll talk about all the other random bins I didn’t mention before. The pink striped bin at the top holds extra diapers and wipes, so we never have to worry about running out while she’s naked on the changing pad. The bins underneath it are her bath toys that she won’t be needing quite yet. The wooden box holds her very small shoe collection, and the pink bin at the bottom (similar here and here) is for clothes that no longer fit her. I get so sad when something has to go in that bin, but it means she’s happy and healthy which is a GREAT thing so I get over it fairly quickly.

Looking for some nursery organization ideas? Check out this colorful and affordable nursery tour! From the closet to the dressers, I’ll show you where to store all of baby’s essentials. #nurseyorganizationideas #nurseryorganizationhacks #nurseryorga…

The Book Shelf Storage

Over to the left of the closet is all of Hailey’s books! After seeing everyone else’s adorable book walls, I decided I wanted one for her room too. It fit perfectly on this narrow portion of wall underneath the AC, since anything bulky would block the closet. You can see a teensy portion of the door down there!

Looking for some nursery organization ideas? Check out this colorful and affordable nursery tour! From the closet to the dressers, I’ll show you where to store all of baby’s essentials. #nurseyorganizationideas #nurseryorganizationhacks #nurserybook…

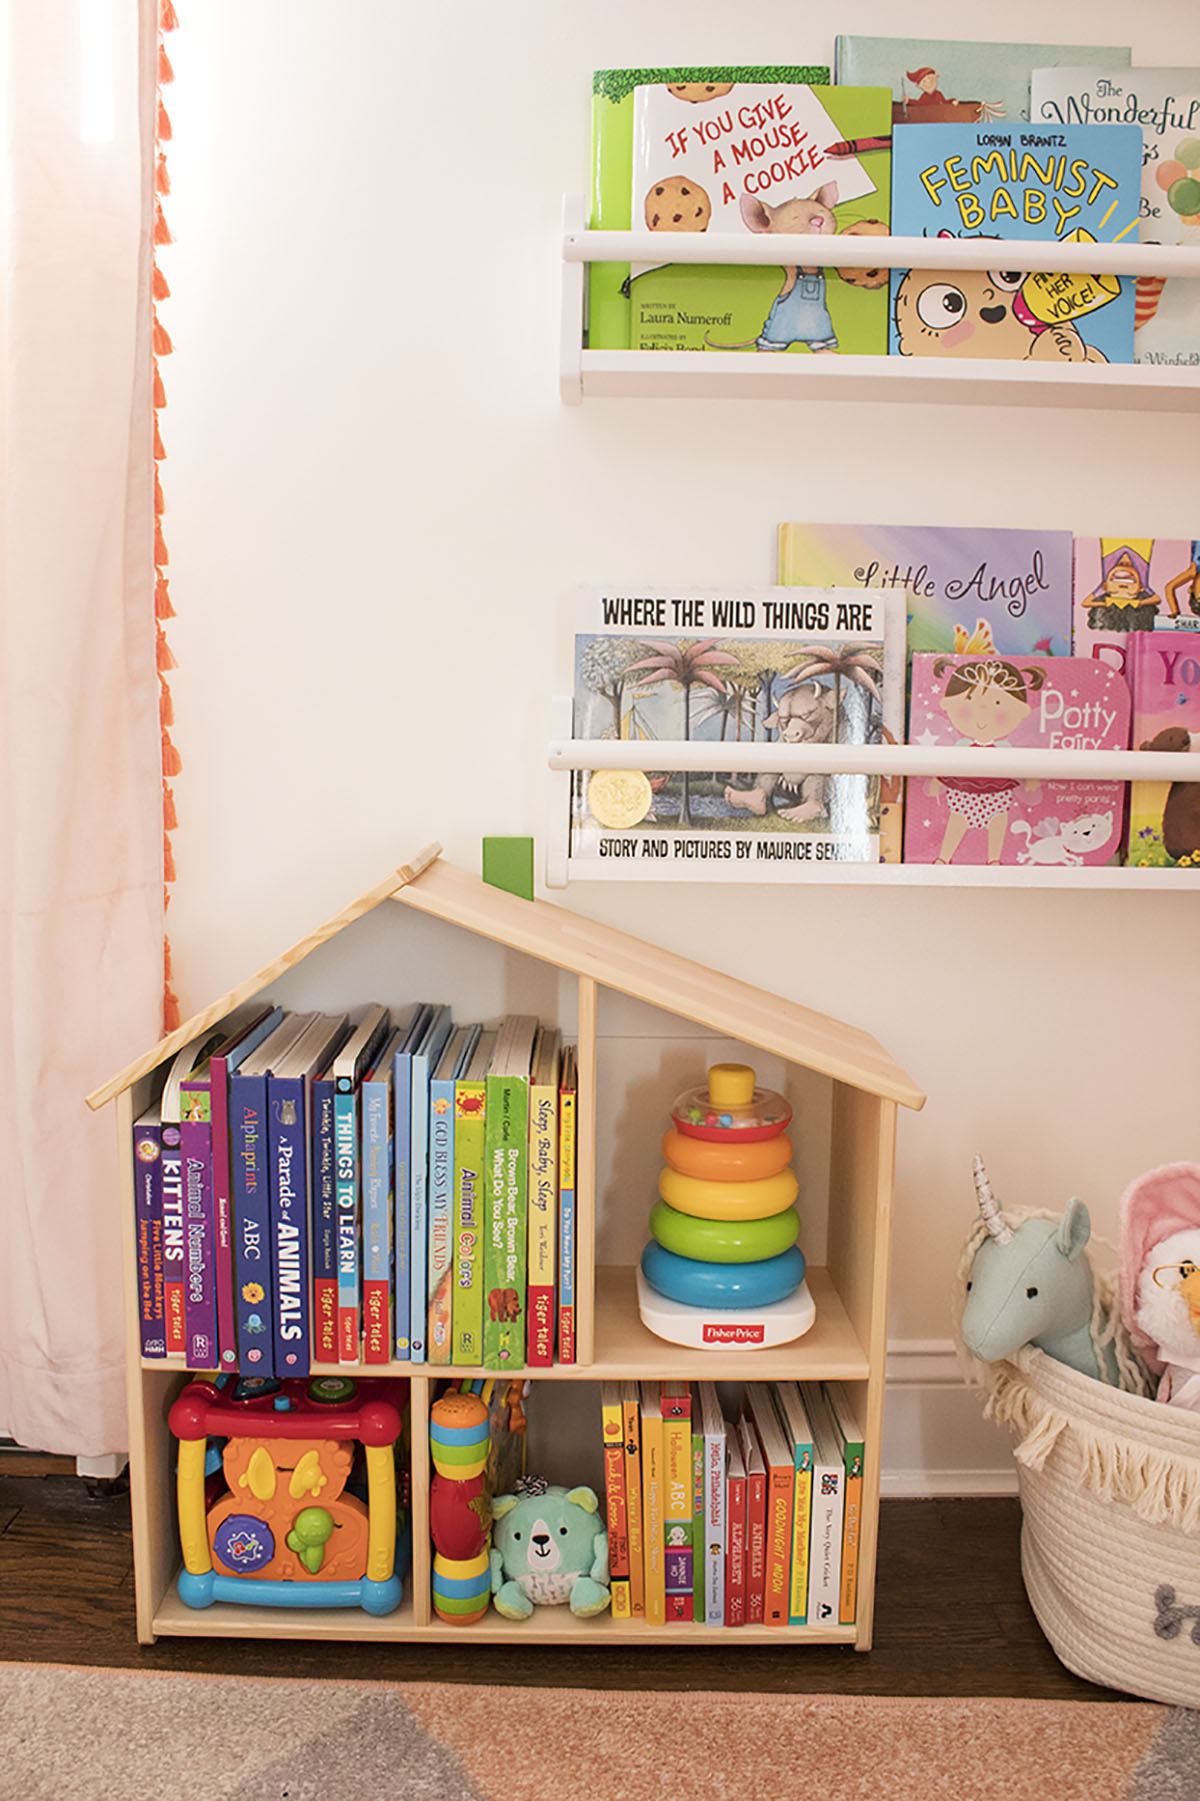
I organized all the books by rainbow order, which made it visually appealing. These wooden book shelves from Ikea were painted white so that they provided a nice, simple place to hold the books. At the bottom, I placed my dollhouse bookshelf which houses some of her smaller books and toys, again in color order. Off to the right side, I have a small basket filled with some of her stuffed toys and dolls. Hailey has quite a few unicorn toys, along with a mermaid and singing Mother Goose!

Looking for some nursery organization ideas? Check out this colorful and affordable nursery tour! From the closet to the dressers, I’ll show you where to store all of baby’s essentials. #nurseyorganizationideas #nurseryorganizationhacks #nurserybook…

I can’t wait to show you the full room reveal, because those curtains are pretty epic too! This room is my favorite in the entire house.

Baby Dresser Storage

Off to the right of the closet is Hailey’s dresser! I chose this dresser because it was wide enough for our changing pad and was still a decent height for her changing pad. PS- I love this changing pad because you just wipe it clean if there’s a mess. No laundry needed. Just go ahead and order one now- you’ll thank me later!

Hailey’s dresser has 6 drawers. The top left holds her hats, headbands, and mittens along with her collection of socks. I kept everything neatly organized and accessible by putting in some smaller bins to help corral everything.

Looking for some nursery organization ideas? Check out this colorful and affordable nursery tour! From the closet to the dressers, I’ll show you where to store all of baby’s essentials. #nurseyorganizationideas #nurseryorganizationhacks #nurserydres…

The top right is where all of Hailey’s diaper changing supplies go. On top of the dresser, I have an organizer that holds diapers, wet and dry wipes plus all her ointments. There’s even a drawer for her brushes and combs! We use vaseline to prevent diaper rash, and put it on using this diaper cream brush. The drawer below this organizer contains spare diapers, wipes, and body lotions.

Looking for some nursery organization ideas? Check out this colorful and affordable nursery tour! From the closet to the dressers, I’ll show you where to store all of baby’s essentials. #nurseyorganizationideas #nurseryorganizationhacks #nurserydres…

Clothes Storage and Folding

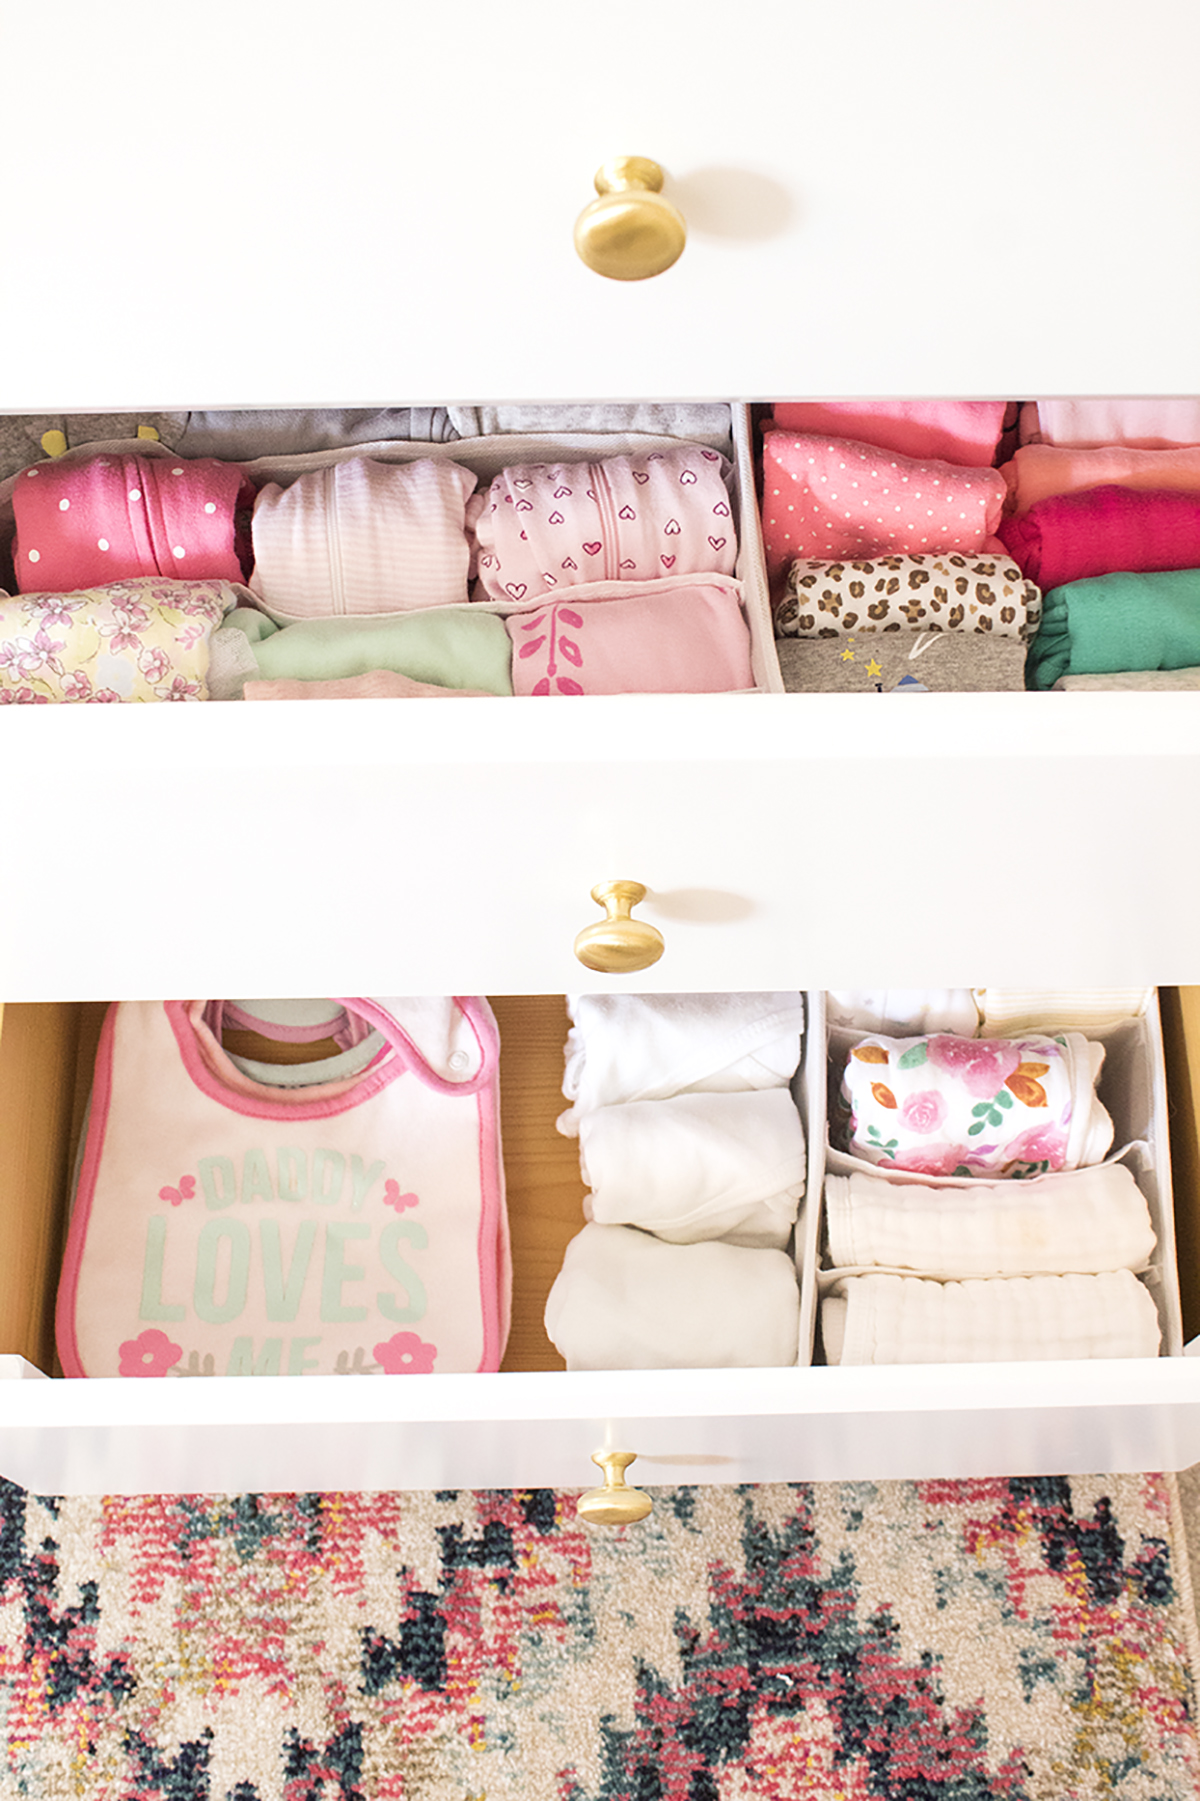
I folded all of Hailey’s clothes nicely and neatly into little cubes, and placed them into these drawer organizers to keep everything contained. Her clothes are so small that without the drawer organizers, they felt like they were flopping around in a giant drawer.

Looking for some nursery organization ideas? Check out this colorful and affordable nursery tour! From the closet to the dressers, I’ll show you where to store all of baby’s essentials. #nurseyorganizationideas #nurseryorganizationhacks #nurserydres…

The bottom 2 drawers hold Hailey’s blankets, bibs, and burp cloths. Again, I folded everything nice and neat and placed it into smaller bins. On the left side I placed all her blanket toys which she didn’t care about at first but now she LOVES them, especially the pink cat we nicknamed Kitty. Super creative, I know ;)

Looking for some nursery organization ideas? Check out this colorful and affordable nursery tour! From the closet to the dressers, I’ll show you where to store all of baby’s essentials. #nurseyorganizationideas #nurseryorganizationhacks #nurserydres…

The bottom right holds burp cloths and bins. Ironically, we got WAY too many bibs and not nearly enough burp cloths, which we definitely needed more! I ended up ordering most of them myself, so if you’re unsure what to get a new momma, try burp cloths. The bottom drawer also holds some wrap sweaters they gave us at the hospital which were essential in the chilly hospital where she only wore a swaddle. They became a little less necessary at home since she wore sleeper pajamas, but they are helpful when she’s wearing a t-shirt.

Looking for some nursery organization ideas? Check out this colorful and affordable nursery tour! From the closet to the dressers, I’ll show you where to store all of baby’s essentials. #nurseyorganizationideas #nurseryorganizationhacks #nurserydres…

Over on the other side of the room, I have fabric dresser drawer that matches the bin in her closet. It holds Hailey’s bath supplies like towels, soaps, and washcloths. It also holds all her medicines and personal care items like thermometers and nail clippers. There’s also a drawer that holds all her fitted sheets and bassinet pad covers. Can we talk about how neatly those fitted sheets are folded? Stand back folks- I’M A PROFESSIONAL!

Looking for some nursery organization ideas? Check out this colorful and affordable nursery tour! From the closet to the dressers, I’ll show you where to store all of baby’s essentials. #nurseyorganizationideas #nurseryorganizationhacks #nurserydres…

PS- I realized these pictures were taken when Hailey was only 6 weeks old. For reference, she’s now 9 months old! Look how tiny she was, my little lumpy baby.

Looking for some nursery organization ideas? Check out this colorful and affordable nursery tour! From the closet to the dressers, I’ll show you where to store all of baby’s essentials. #nurseyorganizationideas #nurseryorganizationhacks #nurserydres…

#SparkJoy: My Intro to KonMari

Anyone who knows me or my family knows we are messy. I can't remember a time that we weren't messy, dating back to when I was a small kid. And I don't mean the fake "oh no don't look at my house, it's such a mess!" but there's only 2 socks on the floor and 3 dishes in the sink. I mean the type where an entire overhaul is needed each time people come over. And I have literally (half) joked that part of the reason I like to have events at my house is that it forces me to clean it regularly. It's a lifestyle I'm used to but hate with a great passion. I'm afraid that one day, it'll all become too much and next thing I know, I'll be surrounded by far too many things. This happened in my bedroom at my parent's house, the 1-bedroom apartment John and I shared, and now it was slowly but surely happening in our house. My attic, which is one of the biggest rooms in the house (which I have all to myself for my studio) had become packed, stuffed... HOARDED. It's a word I'm familiar with and fight to my very core. But I had all the makings of a hoarder and I was heading there on local train. Sure it made stops where I could get off, but I was riding it to the end. Like magic, as soon as I got pregnant, I had enough. Call it nesting, call it a miracle, call it whatever you please but it was a long time coming and needed to happen. 

KonMari Basics Web.jpg

I had looked around my house and noticed the clutter for the last time. Finally frustrated to the point of desperation, I purchased The Life Changing Magic of Tidying Up. People were always boasting about it, mainly for closet clean outs, and I always said I'd check it out "someday" but that day never came for me. Cleaning out my closet would be cool, for sure, but I needed a whole house overhaul. I was desperate, frustrated, and honestly a little scared of what my future would hold. I purchased the book after way too much deliberation and probably years of procrastinating, and I set out to read it right away. 

The Life Changing Magic of Tidying Up

The book starts with the author, Marie Kondo, explaining her history with tidying. She had been doing it all her life, with an almost obsessive need to clean. But she always failed. She explained the reasoning for this was that she was doing it all wrong. I think that for a lot of us, a messy home is equivalent to laziness. Things we know we should have done, but we prolonged it. Well, Marie Kondo was telling us that she didn't have this laziness- but she still failed at keeping her home clean. And that's because "tidy a little a day and you'll be tidying forever". I won't get into too many specifics about the book, because honestly it's a short, easy read and I think that she does the very best job of explaining it. But I know that reading her 100% success rate had me hooked from the very beginning. If I did this process and did it RIGHT, I could have a clean home by the end of it too. 

Putting the book into practice

I decided to read the book before attempting to clean any part of my house. Having been a borderline hoarder and shopaholic all my life, I wanted to do this once, the right way. I wanted to change my life. 

I didn’t realize the impact the book had on me (before even cleaning a single thing!!) until I had a stressed-out crying session. I was stressed about a whole bunch of things, and in my husband’s attempt to console me, he had only made it worse. A few tears turned into full-on bawling. And I shouted something like, “you don’t understand! There’s just so much I need to do and I feel the weight of it all on me! I feel like I just can’t get anything done!” And it hit me... I needed to do things in my business, yes, but I also majorly needed to clean my home. And the thought of just how badly I needed to clean my home was weighing on me to the point of exhaustion. I knew this, but it’s like for the first time I actually realized it in a way that could spark change. I had finally had a breakthrough: I’m really freakin tired of being a slob, and living a life overall that I’m unhappy with. This was my start. 

As I laid in bed that night, I began to think of all the other times I felt this feeling without understanding it. I thought of all those times I was about to do something (with excitement, I might add!) before realizing I hadn’t finished something else. I couldn’t even go up and work in my attic studio, and for a good reason- all my unfinished projects, all my abandoned hobbies, all my clutter, was literally... physically... preventing me from advancing. And I thought to myself, what sparks less joy than going up to make some magic while surrounded by your failures. Of course my studio didn’t bring out the best in me. Instead of showing myself the best, all my accomplishments and the things I loved, I was crippling myself with clutter, and doubt, and neglect. These were not the feelings I wanted to invoke. Not in my studio, not in my home, and surely not in my life. I had to make changes. And I had to do it soon. 

Slow Progress

I'm now about 3 months into the KonMari method and I have to say I fell off the wagon a little bit. I know that procrastination is my biggest weakness, but I had somehow managed to procrastinate this process even further. It's funny, because you often don't notice the passage of time until you look back and realize just how much has gone by. Just like clutter. You don't realize just how much there is until you literally can't function with it anymore. I've been meaning to write this blog post since April and I'm just now getting to it. I am tired of sitting idly by, doing things that don't serve me. I am going to be proactive and set goals for myself and achieve them. And I hope that you guys can join me in doing so!

Join Me! Your Homework

If you want to join me on this insane process of cleaning my house, I urge you to buy The Life Changing Magic of Tidying Up. I only fully used the KonMari method in one room (my closet) but I gotta say that for the past 3 months, it worked. And for those of you thinking that you have a whole family or a partner that makes a mess and needs to contribute, she covers this in her book as well. I'm going to pop in here more often with before and afters, advice on my journey to a clean home, and hopefully an incredible home reveal by the end of the year. With Baby Sunshine coming at the end of September, this is no time to push this off any longer. And for once in my life, cleaning sounds WAY better than procrastinating. And that feels amazing.

So, tell me about your struggles. Have you tried cleaning before but failed? Do you truly hate cleaning? Are you messy, a hoarder, or just really great at hiding your mess? Let me know in the comments below!

29 Goals For This Year

Exactly three weeks ago, I turned 29 years old. That’s one year away from 30! Despite the fact that I feel like I accomplished a lot of the things I’ve wanted to do so far (mostly through stubbornness and perseverance) I feel like I could have done more in my life. One thing I’ve never been good at is making goals for myself. I have lots of ideas but never really plan it out so that anything actually happens. That means a lot of wishing, and not so much achieving. Since we’re throwing a baby into the mix this year, and technically that makes me a real adult now, I figured it was time for some goal setting and accountability! 

29 wishes.png

Back in 2016, I created a list of 27 wishes for my 27th birthday. I went back and checked out how many I achieved, but it wasn’t great! My goals weren't quantifiable, so it's hard to determine what was "done" and what was not.

I made a list of things I hope to achieve this year, separated out by category. I’ll update this as the year goes on and tasks get completed. And, hopefully by this time next year I’ll have 30 brand spankin’ new goals. 

Home

  • De clutter the whole house (and actually keep it that way)

  • Finish fully decorating at least 3 rooms (initial thoughts- nursery, kitchen, attic)

  • Make the most of what we have- diy instead of buy

  • Make the bed every day

  • Make the craft room/attic a place I actually want to work in

Business 

  • Grow the blog into a lifestyle resource (DONE)

  • Launch an e-course by June 30 (DONE- but it launched in August!)

  • Launch a (successful) shop (I shut mine down since it wasn’t producing- sad but it’s ok! Bigger and better things ahead)

  • Make over $25k income with the blog (HAH. I wish! Hoping 2019 will be my year!)

  • Donate to more causes I believe in

  • Get published in a magazine

  • Attend Alt Summit

Family

  • Be the best mom I can be (DONE- a work in progress!)

  • Spend more time with my family without a phone or screen

  • Take a monthly drive to a new place

  • Take our first official family vacation (DONE- while I was pregnant we went to Colorado, Bermuda, and the Hamptons!)

Life

  • Go on more adventures

  • Finish what I start (DONE- goal setting has become a priority and really helps)

  • Do crafts or paint “just because” at least once a month

  • Make more of an effort on personal fitness (2x week)

Finances

  • Pay off our credit cards (DONE-ish. Mine are paid off, still woking on the joint cc!)

  • Spend less, save more- at least $2k this year (DONE but then I had to pay my cc so it’s gone now! Seeing as how I’m currently unemployed, seems unlikely it’ll go back up)

  • Create a budget and stick to it

Self

  • Spend more time on my appearance (DONE- I’ve been straightening my hair and it helps!)

  • Make an effort to dress better (at least 3 days/week) (HAH- with being pregnant and then having a baby, this was a bit silly :P)

  • Practice mindfulness and yoga (at least once a week) (DONE-ISH. I don’t do yoga but I’m thankful every day.

  • Remember to take a break and not be a workaholic (DONE! Pregnancy + a baby helped)

  • Stop procrastinating (DONE! Working so hard on this too)

  • Don’t let fear stand in my way & step outside my comfort zone (Work in Progress)

Some of these might be hard to achieve but I’m hoping that if I work hard at it, I can at least come close to achieving these goals. I’m also hoping that all these goals are kinda cumulative. That working out will make me take the time to dress well. That dressing well will give me confidence to achieve my financial goals. That achieving my financial goals will lead to working on my home and family goals. So on and so forth :) 

What’s on your goals list for this year? How do you actually achieve these things in your life? What’s the best way to plan? I need some help! Let me know in the comments below.