DIY & Affordable Photo Backdrops

Today I want to talk about something a little different- photography backdrops! As you know, good photography is very important (especially here at Party HarDIY!) and sometimes you need to be creative about your photo backdrops. I had written a blog post about my favorite photography items a few months ago, so I wanted to follow up with some other backdrop options that you can try! These backdrops come in a variety of prices from all sorts of places. I hope it helps you to think about your photos in a new way!

*This post contains affiliate links

DIY & Affordable Photo Backdrops. Sometimes you need to be creative about your photo backdrops. These backdrops come in a variety of prices from all sorts of places. I hope it helps you to think about your photos in a new way! #backdrops #photob…

Paper Backdrops

DIY & Affordable Photo Backdrops

DIY Polly Pocket Iron-On Tee with Backdrop Paper in No. 37 Tulip

Backdrop Paper 
Probably the easiest to use, this backdrop paper is meant for photography! It's got a wide variety of colors and it's matte, so you don't need to worry about weird reflections in your photos. Also, it comes on super wide rolls, so you can have a seamless backdrop without having to photoshop out weird edges or seams. I even used it to make my wall look pink once! It can be a bit pricey but if you're careful, you can get maximum usage out of it.

Scrapbook Paper 
Available at any craft store or online, in literally any color or pattern you can think of, scrapbook paper is an affordable way to create a backdrop for small items. You can also layer the paper in interesting ways or angle it, etc.

Colored Cardstock
Colored cardstock is great for photographing small items like jewelry. I made a small hole in mine for the earrings, and I was able to keep the earrings in place while also keeping the look consistent across the different colors of paper and style of earrings. 

DIY & Affordable Photo Backdrops

DIY No Sew Embellished Shirt with wrapping paper backdrop

Wrapping Paper 
A nice mix of the papers above, I think wrapping paper is a great way to add some color or pattern affordably. It does have a slight sheen to it, so it can add a colorful "glow" to your items, but it's cheap enough to get tossed away. I love using it for DIY posts, which can get pretty messy. You can easily gather up the paper and toss it out- barely any cleanup needed!

Easel Paper Roll
Again, this type of paper is great for when you're making a mess! I used it when I was painting my colorful blocks and I wanted to keep the backdrop neutral. It allowed me to paint freely without having a bunch of cleanup after. It's also great for making a clean white backdrop or covering a table with some scratches on it.

Wood & Paint

DIY & Affordable Photo Backdrops

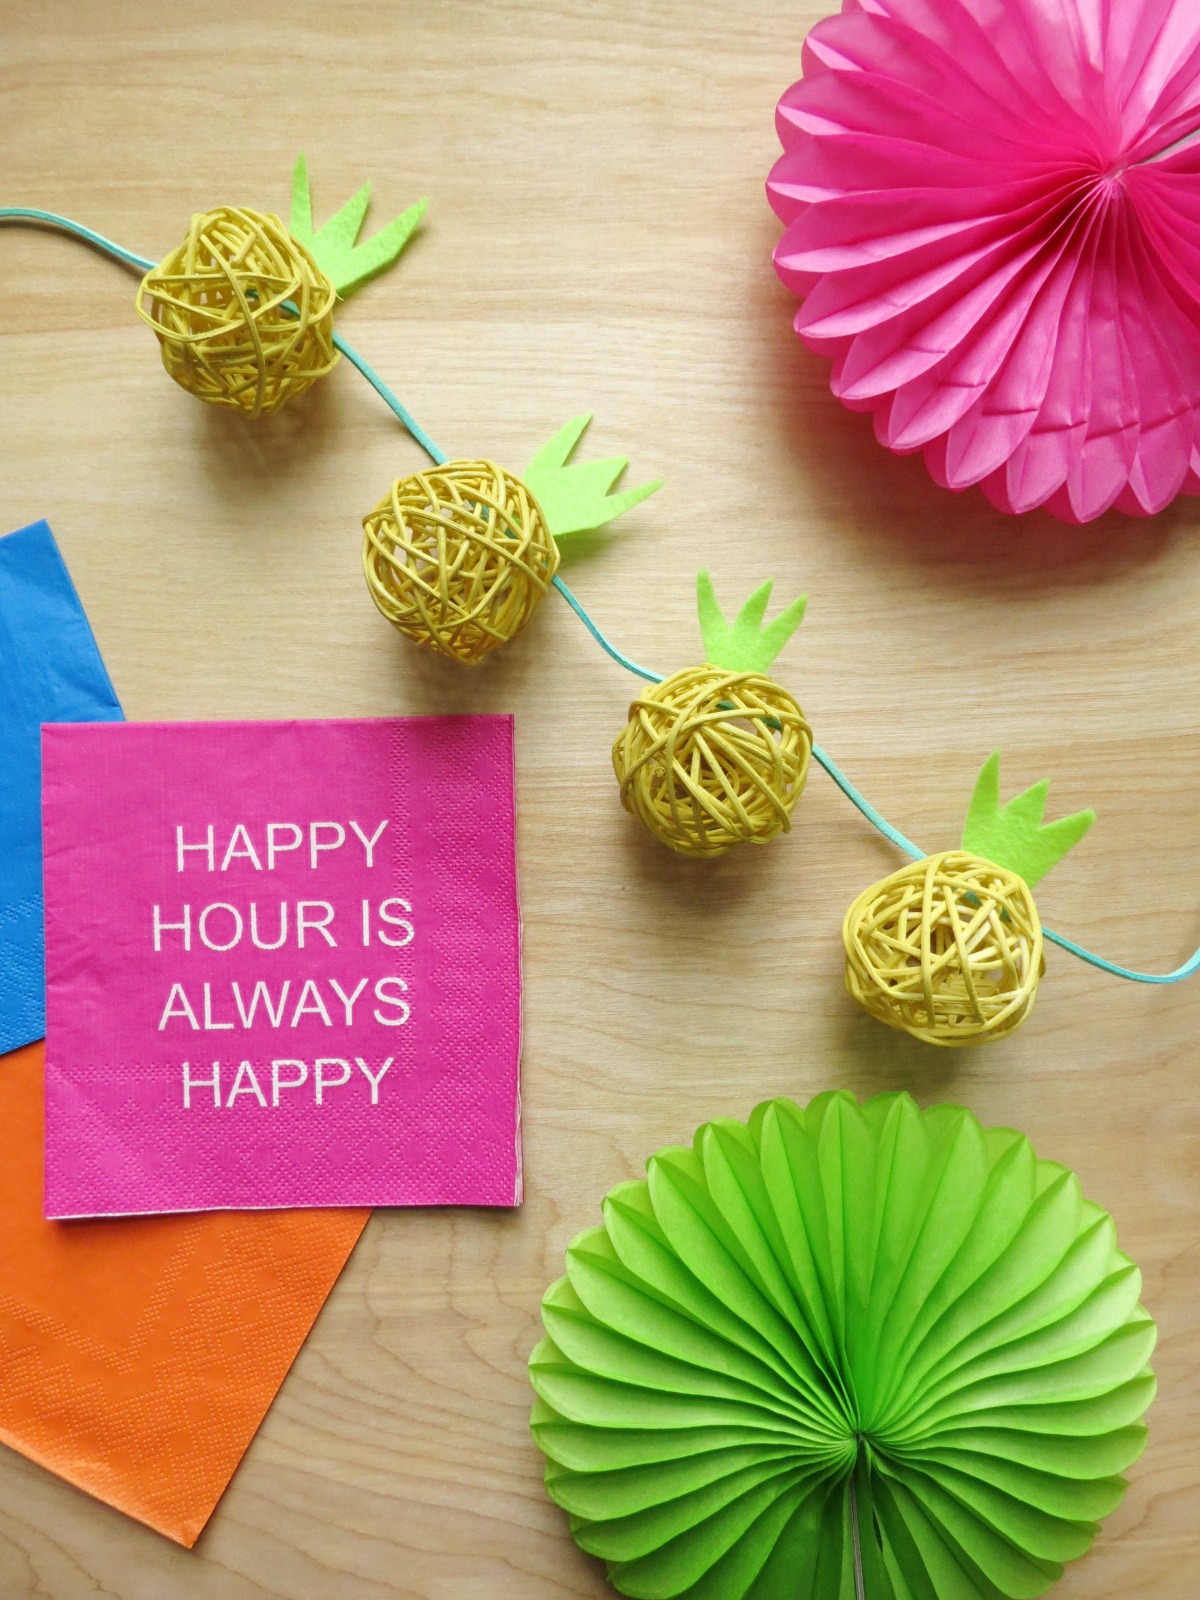
Pineapple Garland DIY with a Wood Backdrop

Painted Abstract Backdrop
If you're looking for something quirky and fun, this painted backdrop is for you! Damask Love used it as a large backdrop for portraits but you could totally make a smaller tabletop version if you wanted! 

Solid Color Photo Backdrops
If durable but simple is more your jam, try this painted wood backdrop! It's really easy to make using plywood panels and house paint samples. 

Stained Wood Backdrop
If you like something a little more rustic, try a stained wood backdrop! This tutorial shows you how to whitewash as well as how to add a colored tint to your wood. 

Colored Wood Paneling
If you like the look of paneling, or if you want it to look like a floor/wall, try this colored paneling DIY. This one is so cute, I think I may just have to make one for myself!
 

Party Backdrops

DIY & Affordable Photo Backdrops

Hey Girl: Ryan Gosling Gender Reveal with Paper Fan Backdrop

Paper Fans
Paper fans are such a cool and easy way to make a statement! I have used them countless times, as both a small photo backdrop or a large scale party table backdrop. I never use the glue it comes with and instead prefer to paper clip them or staple them so that they're reusable! More info on that here.

Balloons
Although they aren't great for the environment, balloons can be such a cool way to make a statement! You can do a balloon arch, make them into letters or numbers... the possibilities are endless! Check out my Balloon Pinterest board for some fun ideas.

Sequin Tablecloths & Runners
If you've got a sequin table runner or tablecloth, they make a PERFECT sparkly backdrop for your pics! You can see how I used it here and here (scroll down).

DIY & Affordable Photo Backdrops

DIY Disco Ball Earrings with Fringe Curtain Backdrop

Fringe Curtains
These are a super cheap and easy way to transform an ordinary wall. They're fairly large and come in all sorts of colors, so they make the perfect backdrop! They're sold everywhere- Amazon, Party City, even the dollar store!

Crepe Paper Streamers
Another dollar store staple, these party streamers make a really cool backdrop! You can mix and match colors, do various shades of the same color, or do all one color to create some depth as a backdrop. You can use them hanging on the wall with a piece of tape, or you can lay them down on a tabletop and place your item on top of them. Works either way!

Misc

DIY & Affordable Photo Backdrops

Mean Girls Conversation Hearts and Fabric Backdrop

Fabric
Although it can be wrinkled sometimes, a piece of fabric is a great way to add a pop of color to your photos. It comes in all sorts of colors, patterns adn textures, plus everyone has it lying around their house somewhere. For one post, I even used the fabric from my ironing board as a backdrop! You can also grab a curtain, a blanket or a tablecloth too!

Foam Boards
In what is probably the easiest and cheapest backdrop of all, you can grab some foam boards from your local dollar store or Target and use those for a backdrop. They're also great for bouncing light, so be sure to place them around your subject while facing the window (aka... don't block the window light with a foam board!) to maximize the light coming in.

DIY & Affordable Photo Backdrops

Tissue Paper
I think I've only used tissue paper as a backdrop once, but I really liked the look so I have to try it again! Since tissue paper is somewhat sheer, it can give you an interesting look if you layer it over another pattern/paper. Mine had some folds, and it made for a great, lightly textured background. And best of all, it's cheap!

Vinyl Backdrop & Stand
I have my vinyl backdrop and stand permanently set up in my attic studio. Since the walls are sloped up there, it acts as a "fake wall" so that there isn't a giant shadow where the ceiling bends (see before pics here). It's large and wide, and can be even wider if you placed it the other way! I've used it on nearly every  and you can't even tell it's a fake wall most of the time!

DIY & Affordable Photo Backdrops

Cutting Mat
If you're a DIY blogger, chances are you'll be cutting something at some point! If you use a cutting mat, why not incorporate it as the backdrop of a photo? Mine is this really cool, bright pink color and it really adds a pop of color to a photo.

Matte PVC Backdrop
I saved the best for last! This is my most used backdrop, hands down. It's literally the backdrop in nearly every single photo I have. It cleans easily, it's bright white, and it's the perfect size for nearly every flatlay and DIY shoot I do. I purchased the entire collection of them, but I really only use the white one. I've had it for nearly 2 years now and I only had to replace it once because I spilled oil paint on it and it just wouldn't come off. After that, I made sure to use a cover in case things got too messy.

Well, there you have it! Tons of backdrop options for your next photo shoot. If you're looking to improve your photos further, I'm creating a FREE photography e-course to help you do just that! Be sure to sign up and get your workbook by clicking the photo below!

#SparkJoy: My Intro to KonMari

Anyone who knows me or my family knows we are messy. I can't remember a time that we weren't messy, dating back to when I was a small kid. And I don't mean the fake "oh no don't look at my house, it's such a mess!" but there's only 2 socks on the floor and 3 dishes in the sink. I mean the type where an entire overhaul is needed each time people come over. And I have literally (half) joked that part of the reason I like to have events at my house is that it forces me to clean it regularly. It's a lifestyle I'm used to but hate with a great passion. I'm afraid that one day, it'll all become too much and next thing I know, I'll be surrounded by far too many things. This happened in my bedroom at my parent's house, the 1-bedroom apartment John and I shared, and now it was slowly but surely happening in our house. My attic, which is one of the biggest rooms in the house (which I have all to myself for my studio) had become packed, stuffed... HOARDED. It's a word I'm familiar with and fight to my very core. But I had all the makings of a hoarder and I was heading there on local train. Sure it made stops where I could get off, but I was riding it to the end. Like magic, as soon as I got pregnant, I had enough. Call it nesting, call it a miracle, call it whatever you please but it was a long time coming and needed to happen. 

KonMari Basics Web.jpg

I had looked around my house and noticed the clutter for the last time. Finally frustrated to the point of desperation, I purchased The Life Changing Magic of Tidying Up. People were always boasting about it, mainly for closet clean outs, and I always said I'd check it out "someday" but that day never came for me. Cleaning out my closet would be cool, for sure, but I needed a whole house overhaul. I was desperate, frustrated, and honestly a little scared of what my future would hold. I purchased the book after way too much deliberation and probably years of procrastinating, and I set out to read it right away. 

The Life Changing Magic of Tidying Up

The book starts with the author, Marie Kondo, explaining her history with tidying. She had been doing it all her life, with an almost obsessive need to clean. But she always failed. She explained the reasoning for this was that she was doing it all wrong. I think that for a lot of us, a messy home is equivalent to laziness. Things we know we should have done, but we prolonged it. Well, Marie Kondo was telling us that she didn't have this laziness- but she still failed at keeping her home clean. And that's because "tidy a little a day and you'll be tidying forever". I won't get into too many specifics about the book, because honestly it's a short, easy read and I think that she does the very best job of explaining it. But I know that reading her 100% success rate had me hooked from the very beginning. If I did this process and did it RIGHT, I could have a clean home by the end of it too. 

Putting the book into practice

I decided to read the book before attempting to clean any part of my house. Having been a borderline hoarder and shopaholic all my life, I wanted to do this once, the right way. I wanted to change my life. 

I didn’t realize the impact the book had on me (before even cleaning a single thing!!) until I had a stressed-out crying session. I was stressed about a whole bunch of things, and in my husband’s attempt to console me, he had only made it worse. A few tears turned into full-on bawling. And I shouted something like, “you don’t understand! There’s just so much I need to do and I feel the weight of it all on me! I feel like I just can’t get anything done!” And it hit me... I needed to do things in my business, yes, but I also majorly needed to clean my home. And the thought of just how badly I needed to clean my home was weighing on me to the point of exhaustion. I knew this, but it’s like for the first time I actually realized it in a way that could spark change. I had finally had a breakthrough: I’m really freakin tired of being a slob, and living a life overall that I’m unhappy with. This was my start. 

As I laid in bed that night, I began to think of all the other times I felt this feeling without understanding it. I thought of all those times I was about to do something (with excitement, I might add!) before realizing I hadn’t finished something else. I couldn’t even go up and work in my attic studio, and for a good reason- all my unfinished projects, all my abandoned hobbies, all my clutter, was literally... physically... preventing me from advancing. And I thought to myself, what sparks less joy than going up to make some magic while surrounded by your failures. Of course my studio didn’t bring out the best in me. Instead of showing myself the best, all my accomplishments and the things I loved, I was crippling myself with clutter, and doubt, and neglect. These were not the feelings I wanted to invoke. Not in my studio, not in my home, and surely not in my life. I had to make changes. And I had to do it soon. 

Slow Progress

I'm now about 3 months into the KonMari method and I have to say I fell off the wagon a little bit. I know that procrastination is my biggest weakness, but I had somehow managed to procrastinate this process even further. It's funny, because you often don't notice the passage of time until you look back and realize just how much has gone by. Just like clutter. You don't realize just how much there is until you literally can't function with it anymore. I've been meaning to write this blog post since April and I'm just now getting to it. I am tired of sitting idly by, doing things that don't serve me. I am going to be proactive and set goals for myself and achieve them. And I hope that you guys can join me in doing so!

Join Me! Your Homework

If you want to join me on this insane process of cleaning my house, I urge you to buy The Life Changing Magic of Tidying Up. I only fully used the KonMari method in one room (my closet) but I gotta say that for the past 3 months, it worked. And for those of you thinking that you have a whole family or a partner that makes a mess and needs to contribute, she covers this in her book as well. I'm going to pop in here more often with before and afters, advice on my journey to a clean home, and hopefully an incredible home reveal by the end of the year. With Baby Sunshine coming at the end of September, this is no time to push this off any longer. And for once in my life, cleaning sounds WAY better than procrastinating. And that feels amazing.

So, tell me about your struggles. Have you tried cleaning before but failed? Do you truly hate cleaning? Are you messy, a hoarder, or just really great at hiding your mess? Let me know in the comments below!

DIY Sun Hat String (aka Stampede String)

It’s summer vacation guys! I'm ready for sun, sand, unlimited ice pops, and best of all, sundresses! And, the perfect addition to a summer dress is a stylish sun hat. Unfortunately for me though, I have a super small head and they always end up flying off! I got tired of holding them down and/or chasing them around, so I wanted to create a solution that would keep my hat where it belongs- on my head! Here's the super easy, genius DIY so your hat can stay on all day long- a stampede string! PS- I wore the string behind my ears/hair, this way I didn't look like a total dork with a string below my chin! You couldn't even see it.

*This post contains affiliate links.

Tired of your sun hat flying off your head on vacation? Me too! Add this stampede string to your hat to keep it on your head where it belongs. Click for the DIY.

You will need:

Sun hat with an elastic rim (mine is from Target)
Suede cord (similar here)
Wood bead (similar here)
Flat pin (similar here)
Scissors
Felt Scraps

Directions:

Tired of your sun hat flying off your head on vacation? Me too! Add this stampede string to your hat to keep it on your head where it belongs. Click for the DIY.


  1. While wearing your hat, find the point near your ears and mark on the inside where the strings should go. 
  2. Take your suede cord and make a hole for your pin near the top, leaving a little extra on the end so it doesn’t break off. I found that it was a bit hard to use the pin to make the hole, so I suggest using a safety pin or thick needle
  3. Repeat for the other side. 
  4. String a wooden bead through both pieces of suede and tie a knot on each string so it doesn’t slide off. 
  5. Using your felt, use a small piece to cover both sides of the pin. If felt is too thick, you can use some regular fabric with fraycheck on the ends. Repeat for both sides. Note: This step is optional, but I realized on the trip that my hair would get caught in the pin and it would hurt when it pulled. 
Tired of your sun hat flying off your head on vacation? Me too! Add this stampede string to your hat to keep it on your head where it belongs. Click for the DIY.

Although this isn’t 100% foolproof (especially if it’s super windy!) this strap will help you to keep your hat on if a big gust of wind comes your way. I know that without it, I definitely would have had to wave my hat goodbye as it flew down the street. It was already flying off in the Target parking lot after I purchased it!

Tired of your sun hat flying off your head on vacation? Me too! Add this stampede string to your hat to keep it on your head where it belongs. Click for the DIY.

I left my bead natural wood, but you could totally paint it to match the string, the hat, or to add an extra pop of color. If you're looking for something to do with those extra beads, try this necklace DIY. It's one of my faves!

So what do you think about this hat string? Are you ready to add one to your oversized sun hats? Or, do you have another hack that's even better? Let me know in the comments below!

Update: The Shop is Closed 

So, I have something to admit- I shut down my shop. I wish I could say it was with a heavy heart, but the truth is that I’m relieved it’s closed. Opening this shop cost me hundreds of dollars. I am not kidding you, and I truly wish I was. I’m embarrassed to think of all the cool things I could have bought with that money, or the trip I could have gone on. The truth is that there's no way of knowing what's going to be a success or a bust. Sometimes you need to dive into the pool to see if you can swim. As a very apt metaphor, I could not. (And, I can't actually swim either.... but thats a story for another day...)

Today I'm going to answer some "FAQ", if you will, about the shop and why it failed. I hope that you guys can feel a bit better about your failures when you read about mine!

Update: The Shop is Closed. Learn about my failures, and why I'm ok with losing hundreds of dollars. Spoiler: It's not because I made more some other way!

How much did you make from the shop?

About $100 and 3 sales. Yes, you read that right. I probably spent 7 times more than I made. That’s a pretty big failure, don’t you think? But hey, I’m ok with it. I’m giving myself a pass on this one. And if you’ve ever fallen flat on your face, I’m giving you permission to forgive yourself too. 

Why did the shop fail?

Well... I don’t know. I put a lot of thought into curating some amazing products that I loved. I bought about 45 items and whittled the shop down to my top 15 or so items. I was super picky about what I sold. I was super picky about the photos. And I was super picky about the names and descriptions. But in the end, it didn’t matter. Cute photos didn’t work. Begging didn’t work. Coupons didn’t work. So, l figured if no one wants to buy it, I might as well stop selling. 

Why did you spend so much? 

Well, the inventory cost money. I didn’t buy tons of anything (less than 15 of each item!) but it adds up. Then, having a Shopify account cost $30/month. I had my items on Amazon too and that was $40/month. And to list on Amazon I had to buy UPC codes which were like $25. In short? My overhead was way too high. My items were priced fairly, but they didn’t sell. At all. And none of this even includes labor- all the time I spent on finding the items, photographing and styling them, editing, listing, promoting, storing, buying packing supplies... a lot went into this shop! 

Update: The Shop is Closed. Learn about my failures, and why I'm ok with losing hundreds of dollars. Spoiler: It's not because I made more some other way!

What are you gonna do with all that inventory then?

I’m going to have a flash sale for it, probably on Instagram stories. With a baby on the way I need to get rid of all the clutter in my life! The supplies are currently taking up a closet in my home, and I’m going to need it for other things soon enough. Plus, what am I gonna do with 15 of the same earrings!?

Why are you telling us all this?

Because hey, maybe you failed too. We only see success stories on the internet from bloggers, the picture perfect moment in their day where things went right. Part of me wanted to shut down my shop in shameful silence. To not publicize the fact that literally no one cared what I had to offer. And another part of me was like, fudge it. I FAILED and maybe you did too. And that’s ok! Let’s commiserate together. Let’s laugh at how bad it was, and dream of successes ahead. Let’s cry over spilled milk and wasted money until we feel a little better about it. Let’s remember that it’s ok to fail, because that means we tried. And that’s wayyyyy better than those guys on the sidelines that were too afraid to jump in. 

At the end of the day, I have no regrets. I tried something, knowing full well it could fail. Which was pretty terrifying, because I hate failure. But guess what? I survived. My friends and family still love me. I’m not ready to give up on my dreams of owning another shop someday. I’m not going to tell others to abandon ship on their dreams because I failed mine. It’s all a learning curve. I just happen to be learning A LOT lately ;)

So, that's my story. Do you guys have a story about a massive failure? How did you feel about it? Did better things come after? Let me know in the comments below!