DIY Pennant Flag Puns

Everyone is super excited about the Super Bowl, and I’m like cool... an excuse to have a party and eat! I’ve never really been into sports (or good at them...) so I figured for Super Bowl, I’ll just do what I do best... crafting! Since I don’t even know who’s playing, I figured I’d keep it nice and generic with some colorful, silly pennant flags that you can use for pretty much any football game in the future. And since I’m ridiculous, they’re full of funny sayings. That’s right- you can make some PUN-nant flags for your home! (see what I did there?!)

Pennant Flag Puns 18.jpg

You will need:

Pennant Flag Puns 5.jpg

Felt (similar here)
Cricut (here)
White iron-on vinyl (here)
Printer (I have this one and love it!)
Pennant template (here)
Cricut Template (here)
Iron (here)
Felt Scraps
Brown acrylic paint (here)
Glue gun
Cricut supplies & fabric scissors (here and here)
Felt football stickers (similar here)

Directions

Pennant Flag Puns Collage.jpg
  1. Cut out your vinyl on the cricut and get it ready for ironing. To learn more about using Cricut iron-on vinyl (with full instructions!) check out this post.
  2. Using your template, cut your pennant flags out of felt. If you position them efficiently, you can get at least 2 flags out of 1 piece of felt. 
  3. Iron your quotes onto the pennant flags. Let cool fully before peeling. See this post for more info.
  4. Create your felt embellishments as per the instructions below.
  5. Glue your embellishments onto the pennant flag using a glue gun.

For the finger:

Pennant Flag Puns 13.jpg

Cut a hand and finger shape out of pink felt. If you’re not sure of the shape, use a photo from online and trace it as a template onto the felt. Add a perimeter with white paint, then paint little triangles below the perimeter for knuckles. Once your paint has dried, iron the #1 onto the foam finger, then glue onto your flag. 

For the cookie:

Pennant Flag Puns cookies.jpg

Cut a squiggly oval out of tan felt. Using brown paint, add small dots for chocolate chips. My paint was named Melted Chocolate- how perfect! Let dry, then glue onto the flag. 

For the beer cup:

Pennant Flag Puns beer.jpg

Cut the shapes out of felt- a cup with handle, an oval with a flat top for the beer, a smaller oval with a flat top for the accent color, and white foam. I also cut an additional cup handle for more depth, which was basically a C-shape. Fold the cup in half, then cut the middle out of the handle. Trim as needed. Glue the felt pieces together and then glue your cup onto your flag. 

Pennant Flag Puns 14.jpg
Pennant Flag Puns 17.jpg
Pennant Flag Puns 16.jpg
Pennant Flag Puns 15.jpg

So what do you do with these now? Add a ribbon and hang them up! Or, add a stick and let your pun-nant flag fly! Or, uh... wave? What great football puns did I miss? Let me know in the comments below!

Spice Girls Rainbow Spa Slumber Party

Happy 20-year anniversary of the Spice World release in the US!!! That's right, the movie itself is almost old enough to be able to drink!! Do you remember the first time you went to see it? We waited just a little bit too long and it was out of most theaters, but there was this small theater by my grandma's house in Hells Kitchen and they still had it on! So my parents took us along with grandma (who barely spoke English, since she was from Greece) and we all watched it together. After watching it, my sister and I literally wanted to re-create the whole thing with our Barbies, so we turned our doll house into the Spice Tour Bus and made our Barbies into the Spice Girls. Ugh, it was such a magical time! This movie brings me so much nostalgia.

Anyway, before I start to REALLY ramble... one of my favorite scenes in Spice World was the one where the girls are all laying in robes under a magically colored tent. It's such a short scene, but I always wanted to recreate that party and hang out there! Unfortunately, it's winter here in NYC and it's fudging COLD so I decided to virtually create this scene for anyone to attempt! 

Ever wished you could be the Spice Girls? Throw yourself a rainbow spa slumber party just like the one in Spice World! You'll be sure to make everyone jealous.

1. White Paper Lanterns 2. Toe Separators 3. Orange Robe 4. Nail Scrub Brushes 5. Pedicure Slipper 6. Green Robe 7. Yellow Robe 8. Chupa Chups Lollipops 9. Diet Pepsi 10. Purple Robe 11. White Tent 12. Pink Robe 13. Orange Blanket 14. Blue Pillows 15. Cow Print Pillow Cover 16. Curtain Panels

Setting Up

To set the scene, you’ll want to set up your tent in the grass, or even indoors if it’ll fit. Lay down your orange blanket (1 or 2, depending on the size of your tent) and throw some pillows around to make it comfy. If you’re putting the tent on the grass, you may want to get a waterproof liner for your blanket so you don’t end up with a moist blanket and wet butts!  Then, take your curtain panels and go around the tent to hang them for some privacy and color. Depending on the style of your tent, I recommend using hook clips for an affordable and easy method of hanging! 

I really wanted this party to have that same cozy feel as the one in the movie, plus the really bright and quirky 90’s ridiculousness we all loved. Since we don’t really have an occasion to set up a tent and sit around lounging in the grass like the Spice Girls, I figured a slumber party/spa day would be the perfect excuse! You can get some super affordable items, like spa flip flops, scrubber brushes, and colorful toe separators. Invite each girl to bring their favorite shade of bright polish, or order a set of these rainbow nail polishes so everyone can choose their fave. It would make a great party favor!

Getting in the 90's Mood

Play your favorite 90’s playlist, or blast some Spice Girls as you get pampered in style. Or, you can even grab a portable DVD player or your laptop to play Spice World in the background.

The girls all wear these plush, oversized robes in bright pink, orange, green, yellow, and a purplish-blue for Posh. Super appropriate, right? Haha. The girls are drinking Pepsi and enjoying their candy of choice, chupa chups, so I included those as well.  You can always opt for something healthier, like cucumber water and a fruit and veggie platter. Or, go all out 90's with some of your favorite 90's snacks, like Fruit by the Foot, Gusher's, and Ring Pops.

Say You'll Be There

Are you guys just dying to throw this party?! It's fulfilling all my 90's dreams, I'll tell you that much! So, which scene from Spice World did you want to recreate? And, which Spice Girl was your favorite? Let me know in the comments below! (PS- I loved Ginger!)

DIY Animal Sweater Necklace

Last month, I made some awesome Animal Sweater Ornaments for my pink mini-tree and I just couldn't bear to put them away! So, what's a girl to do? Re-purpose them into something that can be worn year-round! (or, at least, all winter long.) These animals in sweaters are so cute that everyone wants them. I only wore these twice and I had several questions about where I got them! They would also make a great gift for a winter or animal/dinosaur-themed party, or even as party favors! Overall, I think they're the freakin' cutest and they're so much fun to make!

These animals in sweaters are so cute that everyone wants them! They would make a great gift for a winter or animal/dinosaur-themed party, or even as party favors! Click for the DIY. #diyjewelry #handmadejewelry #diygifts

You will need:

Plastic animals (here and here)
Acrylic paint (here)
Felt (similar here)
Screw eyes (similar here)
Glitter (here)
Nylon cord (here)
Jump rings & clasps (similar here)
Beads (From Joann, like these but in pink & orange) 
Toothpicks
Gluegun
Jewelry tools (here)
Scissors (here)

Directions:

These animals in sweaters are so cute that everyone wants them! They would make a great gift for a winter or animal/dinosaur-themed party, or even as party favors! Click for the DIY. #diyjewelry #handmadejewelry #diygifts

1. Paint a sweater onto your animals using your acrylic paint. I did it freehand, but you can always use some artist's tape if you don't have a steady hand. I did 2 coats.

2. While they dry, cut a few thin strips of felt for the scarf. Try to be mindful of how large the animals' necks are in comparison to the length and width of the scarf.

3. Paint your scarves with either a thin paint brush or a toothpick. I used the pointy side for the polka dots, and the edge for stripes. I used a paintbrush for the thicker stripes, but overall I mostly used toothpicks.

4. Once the animals are dry, add glitter to the edge of the sweater to jazz it up and provide a clean edge. I used glitter paint, but you can achieve a similar look by using a small amount of equal parts glue and glitter to create your own paste/paint. I found that a toothpick was the perfect tool to get the glitter paint on in a thin line.

5. Glue your scarf in place. I used a small dab of hot glue on the scarf to shut it. If it moved around too much, I added a small dab of glue on the animal to secure it in place.

6. Using your pliers, screw the screw eye into place. I first took the pointy screw side and twisted in to make a small hole, then I used my pliers to twist the screw eye into place. When it gets to a point that it's mostly in, I recommend using your hand to twist it all the way in, so that your pliers don't scratch the paint.

These animals in sweaters are so cute that everyone wants them! They would make a great gift for a winter or animal/dinosaur-themed party, or even as party favors! Click for the DIY. #diyjewelry #handmadejewelry #diygifts

7. Cut your string the length you want it to be plus a little extra. Create a Larks Head Knot to secure the thread to your animal pendant. I also added a regular knot after, so that it stayed in place, nice and snug and secure :) 

8. Add your beads. I only wanted a few, so I did 3 neon pink and orange on each side. Be sure your bead hole is big enough for your string, and trim as you go along so that you have a nice, compact edge to thread the beads with. I found that mine got "fat" after a bead or two and needed to be trimmed off.

9. Attach your clasp to one crimp, and your jump ring to another crimp, and attach them to your cord. 

These animals in sweaters are so cute that everyone wants them! They would make a great gift for a winter or animal/dinosaur-themed party, or even as party favors! Click for the DIY. #diyjewelry #handmadejewelry #diygifts
These animals in sweaters are so cute that everyone wants them! They would make a great gift for a winter or animal/dinosaur-themed party, or even as party favors! Click for the DIY.
These animals in sweaters are so cute that everyone wants them! They would make a great gift for a winter or animal/dinosaur-themed party, or even as party favors! Click for the DIY. #diyjewelry #handmadejewelry #diygifts

How cute are these necklaces?! I'm so glad I get to re-use those ornaments and be able to see them daily! I really love re-purposing little animal toys, as exhibited by my Circus Animal Drink StirrersZebra Party Tray, and Animal Sweater Ornaments.  

So, what else would you like to see these animal toys made into? Let me know in the comments below!

DIY Disco Ball Earrings

HAPPY NEW YEAR! 

For the first DIY of the year, I really wanted to showcase something I LOVE- disco balls! I really wanted a pair of disco ball earrings that were simple, and not cheesy. So many of them go with a 70's costume and they're more groovy than classy. I love that you can wear these earrings anytime there's a party- or anytime you want to party. They're super easy to make and lightweight. Plus the pack comes with 12 mini disco balls- that's enough for 6 pairs of earrings! So pop on your earrings, grab some confetti, and party the night (or day) away! If you want a party go along with them, check out this Pink Disco Ball Party!

You can wear these earrings anytime there's a party- or anytime you want to party. They're super easy to make and lightweight. Check out the DIY now!

You will need:

Mini disco balls (here)
Jewelry tool kit (here)
Jewelry findings kit (here)
Pink seed beads (similar here)

Directions:

You can wear these earrings anytime there's a party- or anytime you want to party. They're super easy to make and lightweight. Check out the DIY now!

1. Remove the string from your mini disco balls

2. Take your pin and insert it through the center of your disco ball using the hole from the string as a guide. The flat end should be at the bottom.

3. Add a few seed beads to the top and trim if necessary.

4. Twist your pin around the edge of your round nose pliers to create a hanging hoop.

5. Attach your earring hook to your hanging hoop. Wear and enjoy!

You can wear these earrings anytime there's a party- or anytime you want to party. They're super easy to make and lightweight. Check out the DIY now!

Don't mind my crazy face- confetti makes me a little bit too excited haha. How great are these earrings?! Be sure to check out the Pink Disco Ball Party for even more pink party goodness!

Pink Disco Ball New Year's Eve Party

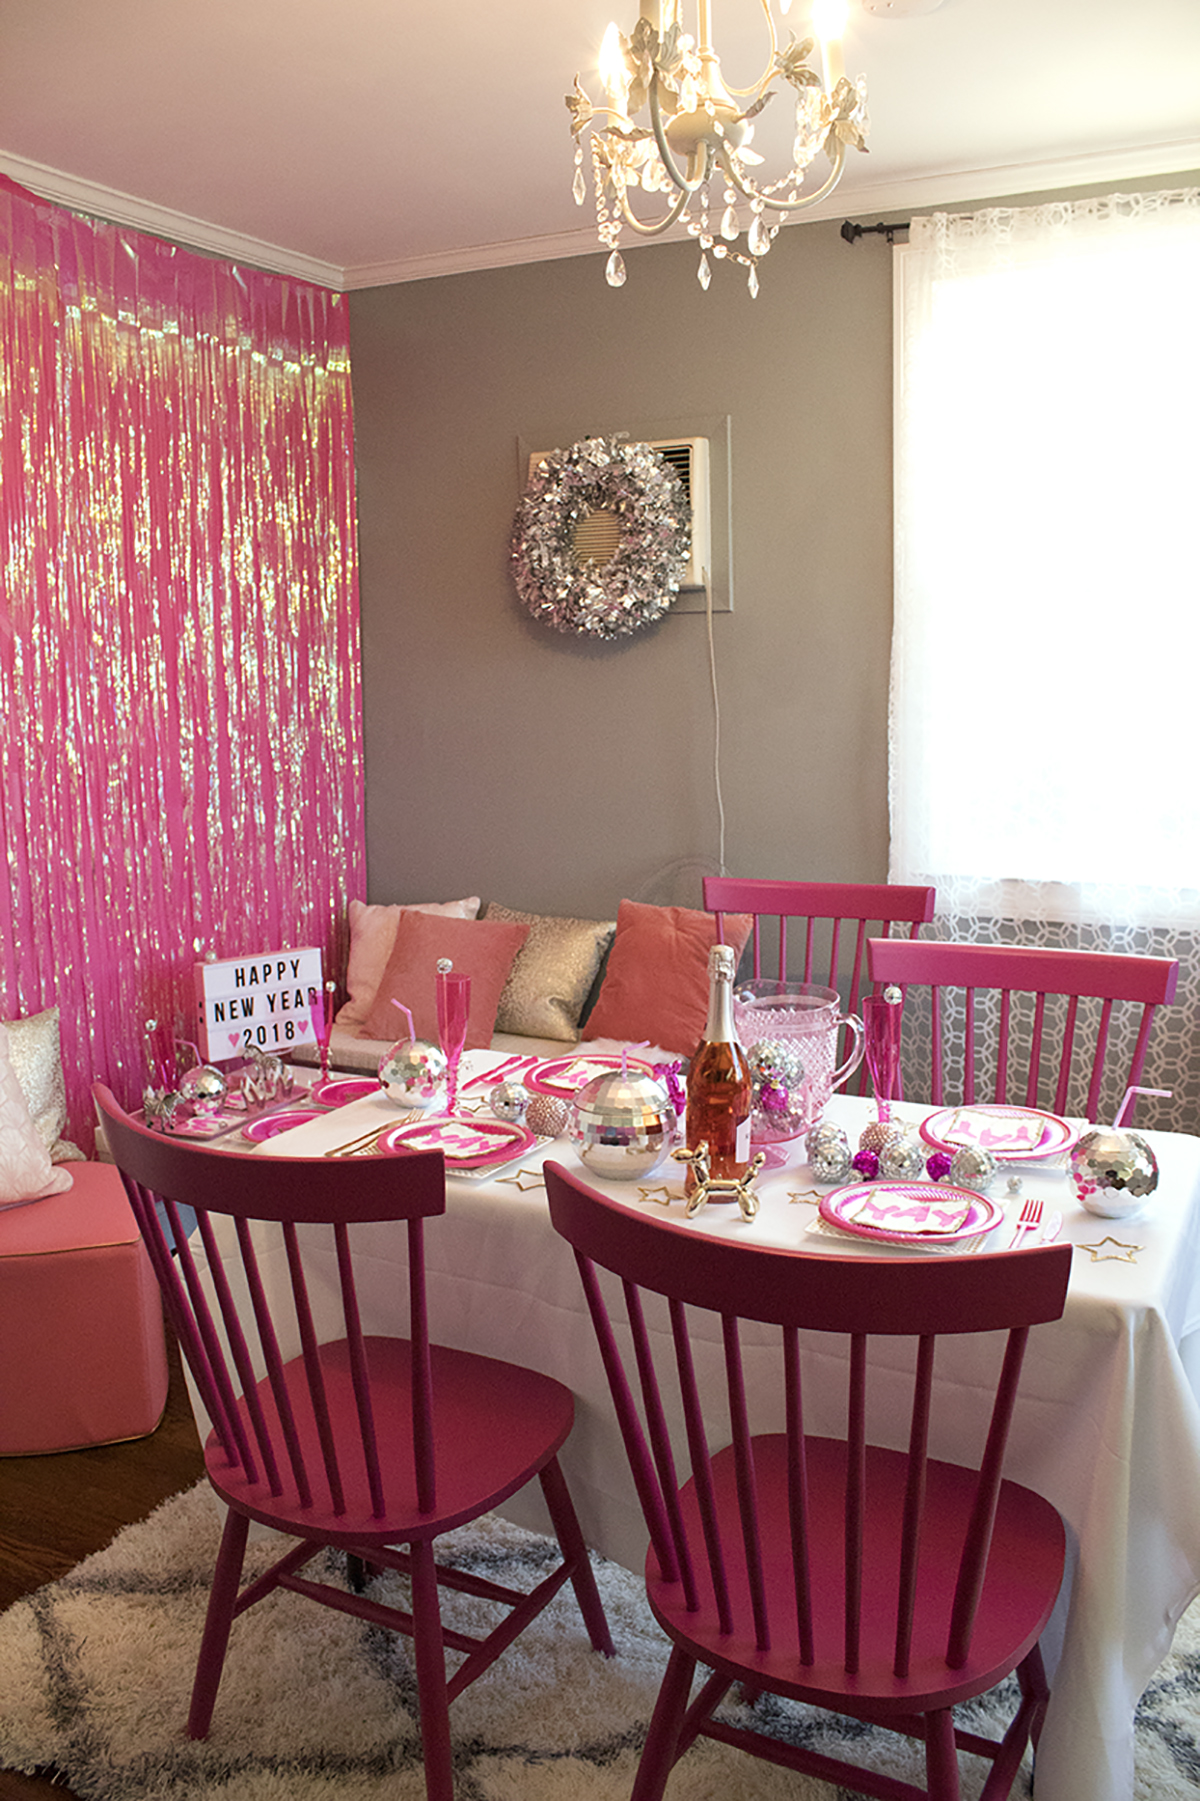
I absolutely love disco balls, glitter and sequins, so it’s no surprise that New Year’s Eve is one of my FAVORITE parties to plan for. It’s the one time of year that you can dress up in glitzy glam from head to toe, and not seem like a weirdo. Last year, I left my New Year’s plans to the very last minute, and ran to my local dollar store to grab some items. While it came out really cute in the end, this year I wanted to plan it out a whole lot more. I wanted it to be PINK. And SHINY. AND DISCO BALLS. Gimme allllll the disco balls! And, since Christmas can be super pricey (goodbye, money!) I wanted this party to be affordable. So, I ran around my house and collected a few items, while also investing in some pieces I can use again and again. I have to say I’m really happy with the results. Can I live in this party permanently?!

Pink and Silver and Disco Balls, oh my! This New Year's Eve Party is just what you need! Click for the full post.

Since this party has a whoooole lot of stuff going on, I wanted to make it easy to get a list of all the supplies. It's all here in this excel sheet, right down to the confetti! You'll know exactly what I used and how much to order, in case you want to re-create the party, or to purchase a specific item. It'll come straight to your inbox in just minutes!

The printable is available in my resource library, which you can get totally FREE access to, just by signing up. What exactly do you get? Access to all my printables, including party planning guides, checklists, and my projects. By signing up, you'll have access to all projects- past, present and future! 

Pink and Silver and Disco Balls, oh my! This New Year's Eve Party is just what you need! Click for the full post.

To dress up your party, opt for an elegant white tablecloth instead of the usual plastic ones. This one is made of polyester and resists stains, so it’s perfect for popping it in the washer after the party is done! It’s also affordable too, just in case you end up with stubborn stains that just won’t come out. 

Pink and Silver and Disco Balls, oh my! This New Year's Eve Party is just what you need! Click for the full post.

Every New Year's Eve party needs as much sparkle as possible! These glasses are dressed up with some basic and inexpensive star wire, and I think they’re so worth it! Because pink + tinsel + champagne = perfection. Top them with a disco ball stirrer and you’re in business, baby!

Pink and Silver and Disco Balls, oh my! This New Year's Eve Party is just what you need! Click for the full post.

For a fun party favor your guests are sure to love, grab a pack of disco ball cups! I have one I got on a Carnival cruise a few years back and I use it at almost every party I throw. It's the BEST for using on New Year's Eve!

Pink and Silver and Disco Balls, oh my! This New Year's Eve Party is just what you need! Click for the full post.

For the table setup, I grabbed a bunch of white and pink items, and created a disco ball table runner! It was super easy, since all I had to do was scatter some disco balls down the center.

Pink and Silver and Disco Balls, oh my! This New Year's Eve Party is just what you need! Click for the full post.

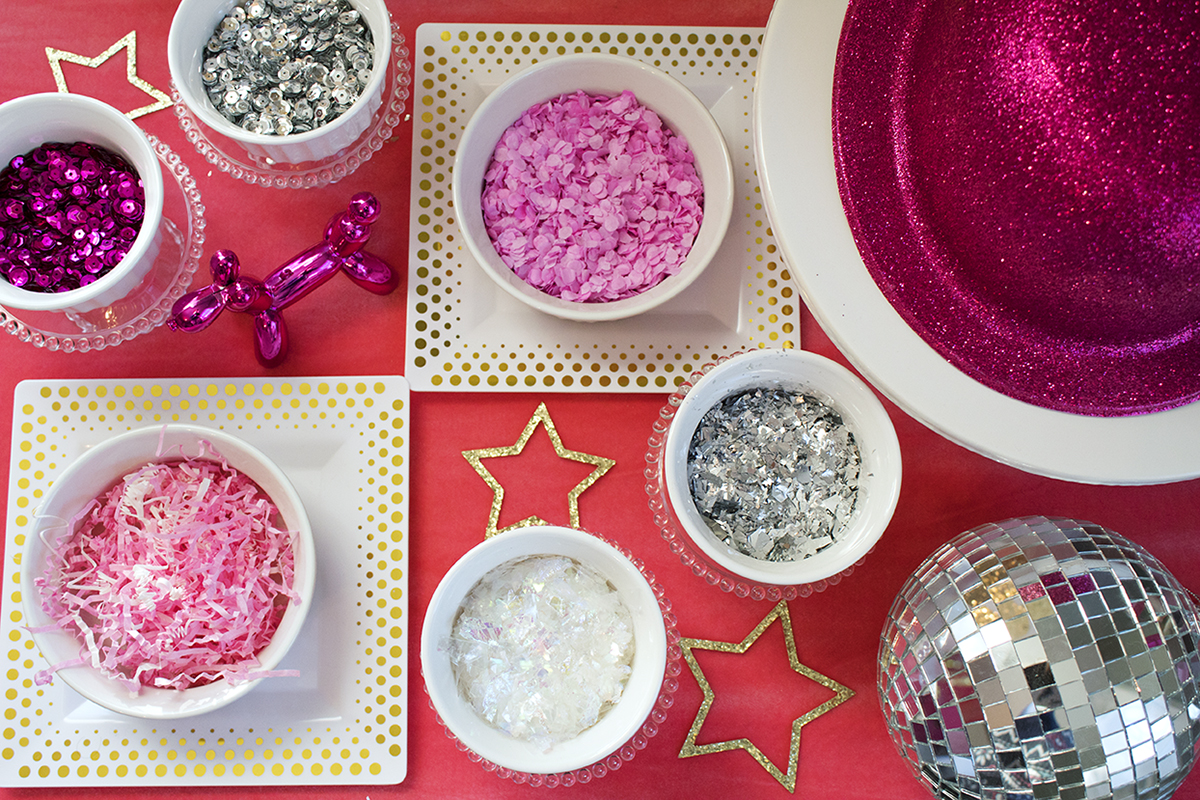
I also set up a bar in the corner to hold all our supplies. It acted as both a champagne bar and a confetti bar! All I had in this corner was a black desk, so I covered it up with a giant silver sequin tablecloth and some pink velvet to match the theme.

Pink and Silver and Disco Balls, oh my! This New Year's Eve Party is just what you need! Click for the full post.

I also wanted to create a little "lounge" area, so I gathered some ottomans and pillows to make it comfy. I set everything up in the corner, and added a small table for everyone to set their drinks on. My zebra tray was the perfect addition. This little lounge didn't cost any money and looked super cute!

Pink and Silver and Disco Balls, oh my! This New Year's Eve Party is just what you need! Click for the full post.

These balloon animal dogs got to make their debut once again. They make me so happy.

Pink and Silver and Disco Balls, oh my! This New Year's Eve Party is just what you need! Click for the full post.

While we were ready to party the night away, Roger snuck in and explored before having a rest under the table. Maybe he was impersonating the zebra so he wouldn't be seen?!

Pink and Silver and Disco Balls, oh my! This New Year's Eve Party is just what you need! Click for the full post.

Woohoo! And just like that, another year came and went. It's past New Year's Eve now, but if you're itching to have this party, I think it would make a great birthday party, bachelorette party, or even a Valentine's Day party! Be sure to request the excel sheet now, so you can get the full list of supplies in a handy excel sheet!

The printable is available in my resource library, which you can get totally FREE access to, just by signing up. What exactly do you get? Access to all my printables, including party planning guides, checklists, and my projects. By signing up, you'll have access to all projects- past, present and future!