DIY Painted Wood Necklace

A few months ago, my boss went to Mexico and brought me back this really pretty necklace. I liked it a lot, but as soon as I saw it, I thought about how cute it would look with a pop of color! It’s such a fun shape, and the two-toned wood was awesome! Adding some rainbow paint took it to the next level for me, and made it match much more of my closet. It’s super easy to do if you have any jewelry, especially souvenirs, that aren’t quite your style!

*This blog post contains affiliate links.

Paint Necklace 10.jpg

You will need: 

Wood necklace (similar here or here)
Nylon cord (here)
Painters tape (here)
Jewelry closures (here)
Jewelry tools (here)
Paint in your choice of colors (similar here)
Scissors (here)
Paintbrush
Pencil & marker

Paint Necklace Collage.jpg

Directions:

  1. Decide on your pattern and tape off your wood pieces. If your tape is super sticky, you may want to make it less sticky by putting it onto something and pulling it off, like your pants, so that it has some lint as a buffer.

  2. If your necklace is like mine, now you cut it off the string. I wanted to be sure the lines for the tape matched up before cutting.

  3. Paint 2 coats. I only did the front and sides so that I didn’t have paint against my skin/clothes but it doesn’t matter either way. Whatever you prefer!

  4. Pull off the tape while paint is still wet and let dry fully.

  5. String your wood pieces back onto the string and tie a knot on the ends if necessary

  6. Add your closures after deciding on the appropriate length for the string.

Paint Necklace 8.jpg
Paint Necklace 11.jpg

I love making over items I already own to make them fit my style better. It’s so nice, especially with sentimental items that don’t get much use. What do you think about this project? Do you plan on making over some wooden jewelry sitting in your closet? Let me know in the comments below!

DIY Disco Ball Earrings

HAPPY NEW YEAR! 

For the first DIY of the year, I really wanted to showcase something I LOVE- disco balls! I really wanted a pair of disco ball earrings that were simple, and not cheesy. So many of them go with a 70's costume and they're more groovy than classy. I love that you can wear these earrings anytime there's a party- or anytime you want to party. They're super easy to make and lightweight. Plus the pack comes with 12 mini disco balls- that's enough for 6 pairs of earrings! So pop on your earrings, grab some confetti, and party the night (or day) away! If you want a party go along with them, check out this Pink Disco Ball Party!

You can wear these earrings anytime there's a party- or anytime you want to party. They're super easy to make and lightweight. Check out the DIY now!

You will need:

Mini disco balls (here)
Jewelry tool kit (here)
Jewelry findings kit (here)
Pink seed beads (similar here)

Directions:

You can wear these earrings anytime there's a party- or anytime you want to party. They're super easy to make and lightweight. Check out the DIY now!

1. Remove the string from your mini disco balls

2. Take your pin and insert it through the center of your disco ball using the hole from the string as a guide. The flat end should be at the bottom.

3. Add a few seed beads to the top and trim if necessary.

4. Twist your pin around the edge of your round nose pliers to create a hanging hoop.

5. Attach your earring hook to your hanging hoop. Wear and enjoy!

You can wear these earrings anytime there's a party- or anytime you want to party. They're super easy to make and lightweight. Check out the DIY now!

Don't mind my crazy face- confetti makes me a little bit too excited haha. How great are these earrings?! Be sure to check out the Pink Disco Ball Party for even more pink party goodness!

Make a Statement: The Shop is LIVE!

EDIT: The shop is now closed. Read more here.

YOU GUYS! Remember back in October when I relaunched the blog as Party HarDIY? Well, I told you there were some big plans in STORE (hah, see what I did there?) and I’m sooo excited to announce the launch of our shop! I’ve always wanted to have my own shop full of cutesy things, and I’ve always had a love of jewelry! Well, now the two have come together in one magical, glimmering place.

Flower Necklace Yellow.jpg

So, what’s available?

A collection of unique and colorful jewelry, sure to add a pop of color to any outfit! The holidays are coming, and these pieces are perfect for adding some sparkle to your outfit, a fun touch of Christmas colors, or to change up an outfit that’s already been worn a bunch of times! Because let’s be real, these pieces are WAY cheaper than buying a new dress!

Um… Tell me more about this collection!

Well, ok! This all started back when I was in my favorite jewelry shop in the city. I thought, wouldn’t it be great to have a collection of fun and colorful necklaces that are affordable? There are SO many expensive jewelry shops out there, and my opinion on costume jewelry is the more, the merrier. So, I decided to curate my own collection of fun, bold, and most of all BRIGHT jewelry. There will also be some new items coming to the shop as well, but for now I decided to start small for the holiday season!

Red Tassel xmas.jpg

Where did your love of jewelry come from?

My grandma! My yiayia had the most insane collection of costume jewelry. I don’t think I ever saw her wearing real jewelry, haha! She had a bunch of bold necklaces and earrings. Fun fact- her ears weren’t pierced! She only owned clip-ons. Here's a picture of us when I was a kid. She's dressed very on brand, and I'm the one in the tutu. I took ballet for a hot minute, but I was AWFUL at it.

Grandma Inspo.jpg

Um… am I brave enough to wear this stuff?

YES! I used to be shy about wearing bright things too. I finally realized that it’s fun to be bold and daring. People notice! I get compliments on my jewelry all the time, and in a sea of people, it’s fun to stand out a bit. You can always start small with a pair of colorful studs!

Blue Square Earring auto.jpg

Ok, you’ve convinced me! What do I even wear this stuff with?

My very favorite thing to wear bold jewelry with is a basic tee! It’s really adds a pop of fun and sass to an otherwise casual item. Try pairing the Daisy Dreams Statement Necklace or the Fringe Benefits Earrings with a basic tee. Another great way to wear these is with a Christmas sweater! Try the Rudolph the Red Nosed Rhinestone Tassel Earrings with your ugly Christmas sweater, or the Worth The Tassel Earrings with a warm, cozy sweater! Heading to a holiday party? Try the Chic-a-Boo Rhinestone Earrings for some added glitz and glam, or the Dragonfruit Dilemma Earrings for a fun, unexpected touch.

Dragonfruit Earring Pink.jpg

Can I get free items?

Um, heck yea!! I’m hosting a giveaway! To enter, follow the instructions on this post on Instagram. Tag a friend for an extra entry! One winner will get all 4 jewelry ornaments- perfect for giving out as Secret Santa gifts, hanging on the tree, or keeping them all for yourself!

DIY Jewelry Ornament 12.jpg

Eek! I hope you guys are as excited about this as I am! I've been working on this for MONTHS, and I'm so happy to see the store is finally live! So, go sign up for free shipping, and enter the giveaway!

DIY Wood Bead Tassel Necklace

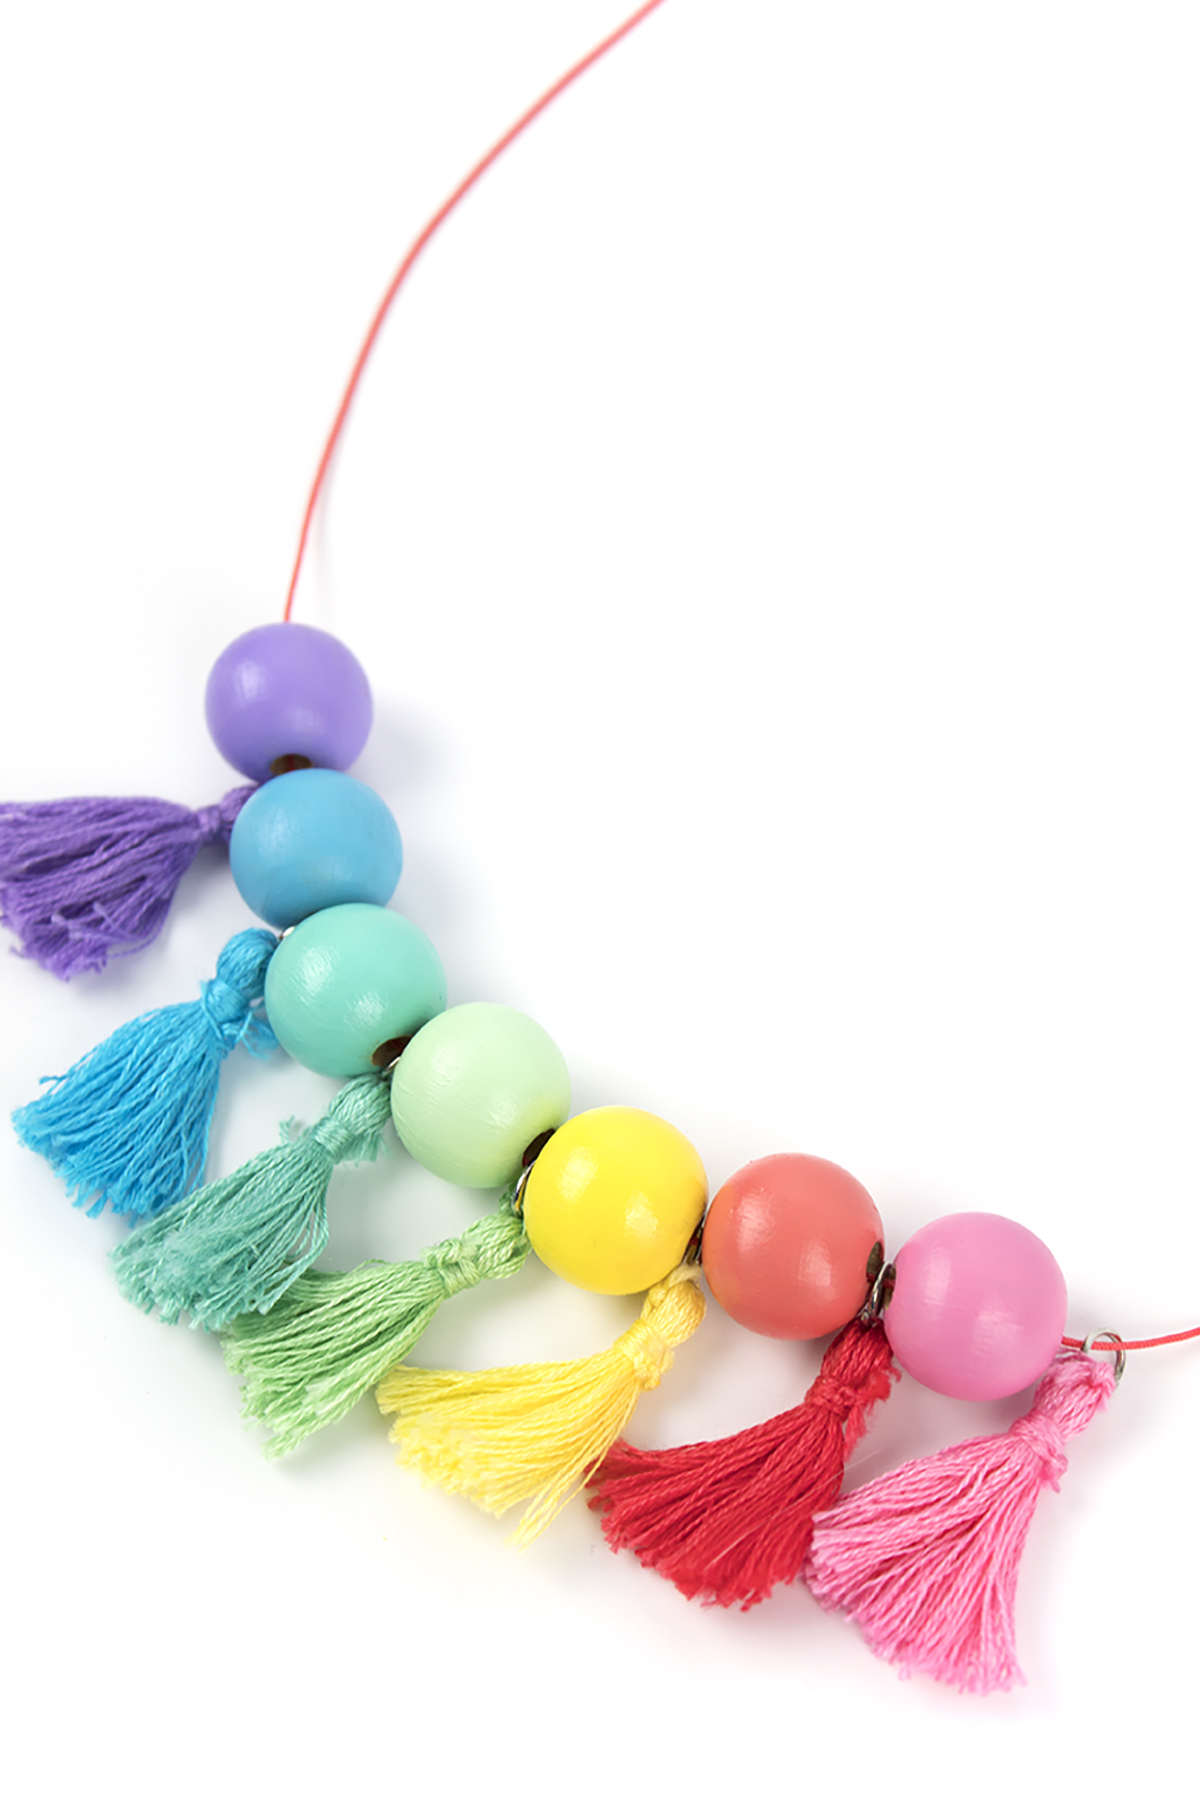
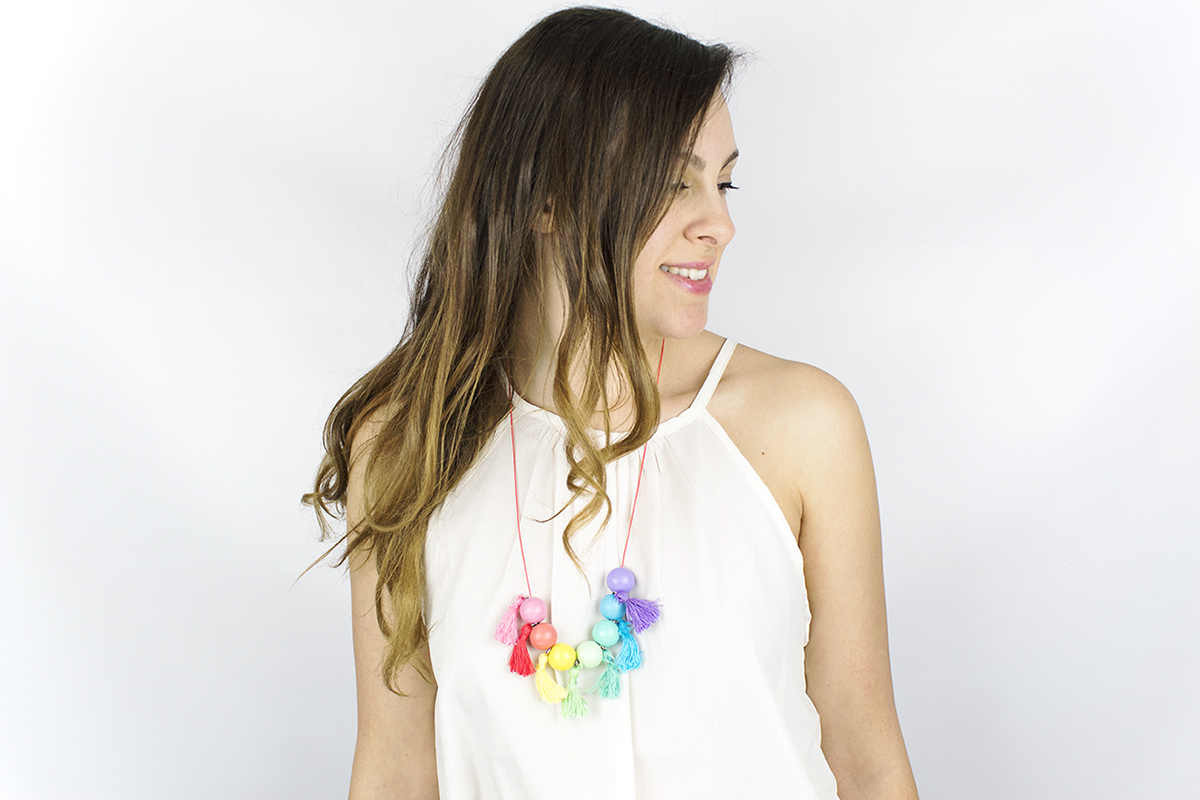
Happy March! Wow, I can't believe it's nearly spring already and St. Patrick's day is next week! St. Patrick's Day was always one of my favorite holidays for some reason. I like almost all of them, but I think it's something about how everyone goes crazy and gets all dresses up that makes me like St. Patrick's Day a lot. Instead of doing a traditional St. Patrick's Day craft, I decided to switch it up a little with a pastel rainbow necklace. My fiancé is a quarter Irish, and he said St. Patrick's Day does not involve rainbows. However, there's no way to find a pot of gold without a rainbow. So, at least in the Hallmark version of the holiday, there's definitely rainbows! If you want to add a little bit of celebration to your St. Patrick's Day outfit this year without looking like you belong in a parade, try wearing this necklace! Honestly, it works well all year round and I think it's perfect for the spring!

Add a little color to your wardrobe with this DIY Wood Bead Tassel Necklace. It features painted beads, DIY tassels, and a customizable palette. Make one for your closet today! #diyjewelry #rainbow #stpatricksday
DIY Wood Bead Tassel Necklace
Add a little color to your wardrobe with this DIY Wood Bead Tassel Necklace. It features painted beads, DIY tassels, and a customizable palette. Make one for your closet today! #diyjewelry #rainbow #stpatricksday

You Will Need:

DIY Wood Bead Tassel Necklace

Embroidery floss (similar here)
Wood beads (similar here)
Nylon cord (here)
Jump rings & clasps (similar here)
Paint (similar here)
Paintbrush (mine are from Michael's, similar here)
Styrofoam (here)
Kebab sticks (here)
Washi tape (similar here)
Jewelry tools (here)
Scissors (here)

DIY Wood Bead Tassel Necklace

1. Take your skewer and wrap it in washi tape. You'll want enough so that the beads won't slide down as you're painting. Put your beads on and paint them. I used bright rainbow colors. Put your skewer into some styrofoam to dry. While you wait...

Add a little color to your wardrobe with this DIY Wood Bead Tassel Necklace. It features painted beads, DIY tassels, and a customizable palette. Make one for your closet today! #diyjewelry #diytassels

2. Cut a piece of cardboard that is the size you want your finished tassels to be. I wanted mine to be around the same size as my beads, so I used that as a template. Wrap the embroidery floss around the cardboard 25 times. You can do less or more, depending on how thick or thin you want your tassels to be. Cut a small piece of floss, thread it through the underside of the top, and tie a few tight knots.

DIY Wood Bead Tassel Necklace

3. Slide the floss off the cardboard and onto a pencil or stir stick. Take a piece of embroidery floss and wrap it around just below the stick. Tie several knots, then cut your embroidery floss. Then, take a jump ring and thread it through the top piece of embroidery floss. Comb your tassel to loosen the weave of the embroidery floss and create and fluffy tassel.

DIY Wood Bead Tassel Necklace

(Psst. if you want to save time and buy your tassels, check out this link).

DIY Wood Bead Tassel Necklace

5. Attach your clasp to one crimp, and your jump ring to another crimp, and attach them to your cord. I wanted my necklace to be long, but be warned- I made mine WAY too long. With the clasps on, it came down to about my belly button! Haha. So, I added a few clasps along the way so I could adjust the length if I wanted to.

DIY Wood Bead Tassel Necklace

6. Thread your beads and tassels. I decided to use a coordinating bead and tassel combo, but you can also mix it up.

Add a little color to your wardrobe with this DIY Wood Bead Tassel Necklace. It features painted beads, DIY tassels, and a customizable palette. Make one for your closet today! #diyjewelry #rainbow #stpatricksday

7. Wear and enjoy! I've gotten so many compliments on this necklace the few times I've worn it so far. I truly love it! If you want to add a fun pop of color to your outfit, this necklace is essential.

DIY Wood Bead Tassel Necklace

Oh, did you know I have not one, but THREE cats? This is Roger and he's probably the friendliest cat on the planet. I found him in my backyard in Astoria and decided to keep him. He's the coolest, funniest dude.

Add a little color to your wardrobe with this DIY Wood Bead Tassel Necklace. It features painted beads, DIY tassels, and a customizable palette. Make one for your closet today! #diyjewelry #rainbow #stpatricksday

I love love loveeeeee this necklace. The pastel rainbow colors are just magical! Would you wear a necklace like this? What do you think of it? Let me know in the comments below!