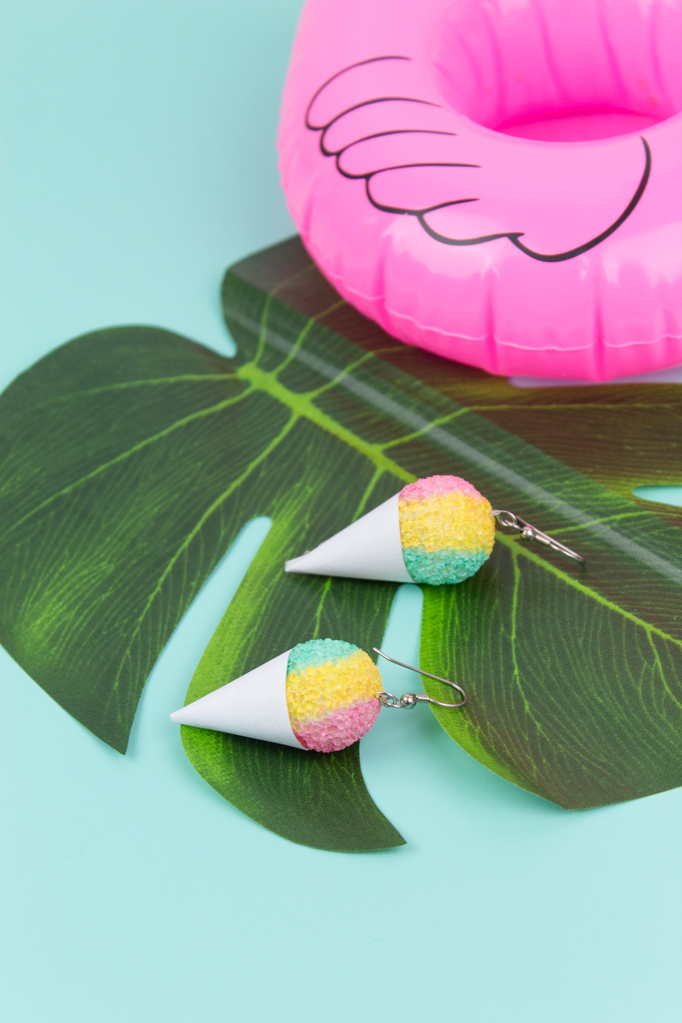
DIY Neon Popsicle Earrings

This is a sponsored post written by me on behalf of Cricut. All opinions are 100% mine.

As you probably know, I’ve been having a LOT of fun making faux leather earrings lately! I’ve been using my new Cricut Maker and holy cow, it’s a game changer! My Explore Air was cool and all, but the Maker can keep up with anything I throw at it. Cutting felt? Yep! Fabric! Thin balsa wood! Chipboard! It feels like the possibilities are endless. 

To share my newfound love, I decided to show you guys a fun DIY project using faux leather, and also answer your questions about cutting faux leather with the Cricut Maker! If you’ve never cut faux leather before, head down to the FAQ before beginning this project! It’s full of helpful tips so that you can get started on the right foot. I love faux leather earrings because they weigh practically nothing- perfect for making an impact without saggy ear lobes!

*This post contains affiliate links.

Cricut-Leather-Earrings-13.jpg
Cricut Collage.jpg

  1. Gather your supplies, then open up the project in Cricut Design Space.

  2. Press the “Make It” button and see what size you’ll need for your materials. I like to cut the pieces before running it through the machine to save some time. I use my cutting mat, ruler, and True Control Knife. This thing is amazing- it cut through 3 layers of vinyl at the same time!

  3. First up, cut your faux leather using the Strong Grip Mat. Be sure to place your leather face-down (aka, leather down and fabric backing up). Smooth it down with your brayer to ensure it’s pressed down securely. 

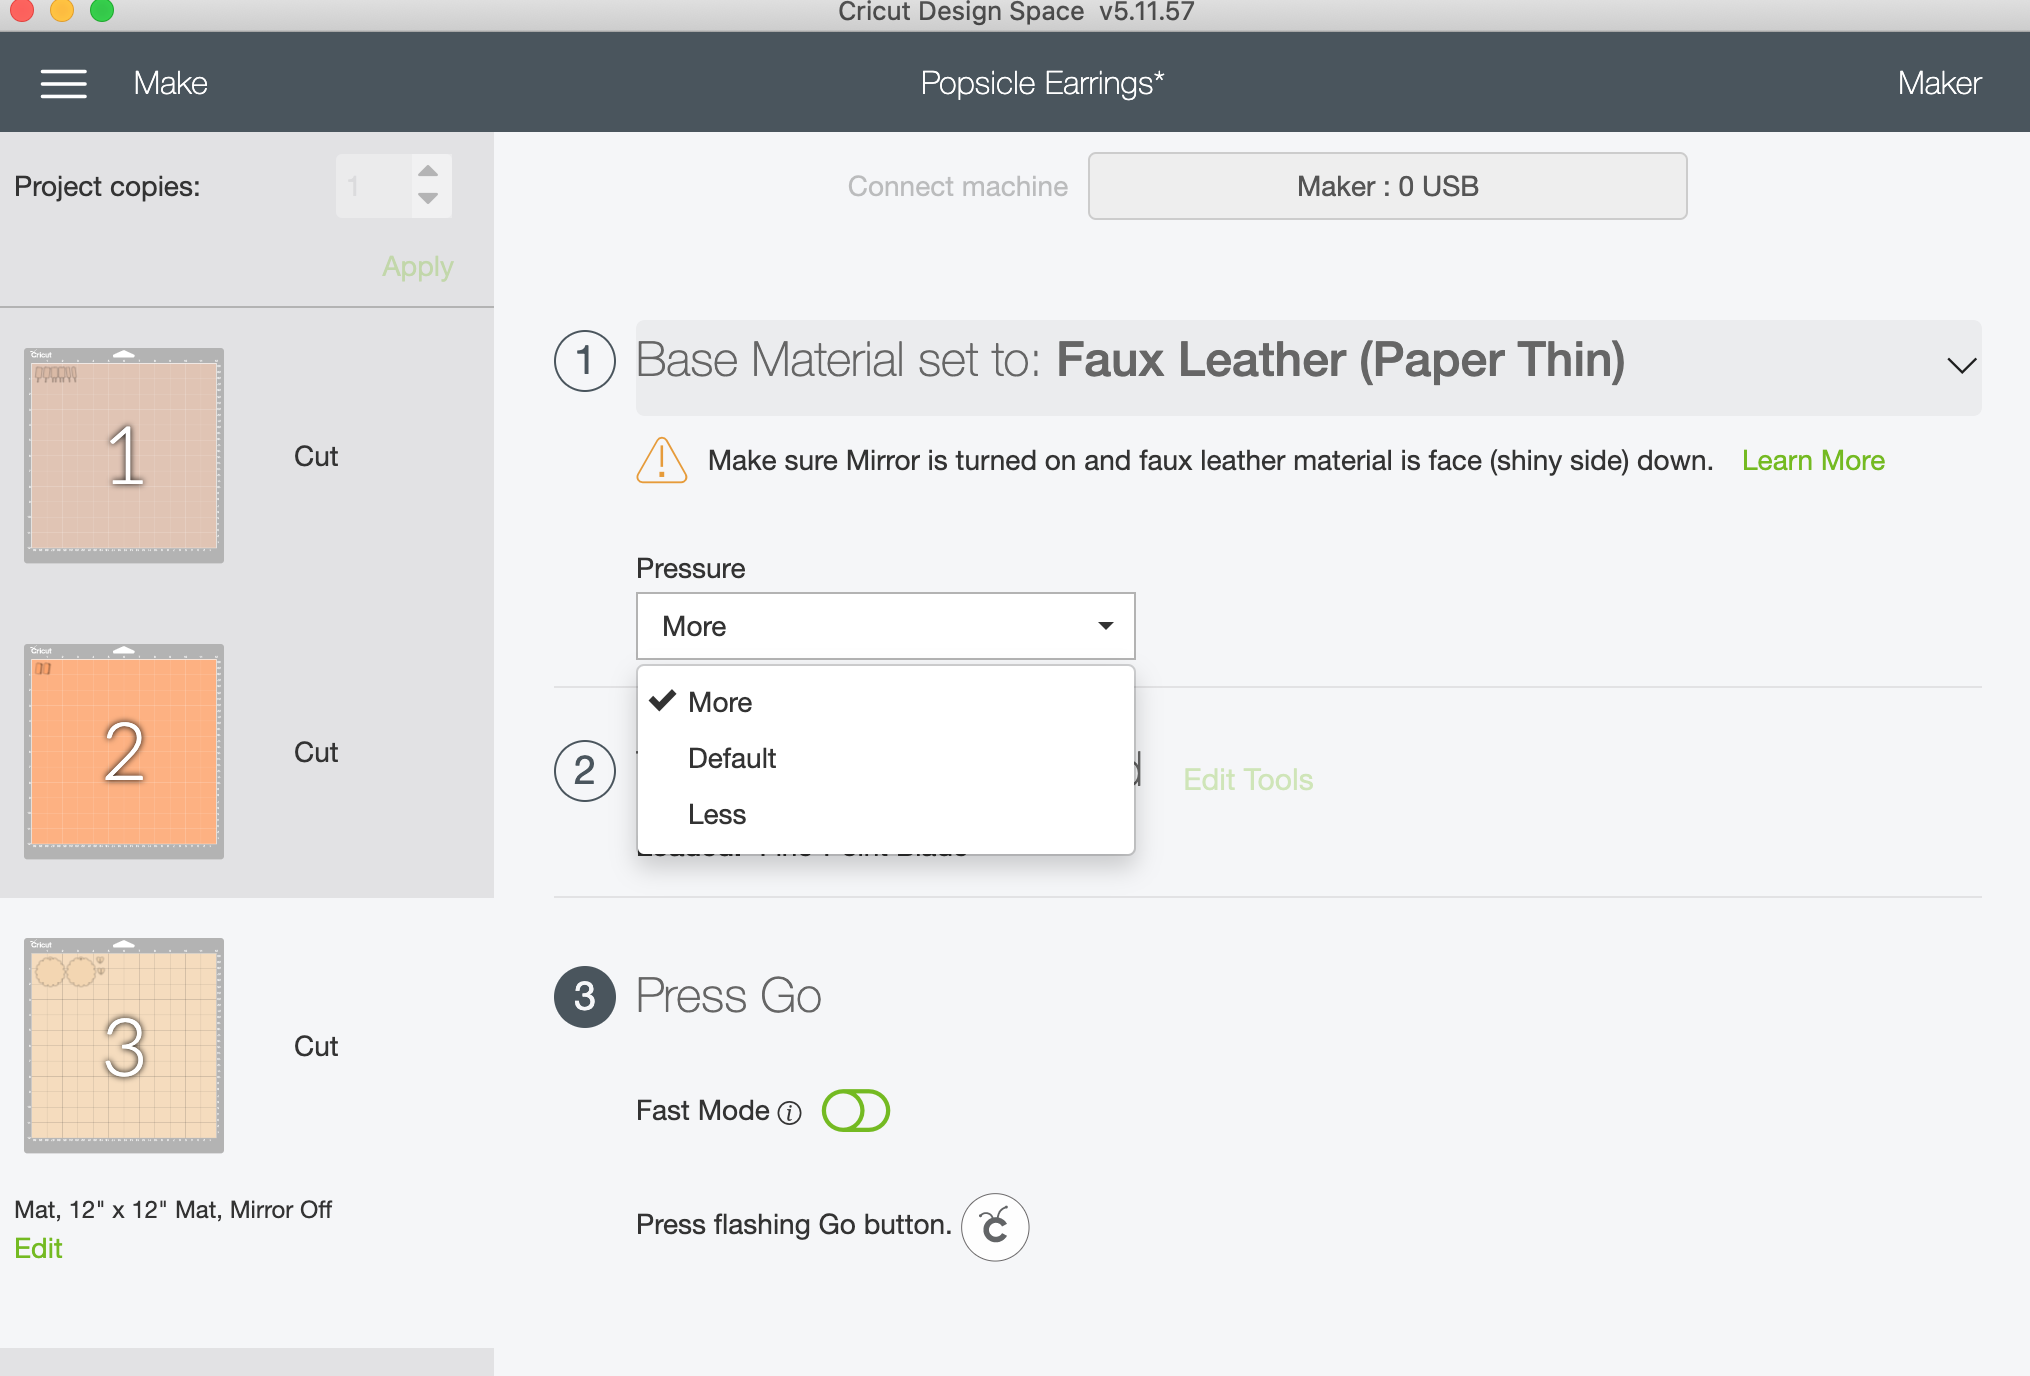
  4. Load your mat into your Cricut Maker. Select the material (faux leather- paper thin) and set the pressure to “MORE”. Once it’s cut, don’t peel it off yet! Test that it comes out easily and smoothly. If not- run it through again.

  5. Cut your vinyl using the standard grip mat. I put all my little pieces of vinyl on the same mat, and just ran it through in order. Weed your vinyl to get it ready for ironing.

  6. Place your faux leather earrings on the EasyPress Mat. Follow the directions for the Easy Press Mini which in this case is 30 seconds on the lowest setting. I used a teflon sheet to protect my faux leather while using the iron. As per the instructions, peel off the protective layer while it’s still warm. I did the brown popsicle pieces first, then the neons after. Use heat-resistant tape to keep things in place so they don’t slide!

  7. Add a jump ring and then an earring hook to your faux leather. Wear them with pride!

Cricut-Leather-Earrings-12.jpg

Now, let’s get into some FAQ about cutting faux leather:

Why is the Maker better than the Explore for faux leather cutting?

This is a great question! Before I got my Maker, I did use my Explore to cut faux leather. And it worked, for the most part. But, the Explore has to go over the leather twice to cut it. This can lead to the faux leather getting tangled up, especially if certain pieces cut well and then it slides over again and dislodges it. It’s also more time consuming! We know that us crafters have limited time as it is, haha.

How do I keep my leather from moving and sliding while cutting?

There are a few tricks to keep that pesky faux leather in place! First, use a Brayer to smooth the leather down and ensure a good adherence. Then, if you really want to keep it in place, add a bit of tape. I use painter’s tape and that works perfectly.

What blade do I need to cut faux leather?

You can make perfect, precise cuts using the fine-point blade.

How do I cut faux leather?

It’s really easy! Just place your leather face down on the mat- I use the purple heavy grip mat. You want to have the fabric backing facing up and the leather on the sticky side of the mat. Don’t worry- it won’t get ruined! Then, I like to use “more” pressure setting. Do your cuts, and then check that the cuts went all the way through. If they didn’t, run it through again and it’ll go over the same cuts, allowing your shapes to break free!

Screen Shot 2020-08-08 at 2.34.19 PM.png

Can I add vinyl to my faux leather?

Yep! Cricut Iron-Ons work perfectly for this. You just want to take some precautions. Remember, faux leather is artificial- aka plastic and melts easily. So, you want to protect it as much as possible before adding your vinyl. Use a teflon sheet to avoid directly touching the leather with your heat source. Second, be efficient. I love to use my Easypress Mini because I know the exact settings. This means I can go quick and avoid unnecessary heat on my faux-leather. It’s also the PERFECT size for earrings! Cricut recommends using their EasyPress Mat which is the perfect size for laying out a few earrings and getting all that iron-on vinyl secured!

Screen Shot 2020-08-08 at 3.18.54 PM.png

My faux leather just won’t cut- now what?

This is what’s great about the Cricut- it has a drawing feature! Switch your designs to DRAW, then load the fabric pen. This amazing pen has disappearing ink, so after you’re done trimming, use some water and the marks are gone! Allow the Cricut to do it’s thing, and you’ll have a precise template that you can now hand-cut.

Oh and PS- this GORGEOUS set of Cricut Pens is the Fine Point Pen Set- Sorbet. What dreams are made of!

Cricut-Leather-Earrings-5.jpg

I hope this post inspired you to make some faux-leather earrings too! I am LOVING my new Cricut Maker, so if you have any questions or if you’re on the fence about getting one, let me know! I can help you decide if it’s the right move for you :) I think one of the best things about the Cricut Maker is that you can create projects that you can sell, which helps you earn your money back that you spent on it! It’s really an investment piece, and a total necessity for any crafter out there!

In case that wasn’t enough, here are 5 things I love about my Cricut:

  1. I can cut faux leather with ease to make gorgeous earrings.

  2. The Cricut design space has thousands of amazing graphics, images and fonts that I can use to customize my projects. It’s SO easy to do, and I love that I can design then cut, all in one place!

  3. I can cut a variety of materials, including paper, vinyl, leather, felt even balsa wood!

  4. The Cricut is perfect for tiny details. I can draw or cut something and it’s precisely like it looked on my screen.

  5. It’s really easy to go from an idea to a finished project. Everything comes out perfectly!

Toddler Matching Game- Shapes & Numbers

Now that we’re quarantined and can’t leave the house, we’ve been looking for activities to keep Hailey busy. She’s been getting a LOT of screen time, so I wanted to make something for her that was fun, easy and educational. Also, bonus points for something that didn’t contain 3,000 pieces for her to throw on the floor and for me to pick up! That’s when I came up with the idea for this felt educational mat- a toddler matching game, if you will. I knew we could teach Hailey her numbers and shapes, but she could also play with it on her own while we cooked or just relaxed. It was perfect timing when Cricut sent me their new Cricut Joy machine, which I’ve been eyeing since they released it! Whether you’ve got a small hobby room or even just a craft cart in the corner, this machine is perfect for you! And, there are SO many projects that you can make with it. If you’ve been on the fence about getting the Cricut Joy, here is the universe telling you- it’s time. Get it now, and see how many amazing things you can make! You won’t regret it.

*This post contains affiliate links.

Cricut-Shape-Mat-15.jpg

You will need:

Free Template (here)
Cricut Joy (here or get the bundle here)
Cricut EasyPress 2 (here)
Cricut Smart Iron-On Vinyl (here, I used white)
Cricut Joy StandardGrip Mat (here)
Cricut Starter Tool Set (here)
Cricut EasyPress Mat 12 x 12 (here)
Felt pieces for the shapes (similar here)
Thick Felt (Stiff or Double Thick)
Felt glue (here)
Velcro (here)
Glitter paper (similar here)
Ruler or T-Square (similar here)
Tailor’s chalk (similar here)

Directions:

This project has a lot of small steps, but is simple to make. So, I split each part up into smaller pieces so that it’s less overwhelming of a blog post.

Prep Collage.jpg

Prepping To Make Your Toddler Matching Game:

  1. Open the template on Cricut Design Space. The template is free to use and can be found here.

  2. Cut your paper template using cardstock. I took one page and cut it in half, and ran each one through the Cricut Joy on the StandardGrip Mat. This paper template is for the felt matching shapes.

  3. Load your vinyl into the Cricut Joy. I used Cricut Smart Iron-On Vinyl (here, I used white), which means I didn’t need a cutting mat.

  4. A couple of notes when cutting vinyl: When using an Iron On, always go shiny side down. And, remember that you want to cut the numbers backwards so that they are mirrored. I’ve already done this on the template, so you don’t need to worry about it!

  5. Weed your vinyl using your weeding tool, then carefully cut out the shapes individually. You’ll want to leave the protective (shiny) layer on so that you can iron it.

Cricut-Shape-Mat-6.jpg

To Make The Toddler Matching Game Mat:

  1. Arrange the vinyl shapes on your felt. Try to keep them centered on the mat and lined up.

  2. Once you’ve arranged your shapes, use a ruler to make sure they’re straight. I did this by placing a T-square under the first shape and then lining up the rest of them along the ruler’s edge.

  3. Set up your Cricut EasyPress 2 to the appropriate settings. You can use their handy Heat Guide but for this project, you’ll use 280 degrees for 30 seconds with light pressure.

  4. Put your felt on the Cricut EasyPress Mat, and use your Cricut EasyPress 2 to iron on the vinyl.

  5. Once your vinyl has cooled, carefully peel off the protective (shiny) layer.

Shapes_Collage2.jpg

To Make The Shapes For Your Toddler Matching Game:

  1. Pick out your felt colors. I used 4 colors and figured out which shape should get which color by using pom poms. This ensured that each color wasn’t too close together. 

  2. Take your cardstock shape templates that you had cut out and arrange them on the corresponding felt colors. Make sure that you have plenty of space around each shape so that you can cut it out afterwards.

  3. Slip your vinyl numbers under the template and ensure (once again!) that you have enough room for each shape.

  4. Use your Cricut EasyPress 2 again to iron your numbers. Note: You can also use the EasyPress Mini for this! Especially if you’re using scrap pieces of felt, where the larger EasyPress would just be too big. Let cool and carefully peel. You’ll now be left with a sheet of felt with a few numbers on it.

  5. Place your shape templates back on the vinyl to ensure that your number is centered in the shape. Trace around your shapes with chalk. Then, cut them out.

Envelope_Collage2.jpg

To Make The Envelope For Your Toddler Matching Game:

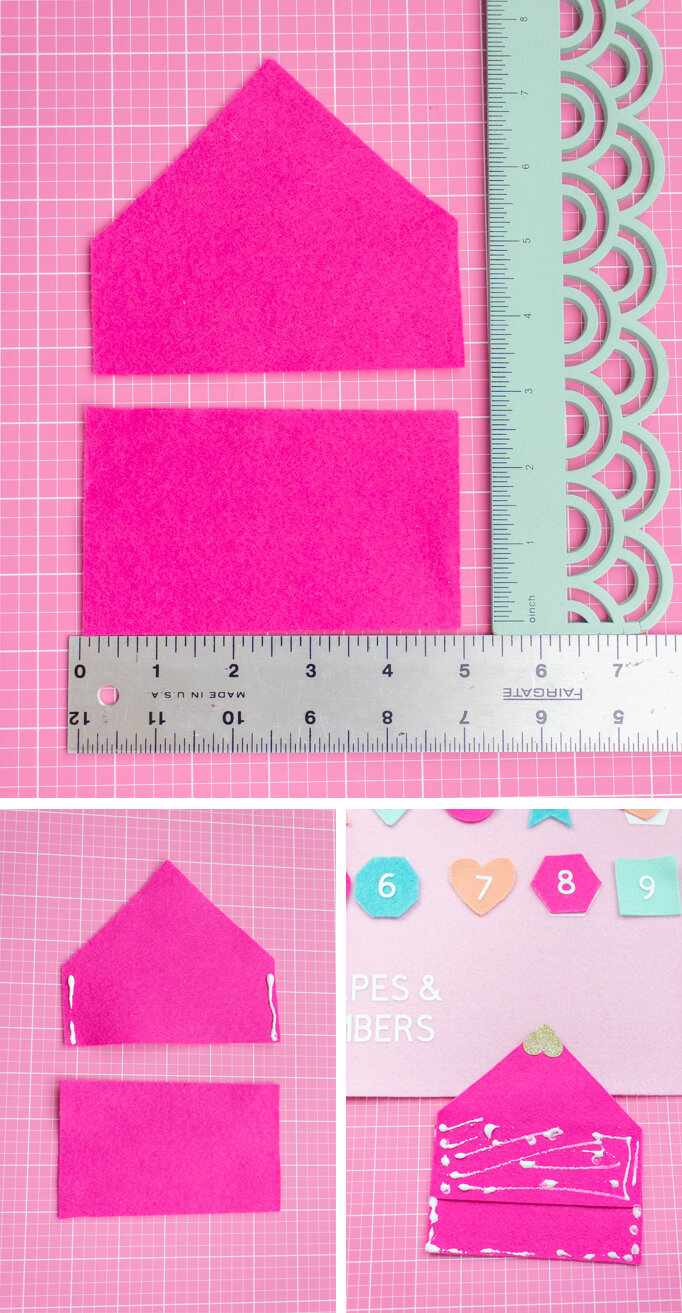
  1. Cut out your envelope pieces from felt. I used a rectangle that was 5 x 2.5 (aka, smaller rectangle) and then a second piece that was approx 5 x 7.5 (aka, the house side).

  2. Take your larger 5 x 7.5 felt rectangle. Fold the two top corners into the center to meet at a point and then cut at the folds. This will create your point at the top while still keeping it nicely centered. Hence, the nickname “the house side”!

  3. Take your “house side” of felt and put felt glue along the two side edges. Then, place your 5 x 2.5 smaller rectangle on top. See the pics for reference on how to make the envelope since it’s a bit funky!
  4. Turn your envelope over and put glue on your envelope as shown in the picture. Then, press it down on your felt mat and wait for it to dry.

  5. For the heart, I used my heart punch but you could just as easily cut one using the Cricut Joy with the Light Grip Mat.

  6. Glue your heart onto the tip of your envelope point. Then, add a piece of velcro to seal it.

Cricut-Shape-Mat-16.jpg

I’m happy to say that Hailey LOVED playing with this matching game! She hasn’t quite gotten the hang of matching the shapes and numbers, but she loves to play with the felt shapes and put them on top of the vinyl on the mat. She’s gone back to it every day, and has even put down her iPad to fiddle with this! It makes a momma so happy. 

Cricut-Shape-Mat-18.jpg
Cricut-Shape-Mat-19.jpg
Cricut-Shape-Mat-20.jpg

Although this project has a few steps, it’s really fun to make and quite simple. It keeps Hailey busy and it’s pretty to look at! And, it all tucks away nicely into the envelope to make clean-up a breeze. I leave this out on the coffee table to she can have easy access when she gets bored. I can’t wait to make more projects like this using my Cricut Joy!

Starting today through 4/25, Cricut is launching their Spring Cleaning Flash Sale, featuring 40% off select materials and accessories, and Explore Air 2 Machines at their lowest price ever of $179.99! In addition, snag a Maker Machine for $329 or a BrightPad for $49!

Explore Air 2 Machines at Their Lowest Price Ever - As Low as $179.99! Valid through 4/25 

Maker Machines Starting at $329! Valid through 4/25  

Save 40% off Select Materials! Valid through 4/25 

Save up to 75% off Materials & Accessories Clearance! Valid through 4/25


Cricut.com is offering Free Economy Shipping on orders $99+ with code SHIPAPR or APRSHIP, and Cricut Access Members receive free shipping on orders through 4/30. Head over to their website and load up your cart girlfriend- let’s get crafting!

DIY Metallic Painted T-Shirt

For my first project on My Magic Mess, I painted a t-shirt. I wasn't 100% happy with the project but it's easy to do and still pretty cute. So, I figured why not do a blog post about it?! This is a project that anyone can do, which I think is the best part. It's the perfect way to give an old t-shirt a new look! I think we all have a few old ones lying around that could use an update.

Metallic Tshirt-3.jpg

You will need:

T-Shirt (similar here)
Paintbrush (similar here)
Metallic Paint (here)
Cardboard
Iron or Dryer

Directions:

1. Put a piece of cardboard inside your shirt to protect it.

2. Paint the collar of your shirt using 2 coats of paint. I started in the back then moved to the front.

3. Let dry for 24 hours, then heat set it using an iron or the dryer.

Metallic Tshirt-6.jpg

This project is so easy to do that literally anyone can do it! If you find that you can't keep the edge straight, then keep going. Otherwise, you can make the line "messy" intentionally and it'll still be cute. What do you think about this easy project? Will you be making one?! Let me know in the comments below!

Rhinestone Ribbon Headband

As a mom, it seems like I’m constantly rocking that mom bun. Whether it’s because my hair is dirty, or because I throw it up in a bun to focus, it always somehow ends up on top of my head. For this week’s My Magic Mess Challenge I decided to make something easy and fun to cover up all those baby hairs I now have. You know, the joys of postpartum hair loss, hah! In addition to being very easy to make, these headbands are super affordable. Pop on a movie while you make it (I watched The First Wives Club on Netflix for the first time!) or grab a few girlfriends and get to crafting together. Either way, you’ll easily have a favorite new hair accessory!

Rhinestone-Headband-6.jpg

You will need:


Beacon Gem-Tac (here)
Rhinestones (similar here and here)
Ribbon (similar here)
Scissors (similar here)

Rhinestone-Headband-1.jpg

Directions:

1. Measure out enough ribbon to make a headband and tie a bow. I used 42 inches.

2. Create a fun pattern with your rhinestones. I added a main design in the middle, with a matching design on the sides for extra sparkle.

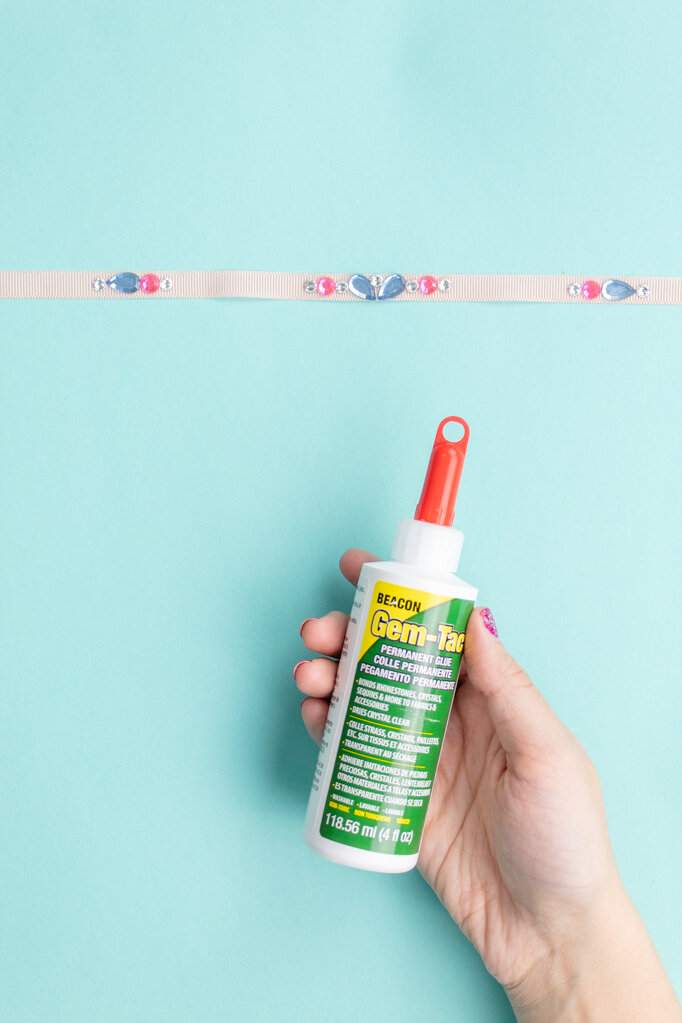
3. Glue the rhinestones on with Beacon Gem-Tac. If too much comes out, you can use a toothpick to add a small dot of glue onto your rhinestone.

Rhinestone-Headband-2.jpg

To tie the headband, I recommend placing it on your head, tying it once, and placing a bobby pin at the back to hold it in place. Then you can tie a bow and remove the bobby pin!

Now you can add some extra sparkle to every outfit.

DIY Geode Trinket Box

For Christmas, I had to make my own gifts and I was pretty bummed about it at first. For starters, I was sad because it meant I was broke and no one likes to be without money! But I also felt like there was no way I could get anyone anything for Christmas and that’s a shitty feeling. So, I decided to do what I do best- get creative! I made a list of everyone that needed gifts, along with ideas of what I could make them based off what I had on hand. I loved this trinket box that I made for my sister so much that I ended up making a second one for my sister-in-law too! I use these containers to hold my hair ties, but you can use them for anything. I created this using containers I already had (look familiar?) and purchased some geodes from Michael’s on sale. I ended up making them for about $2.50 each! However, they look like they cost WAY more than that. I really want to make one for myself now too!

geode-trinket-box-3.jpg

You will need:

Acrylic paint (similar here and here)
Geode pendant (similar here or here)
Ceramic container (similar here)
527 multi use glue (similar here)

Directions:

  1. Paint your canister with your choice of colors. I used Martha steward metallic yellow gold and satin moonstone purple for one, and Martha Stewart metallic copper and craft smart light pink for the other. I did two coats. 

  2. Take any hanging tools off the geode and glue it onto your lid. I just used a small dab- a little goes a long way! You don’t want a bunch seeping out. 

AND THAT’S ALL SHE WROTE. This project is so fun and best of all, EASY to make! I personally didn’t paint the bottom because I find that the paint sticks to stuff and I didn’t want to ruin anyone’s furniture. If you’d like, you can add a piece of felt to cover up the unfinished bottom and prevent scratches on your dresser, but it’s totally not necessary. I didn’t and I think it still looked great!

geode-trinket-box-1.jpg
geode-trinket-box-4.jpg
geode-trinket-box-2.jpg

What would you keep in this little trinket box? Earrings, rings, loose buttons, bobby pins? Let me know in the comments below!