Toddler Valentine Basket Ideas (On A Budget!)

While I was browsing the Valentine section at Target, I got the bright idea to make a Valentine’s day basket for my daughter, Hailey. I know that a Valentine basket technically isn’t a thing, but I love holidays and will take any excuse to celebrate. I started to ponder what I would put in my basket, and I was pretty bummed that I thought of the idea as we were essentially leaving the store. So, I made a list and decided to go back and grab what I needed another time (you know… before the inevitable meltdown began). I knew that I wanted my basket to be Valentine-themed, but I didn’t want to waste money on cheap crap or novelty items that she would only use for a day. This momma is on a budget and every purchase counts. So, I filled up Hailey’s basket with a few items that were fun, but could be used year round. Pretty much everything came from either Dollar Tree or Target!

*This post contains affiliate links

Toddler Valentine Basket Ideas (On A Budget!)

Here’s what I put in my Toddler Valentine Basket:

Red and pink snacks- Since Hailey is only 16 months old, I didn’t want to fill her basket with chocolates or candy. So, I grabbed some of her fave snacks and some new ones for her to try. She loved it and wanted her pouches and yogurt bites right away!

One stuffed animal- She’s not big on stuffed toys, so I grabbed this monkey from the dollar tree. She’s having a monkey moment since she knows how to make the sounds!

Bubbles- Hailey LOVES bubbles, so this big pack from the dollar store was perfect for her basket!

Toddler paint and paint brushes- I love to paint, so I decided to get a wooden heart from the Dollar Tree and some paints to go along with it. I can’t wait to paint with her again- we haven’t done it since she was a tiny baby!

Hershey Kisses- I had to give her some kind of chocolate! It’s a Valentine’s Day tradition. And what’s sweeter than a kiss?

Crayola Bath Items- I found these paint soaps at the dollar tree and I thought they would be a fun addition. At first she was very confused and even got mad at us for putting the paint soap on her! After a few tries, she realized she loved them and kept asking for more paint.

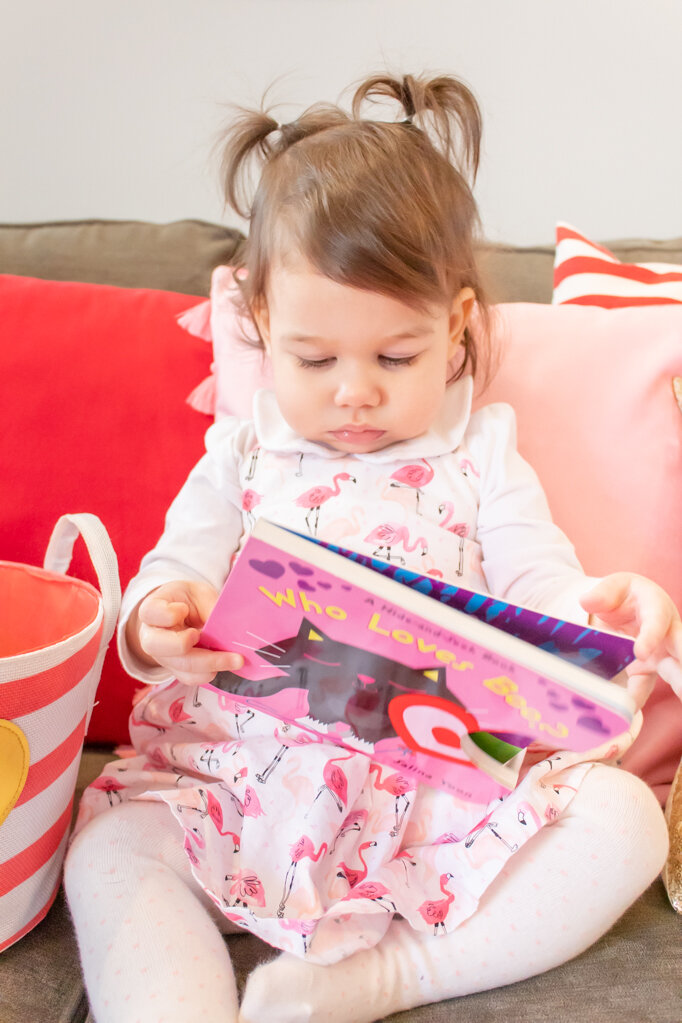
Valentine Book- Hailey loves the Halloween version of this book, so I decided to get her the Valentine version too! We’ve been reading it at night and she seems to like it.

Valentine Basket- This was actually something I had laying around the house if you can believe it! I was going to buy a basket but I figured I’d save the money. I have plenty at home I can use! Maybe next year (or for an older child) it would make sense to get a basket just for this- especially for a kid that likes to play with them.

Well, that’s all there is to it! There are so many items that you can add to a basket for your kids. You just need to be creative and think about what they like! Pick 2-3 colors for your basket that you’d like to stick to and it’ll be perfectly pretty. Or, just grab their favorite items and make it a “love” basket- you know, full of things they LOVE!

Toddler Valentine Basket Ideas (On A Budget!)

What would you put in your child’s basket? Let me know in the comments below!

DIY Geode Trinket Box

For Christmas, I had to make my own gifts and I was pretty bummed about it at first. For starters, I was sad because it meant I was broke and no one likes to be without money! But I also felt like there was no way I could get anyone anything for Christmas and that’s a shitty feeling. So, I decided to do what I do best- get creative! I made a list of everyone that needed gifts, along with ideas of what I could make them based off what I had on hand. I loved this trinket box that I made for my sister so much that I ended up making a second one for my sister-in-law too! I use these containers to hold my hair ties, but you can use them for anything. I created this using containers I already had (look familiar?) and purchased some geodes from Michael’s on sale. I ended up making them for about $2.50 each! However, they look like they cost WAY more than that. I really want to make one for myself now too!

geode-trinket-box-3.jpg

You will need:

Acrylic paint (similar here and here)
Geode pendant (similar here or here)
Ceramic container (similar here)
527 multi use glue (similar here)

Directions:

  1. Paint your canister with your choice of colors. I used Martha steward metallic yellow gold and satin moonstone purple for one, and Martha Stewart metallic copper and craft smart light pink for the other. I did two coats. 

  2. Take any hanging tools off the geode and glue it onto your lid. I just used a small dab- a little goes a long way! You don’t want a bunch seeping out. 

AND THAT’S ALL SHE WROTE. This project is so fun and best of all, EASY to make! I personally didn’t paint the bottom because I find that the paint sticks to stuff and I didn’t want to ruin anyone’s furniture. If you’d like, you can add a piece of felt to cover up the unfinished bottom and prevent scratches on your dresser, but it’s totally not necessary. I didn’t and I think it still looked great!

geode-trinket-box-1.jpg
geode-trinket-box-4.jpg
geode-trinket-box-2.jpg

What would you keep in this little trinket box? Earrings, rings, loose buttons, bobby pins? Let me know in the comments below!

Abstract Painted Gift Tags

Back when I was a kid, I thought it was so cool to have a summer birthday. You didn’t have to go to school, the weather was hot, and something like a pool party or going to an amusement park was an option. So, while my mom did make strawberry cupcakes for all my classmates on my birthday, just being at school kinda sucked. Now that we’re all adults, it doesn't really matter as much. We all probably have to work on our birthdays anyway (cue the crying) so it's now an even playing field. For that next birthday king or queen, how about a handmade gift tag for their present? It’s incredibly fun and easy to make- anyone can do it!

*This post contains affiliate links.

For that next birthday king or queen, how about a handmade gift tag for their present? It’s incredibly fun and easy to make- anyone can do it! If you’re a fan of abstract painting, you’ll love this easy DIY project. Click for the full instructions a…

You will need:

Colored cardstock (similar here)
Paper punch (similar here)
Embroidery floss (similar here)
Acrylic paint (similar here)
Glue gun (similar here)
Scissors (similar here)

Directions:

For that next birthday king or queen, how about a handmade gift tag for their present? It’s incredibly fun and easy to make- anyone can do it! If you’re a fan of abstract painting, you’ll love this easy DIY project. Click for the full instructions a…

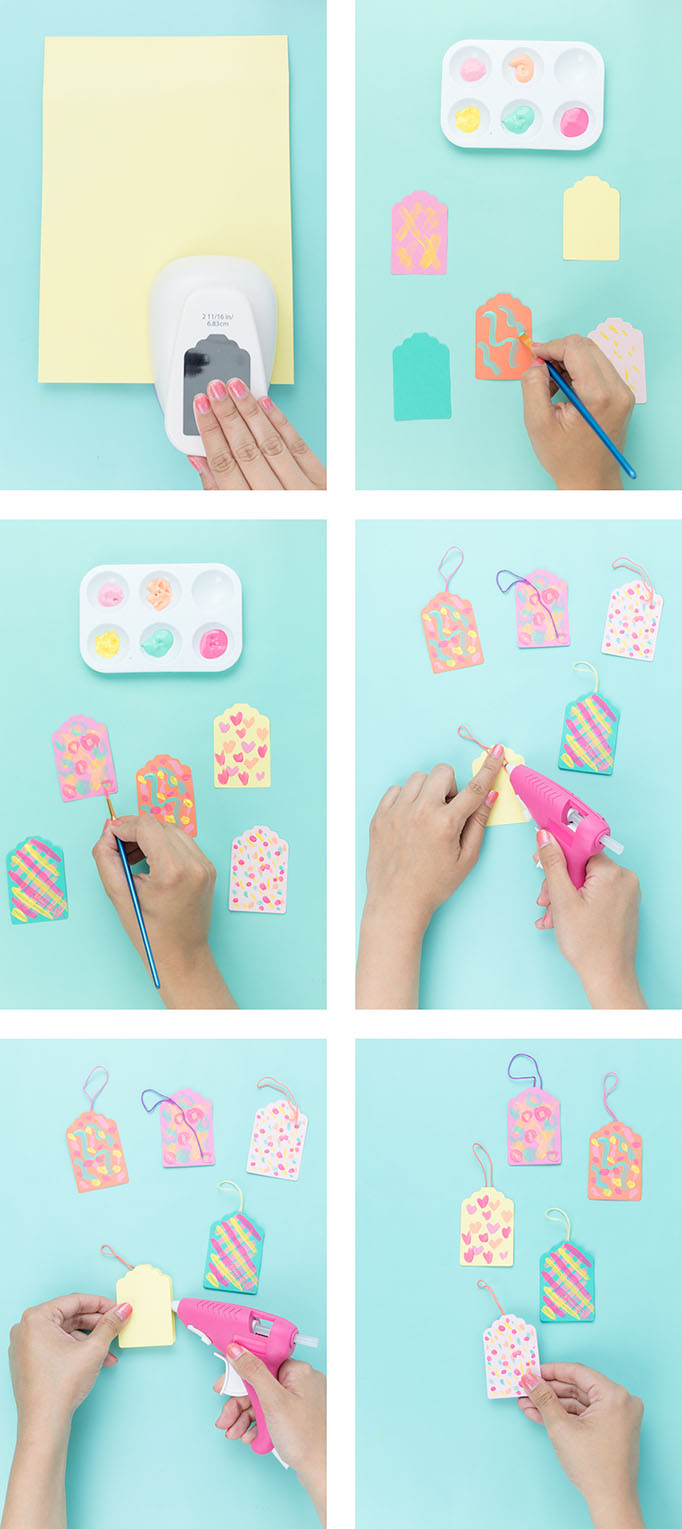
1. Cut out your tags from the card stock in your choice of colors. You'll need 2 pieces of cardstock for each tag you're making. I used the same color for both sides.

2. Paint abstract designs using your choice of paint colors on one of the cardstock tags. For the designs, I kept it simple with xoxo, lines, dots, etc. You can be as simple or as complex as you want.

3. While the paint dries, cut a piece of embroidery floss for the tag.

4. Glue the embroidery floss on the back of the tag, then glue on the blank tag to create a seamless background.

For that next birthday king or queen, how about a handmade gift tag for their present? It’s incredibly fun and easy to make- anyone can do it! If you’re a fan of abstract painting, you’ll love this easy DIY project. Click for the full instructions a…

That's it- you're done! Now add a to: and from: so your recipient knows who to thank for their awesome new present. Hang it on their gift, and get ready to see their face light up. Everyone likes a present!

I always love adding a homemade touch to my gifts because it really makes them more personal, especially in a world where everyone just gets each other gift cards! So, what do you think about these DIY gift tags? SO simple, right?!

DIY Snow Cone Earrings

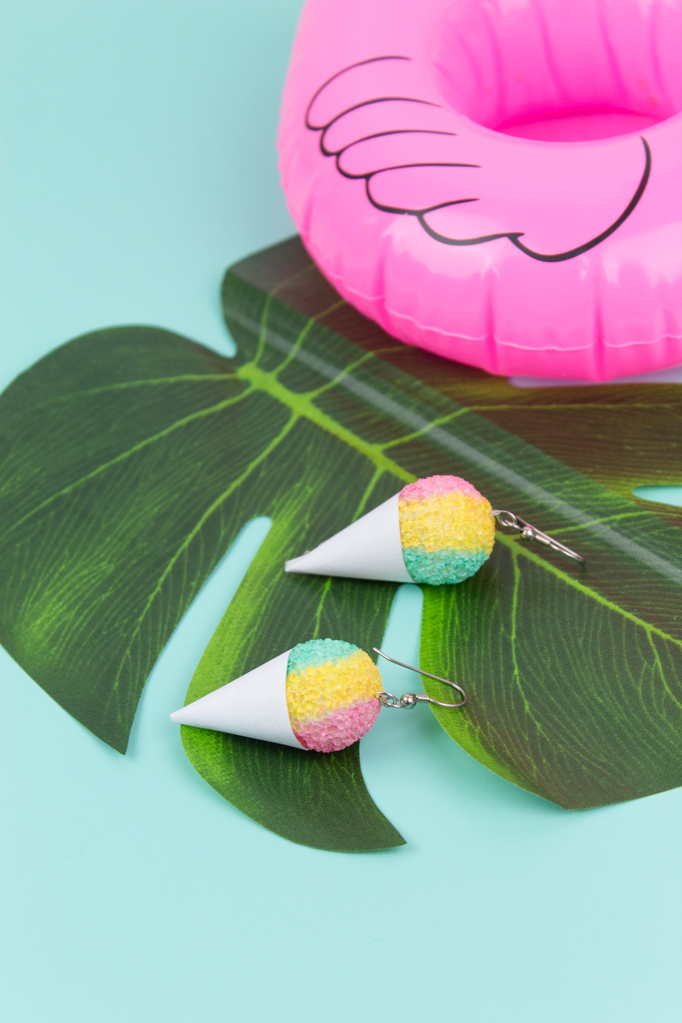
Now that I’ve officially switched over to my summer wardrobe, I’m looking for some fun accessories that can spice up my outfits. I find that a lot of times I wear the same outfit over and over, but I love to switch out my accessories in between. Since we all know I love to DIY anything I can get my hands on, I decided to make these snow cone earrings out of just printer paper and styrofoam balls! They’re great because they can be made in any color of your choosing. They can even be made for Fourth of July in red, white, and blue. They’re so fun and are sure to get the attention of everyone around you. The full DIY is over on the Giggles Galore blog so head on over there now to see it! 

Now that I’ve officially switched over to my summer wardrobe, I’m looking for some fun accessories that can spice up my outfits. I find that a lot of times I wear the same outfit over and over, but I love to switch out my accessories in between. The…

Let me give you a quick overview of the steps, because it’s extremely simple. All you’re doing is painting the Styrofoam balls, tracing the snow cone wrapper template, adding the earring pieces and gluing it all together. Easy peasy, lemon squeezy.

Now that I’ve officially switched over to my summer wardrobe, I’m looking for some fun accessories that can spice up my outfits. I find that a lot of times I wear the same outfit over and over, but I love to switch out my accessories in between. The…

This project would be so fun to make with older kids or teens, or even by gathering up your girlfriends. Grab some rosé and get to crafting! These are now some my favorite earrings that I own and I can’t wait to wear them all summer long. They’re sure to cool off a hot summer day!

DIY Monogram Stockings

So, it's happened. Christmas is over! If you're like me, you're sadly putting away your decorations until next year, while simultaneously scouring the stores for new discount Christmas decor and supplies. Plain stockings are abundant, but what can you really do with those? Well, how about adding a monogram for every member of your family!? Aside from being stinking adorable, these stockings make great place settings at the dinner table. Just tuck a few utensils in them, or use them for a crafting party. The options are endless!

Plain stockings are abundant, but what can you really do with those? Well, how about adding a monogram for every member of your family!? Click for the full tutorial.

You will need:

Plain stockings are abundant, but what can you really do with those? Well, how about adding a monogram for every member of your family!? Click for the full tutorial.

White Stockings
Acrylic paint (here)
Foam Brush (here)
Stencils (here)
Tassels (here)
Pom poms (here)
Needle & thread
Painter's tape or washi tape
Scissors

Directions:

Plain stockings are abundant, but what can you really do with those? Well, how about adding a monogram for every member of your family!? Click for the full tutorial.

1. Decide which style of letter you want to use, and collect the letters you need for your stockings.

2. Place your stencil on the stocking and tape it in place.

3. Using a foam brush, paint on the letter. My stencil didn't lay 100% flat, so I had to press it down while I painted so paint didn't seep through. Once you've made sure there are no missing spots, carefully peel off the stencil.

4. While your letters dry, start making your pom pom tassel charms. Take a needle and thread, and string it through your pom poms. Then, add a tassel charm, and sew back up through the pom poms.

Plain stockings are abundant, but what can you really do with those? Well, how about adding a monogram for every member of your family!? Click for the full tutorial.

Voila! That's all you need for these adorable monogrammed stockings. Mine are mini sized, but you can definitely get a set of larger ones to hang by the fireplace!