How to Throw a Colorful Halloween Party

Halloween is coming, and I'm just so excited! I still remember the very first Halloween party I had way back in high school. While most other teens liked alcoholic binge fests or home destruction, my party was a classy affair. I had found a magazine with all these fun recipes and Halloween themed treats at the supermarket, and I wanted to make everything! I decided then and there that I needed to have a party. This time, I decided to give the traditional Halloween party a facelift with a fresh color palette. It's fun, glam and has just the right amount of spooky. 

To throw a lavish affair on a budget, head on over to Oriental Trading. They've got everything you need to host a haunting affair without breaking the bank! P.S. This is not a sponsored post. I just happen to loooove using Oriental Trading! ;) Be sure to check out my shopping list at the bottom of this post for all the items pictured.

halloween party full table2.jpg

Let's start at the top! For my color scheme, I went with traditional orange and black, mixed in with teal and pink for a fresh and girly twist. I also accented with white and gold to keep it light and add a bit of glam. 

Halloween is coming, and I'm just so excited! I decided to give the traditional Halloween party a face-lift with a fresh color palette. It's fun, glam and has just the right amount of spooky. Click to find out all the details!

Now onto the table setup! I put some candy in my DIY dollar store candy dishes. I only bought two kinds, but Oriental Trading has TONS of different kinds of candy! I think my favorites are these heart candies, which are tasty and so addictive. 

Halloween is coming, and I'm just so excited! I decided to give the traditional Halloween party a face-lift with a fresh color palette. It's fun, glam and has just the right amount of spooky. Click to find out all the details!

Be sure to add some faux piñatas to your table as favors to your guests. They're fun and easy to make while watching tv! I recommend binge watching Friends as you make them.

Halloween is coming, and I'm just so excited! I decided to give the traditional Halloween party a face-lift with a fresh color palette. It's fun, glam and has just the right amount of spooky. Click to find out all the details!

In the center, I included a teal pumpkin. It's cute, colorful and supports a great cause!

Halloween is coming, and I'm just so excited! I decided to give the traditional Halloween party a face-lift with a fresh color palette. It's fun, glam and has just the right amount of spooky. Click to find out all the details!

So much fun!

Halloween is coming, and I'm just so excited! I decided to give the traditional Halloween party a face-lift with a fresh color palette. It's fun, glam and has just the right amount of spooky. Click to find out all the details!

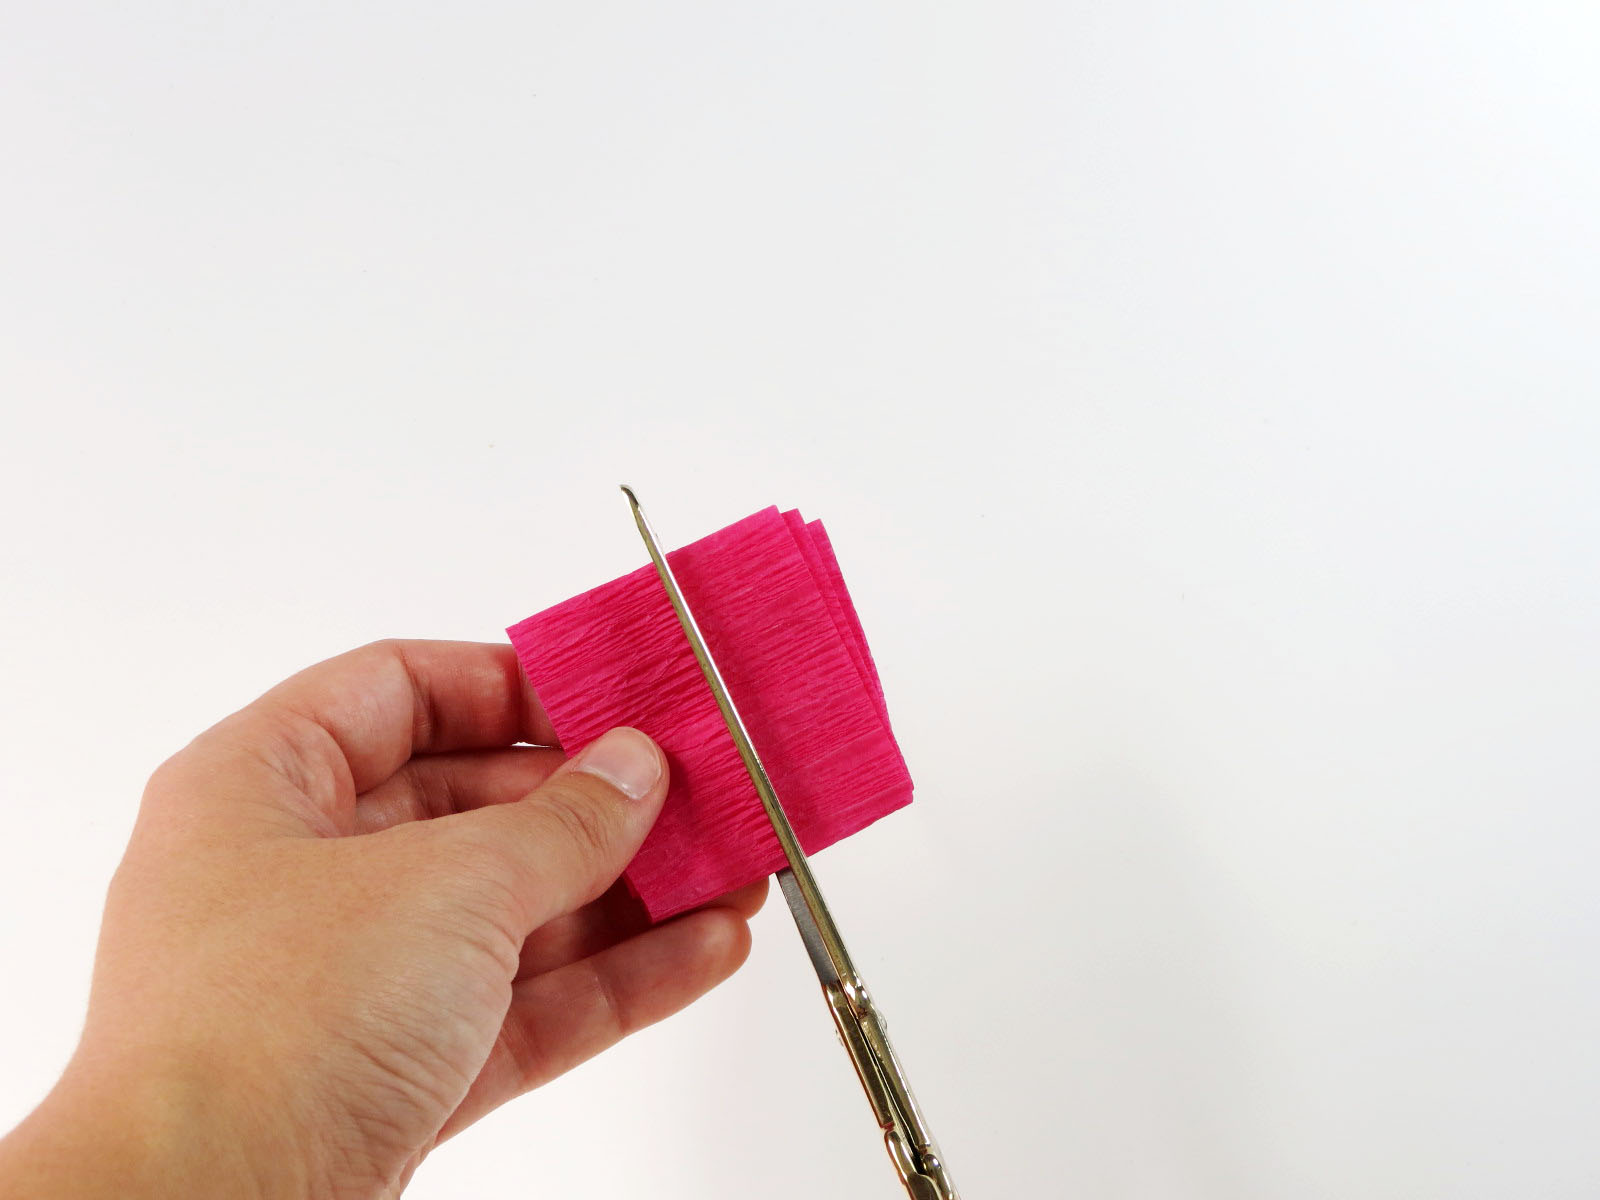
I made this table runner using leftover crepe paper from my faux piñatas and some scotch tape. It was virtually free and can be tossed in the trash when the party is over! 

Halloween is coming, and I'm just so excited! I decided to give the traditional Halloween party a face-lift with a fresh color palette. It's fun, glam and has just the right amount of spooky. Click to find out all the details!

I love this cute and quirky Trick or Treat banner. It comes in two parts, so you can hang it up however works best for you!

Halloween is coming, and I'm just so excited! I decided to give the traditional Halloween party a face-lift with a fresh color palette. It's fun, glam and has just the right amount of spooky. Click to find out all the details!

For the table, I stacked the plates so that each place setting can get all the colors at once. It adds a festive and spooky touch. Ditto for the forks and straws! Finally, each person gets an orange candy stick to go with it.

Halloween is coming, and I'm just so excited! I decided to give the traditional Halloween party a face-lift with a fresh color palette. It's fun, glam and has just the right amount of spooky. Click to find out all the details!

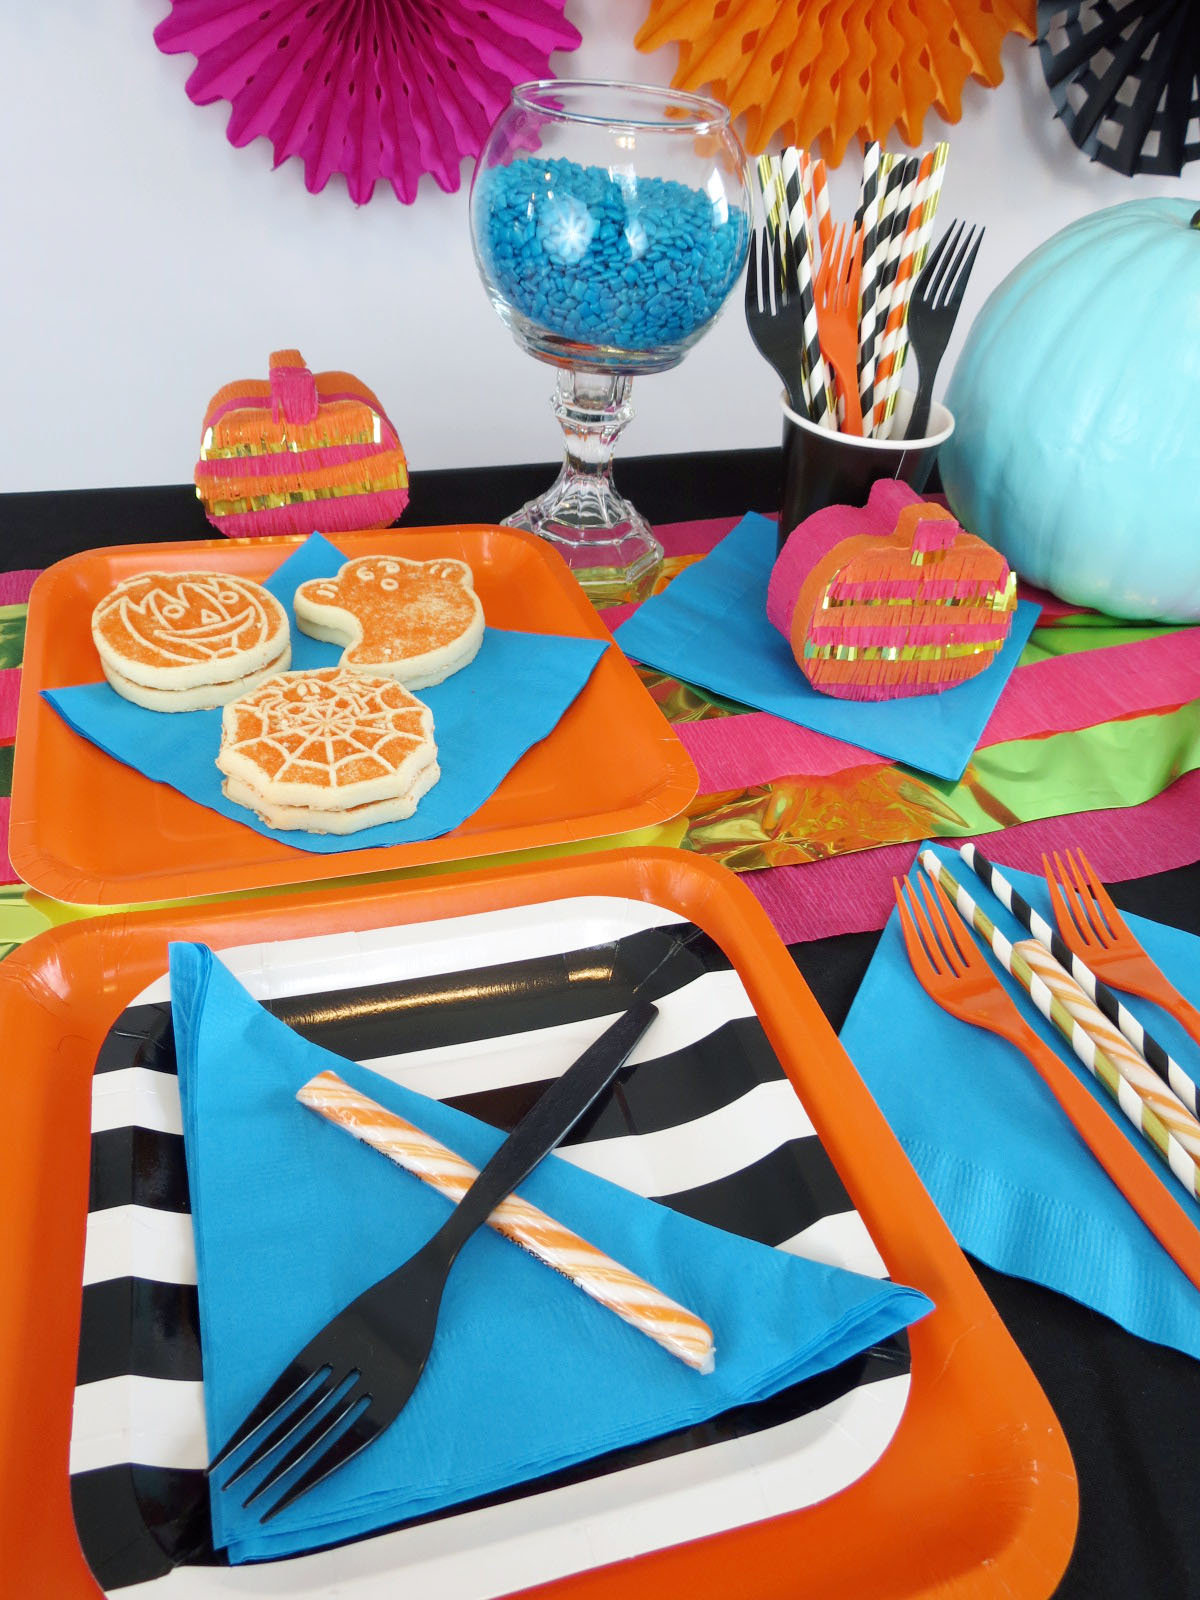
I love it all, but I think these spiderweb paper fans are my favorite part. Look at how cute they are! They add a spooky touch that's so elegant.

Halloween is coming, and I'm just so excited! I decided to give the traditional Halloween party a face-lift with a fresh color palette. It's fun, glam and has just the right amount of spooky. Click to find out all the details!

Now raise a glass and celebrate a job well done!

Planning a party is so rewarding, especially once everyone arrives and you get to have some fun! So what do you think? Do you agree that Halloween doesn't have to be spooky? Let me know in the comments below!

DIY Mini Faux Pinata

I love a good piñata, but the thought of making them from scratch seemed a bit daunting and time consuming, especially for something that would be torn apart. That's when it hit me- faux piñatas! All the cuteness and fun of a piñata, made in half the time, that can be kept indefinitely. Win-win! So, I scoured Oriental Trading for supplies and got to work creating this tiny piñata tutorial.

I love a good piñata, but the thought of making them from scratch seemed a bit daunting and time consuming, especially for something that would be torn apart. That's when it hit me- faux piñatas! All the cuteness and fun of a piñata, made in half th…

You will need:

Papier mache boxes
Crepe streamers
Gold streamer
Candy
Scissors
Hot glue gun
 

Step 1: Take your crepe paper and measure around the perimeter of the piñata base. Add a teensy bit of extra length and cut.

I love a good piñata, but the thought of making them from scratch seemed a bit daunting and time consuming, especially for something that would be torn apart. That's when it hit me- faux piñatas! All the cuteness and fun of a piñata, made in half th…

Step 2: Fold your length of crepe paper in fours so that it's compact. Put the crepe paper against the lid rim and cut at the width of the rim. Save the wider section- you'll be using it for the bottom. Do this for all the colors to mix and match, or keep it the same for consistency.

I love a good piñata, but the thought of making them from scratch seemed a bit daunting and time consuming, especially for something that would be torn apart. That's when it hit me- faux piñatas! All the cuteness and fun of a piñata, made in half th…

Step 3: Wrap the lid in the narrow section, putting glue every few inches as you work so the glue stays hot.

I love a good piñata, but the thought of making them from scratch seemed a bit daunting and time consuming, especially for something that would be torn apart. That's when it hit me- faux piñatas! All the cuteness and fun of a piñata, made in half th…

Step 4: Wrap the bottom of the pumpkin with the wider section from before. Glue every few inches to secure it.

I love a good piñata, but the thought of making them from scratch seemed a bit daunting and time consuming, especially for something that would be torn apart. That's when it hit me- faux piñatas! All the cuteness and fun of a piñata, made in half th…

Step 5: Now that the perimeter of your pumpkin is wrapped, you can start the piñata part at the top! Cut a length of crepe paper, and fold it so it's narrow. Cut in half width-wise. 

I love a good piñata, but the thought of making them from scratch seemed a bit daunting and time consuming, especially for something that would be torn apart. That's when it hit me- faux piñatas! All the cuteness and fun of a piñata, made in half th…

Step 6: Take your folded crepe paper and cut slits close together to make the pinata fringe.

I love a good piñata, but the thought of making them from scratch seemed a bit daunting and time consuming, especially for something that would be torn apart. That's when it hit me- faux piñatas! All the cuteness and fun of a piñata, made in half th…

Step 7: Starting at the bottom, glue the fringe onto the top of the lid. Continue all the way to the top.

I love a good piñata, but the thought of making them from scratch seemed a bit daunting and time consuming, especially for something that would be torn apart. That's when it hit me- faux piñatas! All the cuteness and fun of a piñata, made in half th…

Step 8: Trim the excess from the sides of the lid. 

I love a good piñata, but the thought of making them from scratch seemed a bit daunting and time consuming, especially for something that would be torn apart. That's when it hit me- faux piñatas! All the cuteness and fun of a piñata, made in half th…

Step 9: Fill with candy. Finito!

I love a good piñata, but the thought of making them from scratch seemed a bit daunting and time consuming, especially for something that would be torn apart. That's when it hit me- faux piñatas! All the cuteness and fun of a piñata, made in half th…

Don't forget to make some teal pumpkins as well to support this great cause!

I love a good piñata, but the thought of making them from scratch seemed a bit daunting and time consuming, especially for something that would be torn apart. That's when it hit me- faux piñatas! All the cuteness and fun of a piñata, made in half th…

How cute are these? I think they would make great seat markers at your place settings or nice favors for your party guests. What do you think of faux piñatas? Better than the real thing?! Let me know in the comments!

DIY Snowcone Party Hats

I know what you're thinking- party hats are for little kid's parties! I have many memories of wearing hats with a lame design that matched all the plates and napkins. And they never looked good. However, this isn't a regular hat- it's a cool hat! You can create these in complimentary colors to tie into your theme without being matchy-matchy, preventing the super cheeseball effect. They're cheap and easy to make, and make really cute festive accessories. Plus, since you're adding the elastic yourself, you don't have to worry about it choking you and creating a double chin! Double win! Well, have I convinced ya? Check out the easy how-to below.

This isn't a regular hat- it's a cool hat! They're cheap and easy to make, and make really cute festive accessories. Click to check out the easy how-to!

You will need:

Snow cone cups (I got mine from Michaels)
Pom poms
Glue gun
Elastic cord (optional)

This isn't a regular hat- it's a cool hat! They're cheap and easy to make, and make really cute festive accessories. Click to check out the easy how-to!

For this project, all you need to do is glue the Pom Pom onto the snow cone. Easy peasy! If you're planning on wearing them, create a small hole on each side and pull a piece of elastic through an tie a knot.

This isn't a regular hat- it's a cool hat! They're cheap and easy to make, and make really cute festive accessories. Click to check out the easy how-to!

These are so cheap and quick to make that you can easily create a set for a party. And the bonus? They're SUPER cute!

This isn't a regular hat- it's a cool hat! They're cheap and easy to make, and make really cute festive accessories. Click to check out the easy how-to!

Try placing a hat on each place setting to dress up the dinner table, or scatter them around the room to ensure everyone sees them. Or, even better, welcome each guest into your party by letting them pick their favorite! How do you plan on using these party hats? Let me know in the comments below! 

10 Tips to Start Planning Your Halloween Party

Happy Friday party peeps! Can you believe there are only 24 days left until Halloween?! This gives you juuuuust enough time to start planning your party. Grab a mug of hot apple cider and check out these 10 tips to start planning a spook-tacular Halloween party!

Can you believe it’s almost Halloween?! This gives you juuuuust enough time to start planning your party. Unsure where to start? Check out these 10 tips to start planning a spook-tacular Halloween party! #halloween #halloweenparty #partyplanning

1. Check out some party inspiration to get yourself into the spirit.

2. Peruse the stores for decorations and party supplies that will haunt your guests for years to come.

3. Plan out your costume and show everyone how punny you are.

4. Look up recipes that are sure to be a scream.

5. Brew up some cocktails for your best witches.

6. Plan out the guest list and send some cute invites.

7. Create a spooky playlist and get ready to do the Monster Mash.

8. Collect your candy without having to go door to door.

9. Create costume contest awards that are to die for.

10. Get your pets ready for a frighteningly good time.

Which part of Halloween is your favorite? Let me know in the comments!

What Greece Taught Me About Being a Great Hostess

This summer, I went with my sister and my fiancé to Greece and spent 2.5 weeks island hopping and visiting family for the first time. Even though we had never met before, it didn't seem to make a difference. Distant aunts and cousins welcomed us into their homes with open arms, acting as though they had known us for all our lives. It was such a change from NYC, where you are suspicious of strangers and fear talking to new people, lest they be a weirdo. At first we felt a little awkward, but we quickly learned to love their hospitality. It was nice being part of a big family and meeting new people.

While staying with various family members in places ranging from big cities to tiny towns, we noticed they all had something in common when it came to how they treat visitors. Here are nine lessons I learned about being a hostess. 

While staying with various family members in places ranging from big cities to tiny towns, we noticed they all had something in common when it came to how they treat visitors. Here are nine lessons I learned about being a hostess.

1. Treat every guest as if they are your family. To Greeks, everyone is family whether you've known them for 5 minutes or 5 years. They love to open their homes and their hearts to people, always making sure their guests are comfortable. Their favorite thing to do is to feed everyone, so you have to always bring a big appetite!

While staying with various family members in places ranging from big cities to tiny towns, we noticed they all had something in common when it came to how they treat visitors. Here are nine lessons I learned about being a hostess.

2. Give your guests lots of options. When we stayed with my dad's aunt, she offered us a pair of her pajamas to sleep in. She opened up her dresser and showed us all the options and urged us to wear whatever we wanted instead of choosing one for us. Even though we had our own pajamas, we were excited to choose from her selection. My sister and I even fought over the same pair!

While staying with various family members in places ranging from big cities to tiny towns, we noticed they all had something in common when it came to how they treat visitors. Here are nine lessons I learned about being a hostess.

3. Show guests that your home is their home. In Greece, it's not enough to just tell someone to make themselves at home. You have to show them how they can open the fridge when they want to, show them where items are in the kitchen cupboards, and where the laundry machine is. This serves two purposes- taking some of the responsibility away from the host, and allowing the guests to feel 100% welcome and comfortable. 

While staying with various family members in places ranging from big cities to tiny towns, we noticed they all had something in common when it came to how they treat visitors. Here are nine lessons I learned about being a hostess.

4. Always have some fruits and snacks on hand. In Greece, you can't go to someone's house without being offered something to eat. We were constantly offered delicious, ripe fruit. It was an easy thing to serve that everyone enjoyed. It has virtually no prep time, it's healthy, and it can be served on the fly in case you get unexpected guests.

While staying with various family members in places ranging from big cities to tiny towns, we noticed they all had something in common when it came to how they treat visitors. Here are nine lessons I learned about being a hostess.

5. If someone is a picky eater, find a way to accommodate them. As an extremely picky eater, I was nervous to have people cook for me. Luckily, everyone was super accommodating. They would order some chicken souvlaki for me, or modify their recipes to make it to my liking. It really helped me to feel at ease! To make your guests feel welcome, ask about dietary restrictions or allergies ahead of time to avoid any surprises.

While staying with various family members in places ranging from big cities to tiny towns, we noticed they all had something in common when it came to how they treat visitors. Here are nine lessons I learned about being a hostess.

6. Be open to people even if you don't understand them. My fiancé doesn't speak Greek, but that didn't stop anyone from treating him like family. They would bond with him in any way possible, whether it was sharing a beer or offering him food. 

While staying with various family members in places ranging from big cities to tiny towns, we noticed they all had something in common when it came to how they treat visitors. Here are nine lessons I learned about being a hostess.

7. Make a signature dish from your culture. Some people are afraid to try new foods (guilty!) but others can be very curious to learn more about your culture. Pick a dish that's unique but safe and serve it to your guests so that they can get a taste of the local cuisine. Or, if you've got people visiting from out of town, make something that's regional. It can be a city favorite, something locally sourced, or fresh produce. 

While staying with various family members in places ranging from big cities to tiny towns, we noticed they all had something in common when it came to how they treat visitors. Here are nine lessons I learned about being a hostess.

8. Always offer something sweet after a meal. In Greece, restaurants always serve you some kind of small dessert or liqueur after dinner. It's a nice gesture that shows your business was appreciated. If you have a friend come over, even just to drop something off, offer them a small treat and a coffee, and have a quick chat before they go. 

While staying with various family members in places ranging from big cities to tiny towns, we noticed they all had something in common when it came to how they treat visitors. Here are nine lessons I learned about being a hostess.

9. It's always a good time for a spontaneous dance party. Greeks love to dance, so it's totally normal for them to put on some music and suddenly break into a line dance. It's really fun and silly, and you aren't judged for being bad at it. Next time a friend comes over, try playing something popular, like the Macarena, and burst into giggles as you do the dance.

While staying with various family members in places ranging from big cities to tiny towns, we noticed they all had something in common when it came to how they treat visitors. Here are nine lessons I learned about being a hostess.

The main thing I learned from Greece was that any gathering can become a celebration. Next time you have friends and family together, try some of these tips to turn an ordinary dinner into a can't-wait-until-next-time soiree. 

Have you learned any lessons about being a hostess in your travels? What are they?! Leave them in the comments.