Bridesmaid Brunch Craft Party Ideas

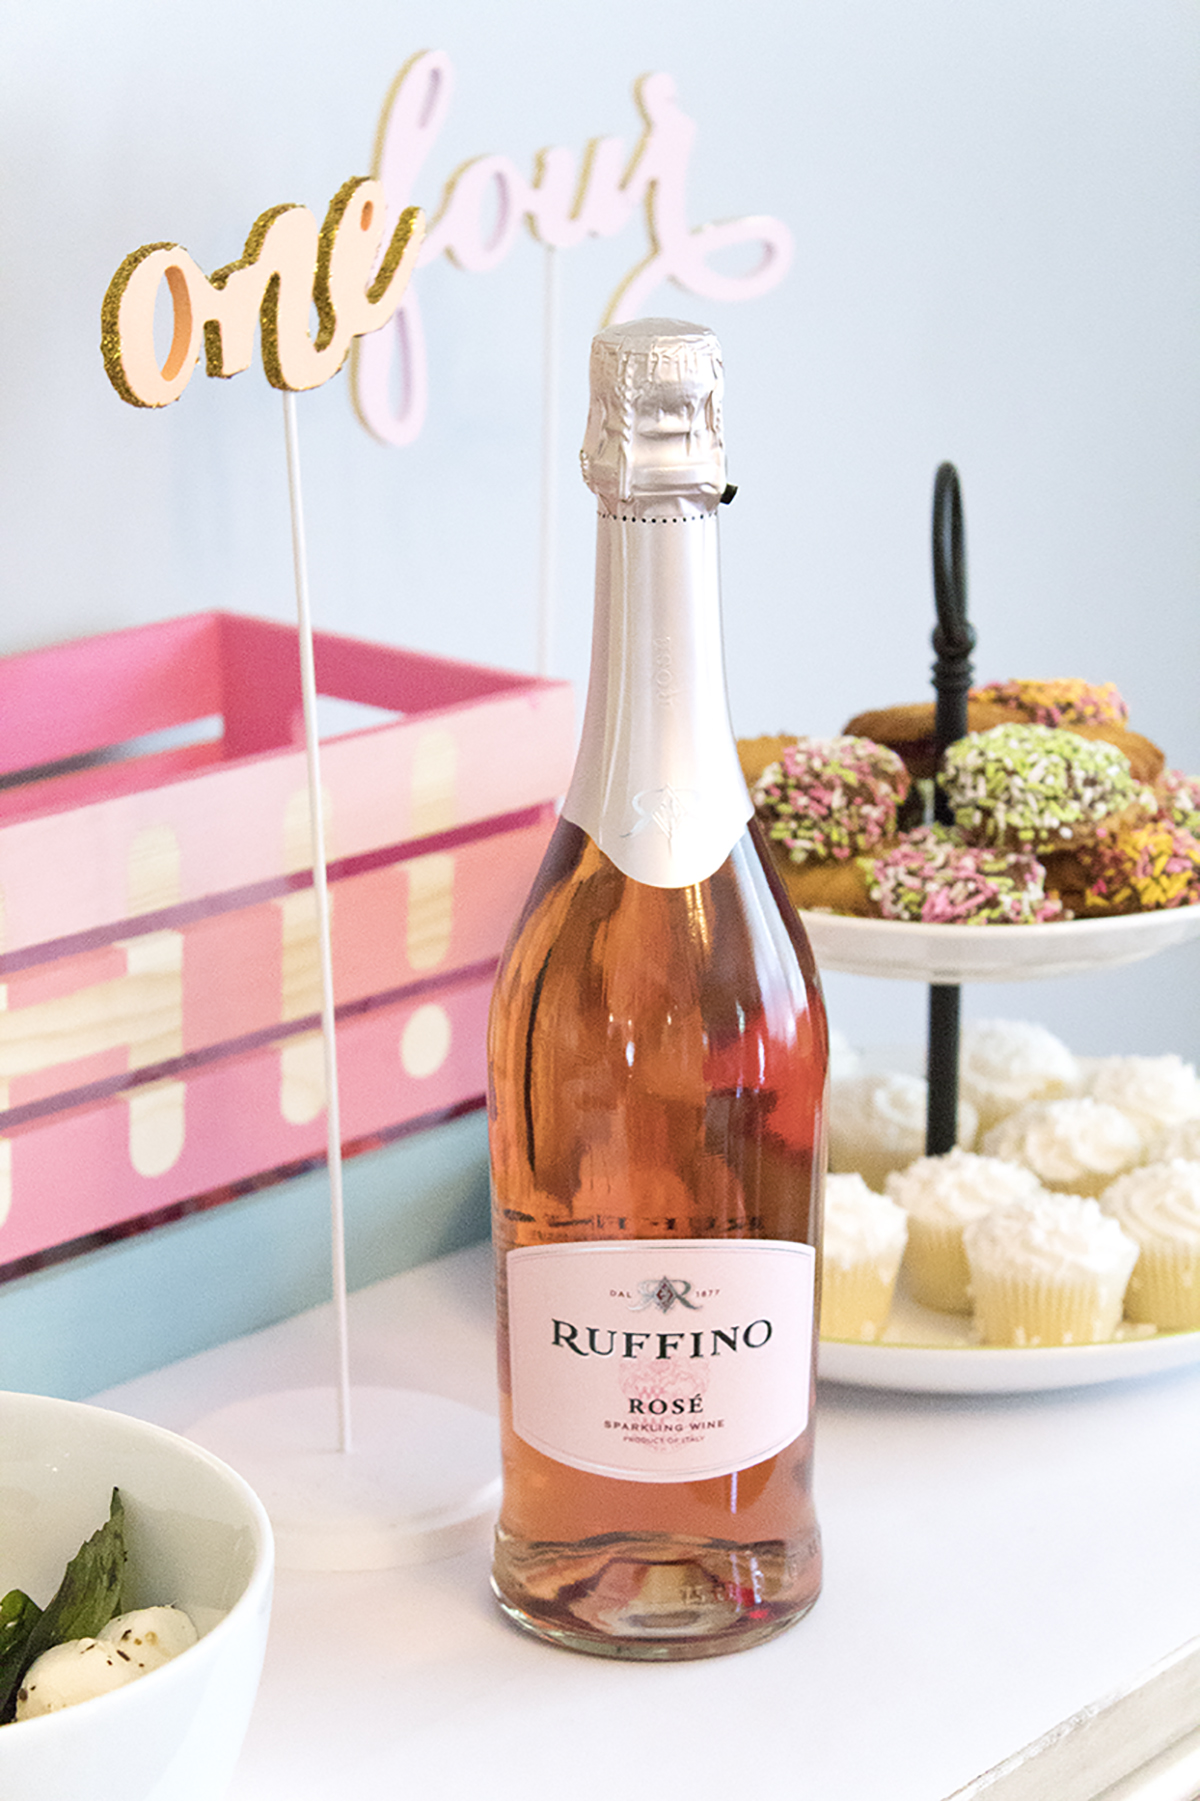
Let's get real here: wedding planning isn't exactly as glamorous as you imaged it to be. There are a lot of moving parts, tons of decisions to be made, and a whole lot of DIYs you want to try. Planning a wedding kind of becomes a part time job, except you're spending money instead of making it. So, rather than spending your weeknights filled with tears crafting 100+ favors, why not invite your friends or bridesmaids over for a fun crafternoon?! You can pop a bottle of rose, have some finger foods, and take bets on who's going to cry during the ceremony (like your Aunt Bertha, who cries over everything). 

Wedding planning got you down? Take a (short) break and invite your friends over for a crafting brunch party! It's super affordable with Oriental Trading. Click the photo to learn more!

Since you're already spending a ton on wedding related things, I know what you're thinking. You don’t need one extra thing to spend a ton of cash on. Well, fear not my friends! Oriental Trading is your party headquarters, and everything is SO affordable! With their new Marry Me section, you'll find all their wedding-worthy supplies in one place, for a great low price. They've got everything you need for the bridal shower, the ceremony, reception, and more! The options are seriously limitless, and there are tons of ideas under many of their products, showing you how to use them.

*Note: This post is a collaboration with Oriental Trading, but all opinions are my own. My love affair with them started way back when I first got their catalogs as a kid!

Wedding planning got you down? Take a (short) break and invite your friends over for a crafting brunch party! It's super affordable with Oriental Trading. Click the photo to learn more!

Think about how much time you’ll save by having your friends join you in crafting, and how much fun it’ll be! During a time of intense stress and worry, you need a break to hang with your girls and laugh. Plus, it'll be a nice way to say "thank you" if you've been a little bit of a grumpy bridezilla lately. 

Table Setup

Wedding planning got you down? Take a (short) break and invite your friends over for a crafting brunch party! It's super affordable with Oriental Trading. Click the photo to learn more!

To set up the table, I stuck with a simple white (disposable) tablecloth. Since crafting can get messy, I added a table runner using easel paper to catch any spills. I gave each person a place setting for snacking, which was cute and colorful! I started with a square gold dot plastic dessert plate as sort of a charger, topped with a hot pink plate for a pop of color. Each person gets a set of gorgeous gold utensils and a hot pink napkin to keep things tidy, as well as a paint palette for their watercolors.

Wedding planning got you down? Take a (short) break and invite your friends over for a crafting brunch party! It's super affordable with Oriental Trading. Click the photo to learn more!

Everything is more fun with a glass of wine, so each gal gets a really cute purple wine glass for her rose with a gold striped strawClear cupcake stands put the jordan almonds on a pedestal, making it easier for everyone to reach them. 

Wedding planning got you down? Take a (short) break and invite your friends over for a crafting brunch party! It's super affordable with Oriental Trading. Click the photo to learn more!

I kept the rest of the decorations simple by propping up my Pop Fizz Clink sign from my Disney-Themed Backyard Engagement Party. Finger foods and small desserts finish up the fun. P.S.- the white easel paper would be the perfect backdrop for using colorful sharpies to label what's what!

Wedding planning got you down? Take a (short) break and invite your friends over for a crafting brunch party! It's super affordable with Oriental Trading. Click the photo to learn more!

 The Crafts

A few weeks ago, I showed you 3 fun projects you can make using Oriental Trading products to add a pop of color to your wedding. These projects are perfect to make with your besties or bridesmaids!

Jordan Almonds

Place all your almonds in decorative bowls with a spoon for easy scooping. Keep your tulle, ribbon, and charms nearby so that it's easy for everyone to assemble. I also recommend pre-cutting the ribbon to ensure that it's all uniform and to prevent waste. The full DIY is here.

Wedding planning got you down? Take a (short) break and invite your friends over for a crafting brunch party! It's super affordable with Oriental Trading. Click the photo to learn more!


Table Numbers

Have your friends help out by painting the table numbers. I did about 3 coats on each one, so it's definitely time consuming! I recommend enlisting an especially crafty friend for the glitter and/or gold foil. It can get complicated and messy, so you definitely want someone precise to handle it! The full DIY is here.

Wedding planning got you down? Take a (short) break and invite your friends over for a crafting brunch party! It's super affordable with Oriental Trading. Click the photo to learn more!


Watercolor Escort Cards

When you get all your friends together, you've got to do this super fun project! It's seriously easy and best of all, really fun!

Looking for an easy and affordable way to guide people to their seats? This.is.it! The full how-to is on the blog, along with ideas on how to get your bridesmaids to help! Click the photo to learn more.

You will need:

Watercolor Paints (here)
Paintbrushes (similar here)
Paint Palette (here)
White Place Cards (here)
Gold Sharpie (here)

Looking for an easy and affordable way to guide people to their seats? This.is.it! The full how-to is on the blog, along with ideas on how to get your bridesmaids to help! Click the photo to learn more.

Each gal will get a set of watercolor paintbrushes, as well as a paint palette. Grab your watercolor paints and your white place cards and give each card a unique look. I added layers of complimentary colors for variation, but it still looks cohesive.

Looking for an easy and affordable way to guide people to their seats? This.is.it! The full how-to is on the blog, along with ideas on how to get your bridesmaids to help! Click the photo to learn more.

Once they're all dry, use a gold sharpie to add a name and a table number to guide people to their seats in style. Write the names in script, or make it fancy with some faux calligraphy!

Looking for an easy and affordable way to guide people to their seats? This.is.it! The full how-to is on the blog, along with ideas on how to get your bridesmaids to help! Click the photo to learn more.

I did the script freehand, but I think if you either got someone to do calligraphy, picked a friend with fancy handwriting, or printed the names on the cards, it would look even better! Be sure to make some extras, as you're bound to mess up a few of them while writing.

Looking for an easy and affordable way to guide people to their seats? This.is.it! The full how-to is on the blog, along with ideas on how to get your bridesmaids to help! Click the photo to learn more.

Woo! I'm not sure about you guys, but a bridesmaid crafternoon brunch party seems like exactly what I need to get over these pre-wedding blues! A few laughs does everyone a world of good. Be sure to check out Oriental Trading's new Marry Me section for everything you'll need for this party, the bridal shower, the wedding, and beyond! 

What's been the hardest part of wedding planning for you? For me, it's been the fact that my mom, sister, and friends live kinda far away, so I've been doing it (cue Eric Carmen) all by myyyseeelllfff. I wish I had them to help/laugh/decide on things. How about you? Let me know in the comments below!

Adding a Pop of Color to Your Wedding

When you think of weddings, you think of white. While some may see that as very limiting, I see it as a blank canvas to incorporate any color you wish. Often, people add "wedding colors" and it's usually one shade of a color, like a deep purple or emerald green or blush pink. What if, instead of focusing on one color, you added shades of many colors? I think it would be a lot more fun (and a lot less stressful) to fill your wedding with complimentary hues. 

When it comes to adding some color (and fun!) to your wedding, look no further than Oriental Trading. They've got everything you need for weddings, whether you want to do a few crafts projects, get something that's personalized, or something that's ready to go out of the box. Plus, with their new Marry Me page of their website, all the wedding items are in one easy to find place. I call that a win-win.

*Note: This post is a collaboration with Oriental Trading, but all opinions are my own. My love affair with them started way back when I first got their catalogs as a kid!

Let those table numbers stand out! Click to see how I added a modern twist to this traditional wedding element, along with 2 other ideas to add a pop of color to your wedding!

Oriental Trading has everything you need to craft any project for a wedding or a party. Today, I've got 3 fun and easy projects you can make using Oriental Trading products and craft supplies. I've linked all the products I've used, so you've got everything you need in one easy-to-find place! Ok, enough with my blabbing... Let's get crafting!

Jordan Almonds 

Jordan Almonds don’t have to be boring! Click to see how I added a modern twist to this traditional wedding element, along with 2 other ideas to add a pop of color to your wedding!

You will need:

Jordan Almonds in your wedding colors (I used coral, light blue, and pink)
White Tulle (here)
Contrasting Ribbon (here)
Thank You Charms (here)
Spoon (here)

Jordan Almonds don’t have to be boring! Click to see how I added a modern twist to this traditional wedding element, along with 2 other ideas to add a pop of color to your wedding!

In many cultures, it's traditional to give out Jordan Almonds at a wedding. I'm Greek, and I can tell you for a fact that you can't attend a Greek wedding without receiving one of these bombonieres! For more info on Jordan Almonds, check this out.

How To:

Jordan-Almonds-GIF2.gif

1. Pick Jordan almonds in colors that match your theme.

2. Place 5 almonds in the tulle. I started by mixing my colors, but I realized I preferred all one color with a contrasting ribbon.

Jordan Almonds don’t have to be boring! Click to see how I added a modern twist to this traditional wedding element, along with 2 other ideas to add a pop of color to your wedding!

3. If you want the bow in the back, loop your tag onto the ribbon. If you want your tag in the front, add it as you're making the loop of the bow. Oriental Trading also offers personalized ribbon, which would be even better to add! 

4. Once you've decided how you want your bow, slide your almonds into the middle of your tulle, grab the sides, and tie your ribbon around it in a bow.

Jordan Almonds don’t have to be boring! Click to see how I added a modern twist to this traditional wedding element, along with 2 other ideas to add a pop of color to your wedding!

Table Numbers

Let those table numbers stand out! Click to see how I added a modern twist to this traditional wedding element, along with 2 other ideas to add a pop of color to your wedding!

You will need:

White Table Numbers (here)
Paint or Spray Paint (here)
Paint Brushes and Palette (similar here and here)
Gold Foil (here)
Gold Foil Adhesive (I used this one)
Gold Glitter (here)
Mod Podge (here)

Let those table numbers stand out! Click to see how I added a modern twist to this traditional wedding element, along with 2 other ideas to add a pop of color to your wedding!

People need to know where they're sitting, right? Why not lead them there in the brightest, glitziest way possible?!

How To:

1. Paint or spray paint your table numbers, but leave the edges blank. Do 2 coats, or as many as it takes to get smooth coverage, and let dry. (FYI- I used paint).

2. Paint the white edges of your numbers with foil adhesive. Work carefully so that you don't get it off the white edge. It sticks to anything with adhesive, so heed my warning and be careful!

3. Wait about 20 minutes for it to cure and be slightly tacky. Fun fact- this stuff dries sticky, so even if you wait a little too long, it'll still be sticky for the foil.

Let those table numbers stand out! Click to see how I added a modern twist to this traditional wedding element, along with 2 other ideas to add a pop of color to your wedding!

4. Take your foil and cut/rip to size, then attach it to the edges of the numbers. Take your stiff brush and brush off any extra foil. This stuff gets messy, so put a paper or a plate underneath so you don't make a huge mess :)

5. To do the glitter edge, mix gold glitter with mod podge. Using a paintbrush, paint the mixture onto the edges in small sections. Before the mixture dries, sprinkle some glitter onto the wet glue to cover any bald spots. Continue until you've done the whole perimeter, then go back and fill in any bare spots.

6. To travel to the venue, wrap each with white tissue paper to prevent scratches. Do not assemble them until you arrive, as they are fragile and may snap in transit. 

Let those table numbers stand out! Click to see how I added a modern twist to this traditional wedding element, along with 2 other ideas to add a pop of color to your wedding!


Welcome Basket

Your welcome basket doesn’t have to be formal! Click to see how I added a modern twist to this traditional wedding element, along with 2 other ideas to add a pop of color to your wedding!

You will need:

Wooden box (I used this one, but this one is better!)
Acrylic Paints (here)
Paint Brushes and Palette (similar here and here)
Self Adhesive Letters (here)

Your welcome basket doesn’t have to be formal! Click to see how I added a modern twist to this traditional wedding element, along with 2 other ideas to add a pop of color to your wedding!

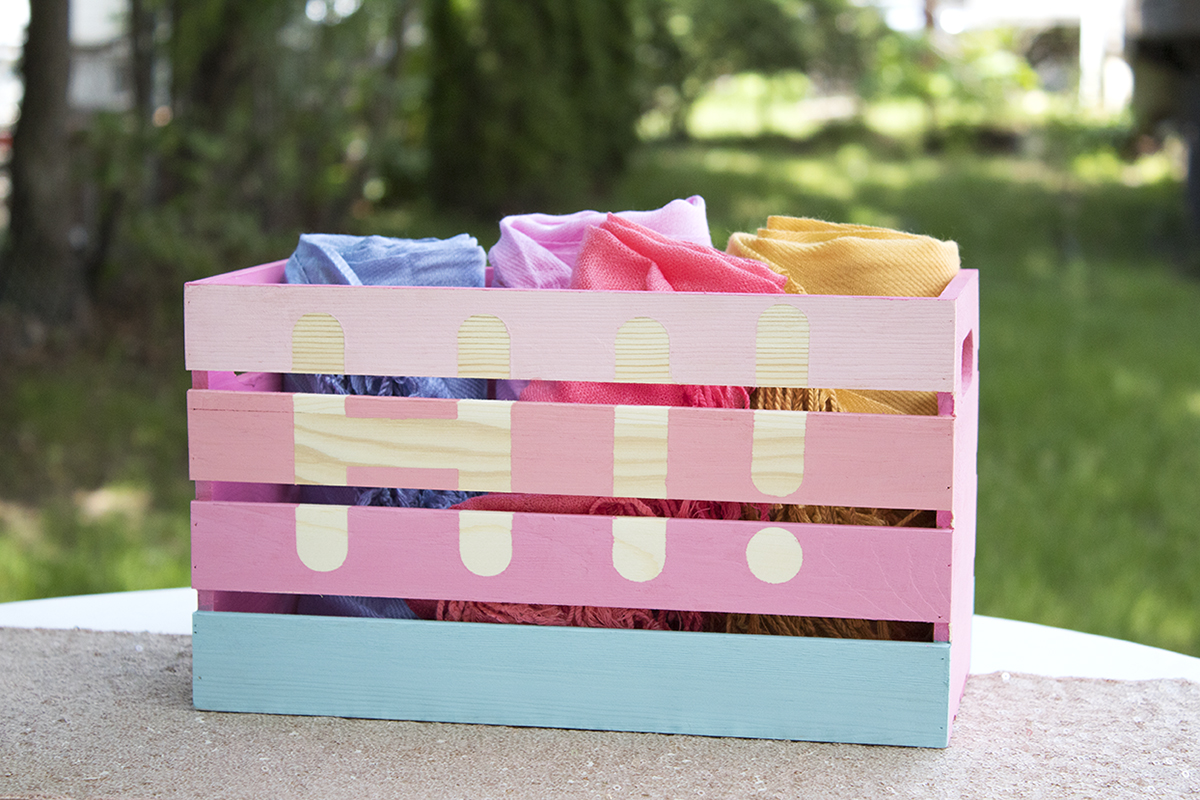
Show your friends and family that this is bright occasion from the start with this fun welcome basket! You can also re-use it after the wedding to hold mail or greet guests in your entryway!

How To:

1. Take your letters and put your message on the box. I chose to keep it simple and write "Hi!" You can also do the couple's initials or a monogram.

2. Mix up your paints until they are the right color. Use a toothpick or a thin paintbrush to stir. If the paint is too light, it'll make it hard to read the Hi, so be aware of that when painting your box.

Your welcome basket doesn’t have to be formal! Click to see how I added a modern twist to this traditional wedding element, along with 2 other ideas to add a pop of color to your wedding!

3. Carefully paint your basket. I did a different color for each bar to keep it interesting.

4. While your paint is still wet, carefully peel off your stickers using tweezers. If your box is like mine, I recommend you actually don't paint the inside of the box. It got really tricky with all the little rungs. Especially since I made my own colors, because I found that I would run really low and have to try really hard not to run out before I finished. 

5. Place your box on your welcome table and fill it with pashminas, ceremony programs, or bubbles!

Your welcome basket doesn’t have to be formal! Click to see how I added a modern twist to this traditional wedding element, along with 2 other ideas to add a pop of color to your wedding!

With a little bit of crafting, and a whole lot of imagination, you too can make your wedding unique with a fun pop of color. I've got a follow-up post coming with ideas for getting your gals together for a fun crafternoon, so stay tuned!

Be sure to visit Oriental Trading and their Marry Me page to start customizing your own wedding!

So what do you think? Will you be adding a pop of color to your wedding? How do you plan to do it? Let me know in the comments below!

Wedding Planning Update- Just 3 More Months!

Oh my gosh, you guys!!! My wedding is less than 3 months away. 87 days!! I can't wait for it to be here. I feel panicked because I have so much to do, and also feel sad that it'll be over soon. All at the same time. I've basically become an emotional mess lately and even the smallest things make me cry. I'm that person now. Anyway... here's what's been happening. 

Wedding Update- 3 More Months! This month we're chatting about charger plates, choosing suits, favors, and more! Click for the full post.

Invites-Picked and Packed!

Ah, invitations. The bane of my existence for the last 8 months. I really wanted my sister to design some invites for us, and her first draft was really cute! Unfortunately, as with many DIY projects, these were going to cost wayyyy more to print them ourselves than to purchase pre-made ones. And so we sadly had to scrap our idea :( Luckily, we were able to find some nice invitations online from Wedding Paper Divas. With a half off coupon, we were able to purchase them for $422.80, including custom foil, expedited shipping, and addressing the envelopes! Our original quotes were over $1k, and to custom print with foil we were quoted over $1,800 (!!!), so this was an amazing price. They're all packed up and ready to get shipped this week.

Wedding Song- Chosen!

They say when you snooze you lose, but for me it worked out. I was too tired to get up when my alarm went off, so I stayed in bed listening to the radio and heard a song that I thought would be perfect. I looked up the lyrics and started crying. But, I hated the radio version so I found a cover! I like it so much better, and every time it comes in the radio when we drive I get so emotional and excited for our wedding. I can't wait to dance together.

Wedding Update- 3 More Months! This month we're chatting about charger plates, choosing suits, favors, and more! Click for the full post.

Bridal Party Outfits- Done!

Dresses have been purchased! My sister got her dress from RK Bridal in the city (where I got my dress) and my mom got hers from Lord & Taylor. Since my sister is technically my only bridesmaid, this made things a bit easier. We went to a few stores and she tried on a bunch of different styles, but we settled on a lace and chiffon one. My mom has 2 dresses she bought and is trying to narrow it down to see which one she likes better. My dad also found his suit, a black Sean John suit haha.

Suits- Explored

We started looking into a suit for John and his brother. We checked Jos. A Bank, where the salesman was very kind. John has really broad shoulders (which I LOVE) but they make finding a suit difficult. Most suits made for a man with shoulders as large as his are much larger men in general, so the jackets looked giant on him. They suggested making a custom suit, which would only cost slightly more than buying one off the rack. I wasn't entirely sure what I wanted yet, so we paused that. Then, we went to men's warehouse, where we didn't see any colors we liked. The salesman told us that we should come back in early June to see the new colors, so we decided to wait until then before making any decisions. We are going this weekend to see them, and hopefully we can decide on his suit! 

Wedding Shoes- Ordered! 

Since our wedding ceremony will be outside, I wanted a wedge instead of a heel. I also wanted them to be pink and to have some sparkle. Luckily, Badgley Mischka had just what I needed. I got them on Amazon and I saved about $70 on them! The wedge heel has some texture on it which I love, and they actually feel pretty comfortable. 

Wedding Update- 3 More Months! This month we're chatting about charger plates, choosing suits, favors, and more! Click for the full post.

Napkins- Ordered

We ordered some cute custom printed napkins from For Your Party to put out at cocktail hour. I had already wanted to order some, and they had them at a wedding we went to. It was super cute! Luckily, this made convincing John to get them that much easier. I'm sneaking Disney references into my wedding any way I can, and these napkins were no exception ;)

Charger Plates- Ordered

This was a debate from a few months ago when we were wondering how nice we should go with the table settings. We looked into a rental company and there were all sorts of options for chargers. In the end, it didn't seem worth it to me to rent, essentially, a fake decorative plate for $5/piece. I was able to purchase them from Dollar Tree for a fraction of the cost, less than $200! Plus they're mine to keep so I can sell them after the wedding if I want to. I had purchased the same ones for my Dollar Store Easter Decorations post and I think they look pretty good! 

Wedding Update- 3 More Months! This month we're chatting about charger plates, choosing suits, favors, and more! Click for the full post.

Favors- Picked! 

Hooray! Our favors have been ordered! I don't want to give too much away since I know my family likes to read these updates (oh, hey guys!) but we ordered some cute and whimsical favors for everyone. We ordered them from Wedding Favors Unlimited, which offers price matching and $20 off if you find a lower price than theirs! Also, it shipped to us really quickly! From the date we ordered, it took 2 days for them to arrive. We'll also be giving out Jordan almonds since it's traditional and there should at least be some traditional elements, right?! 


Need to do:

Rehearsal dinner- Booking the venue for the rehearsal dinner has been on my list for a long time! Well actually... it was on John's. But somehow it made its way over my list, as it seems everything else has! We still haven't officially booked this and I'm so eager to cross it off. We are so close on this one.

Plan our ceremony- One of our friends is performing the ceremony, so we need to finalize all the little details to make it a great and memorable ceremony.

John's suit- Although we browsed suit options, we need to get his suit ordered since we are thinking of doing a custom suit. 

Centerpieces & decor- We ordered our flowers, but I want to buy any other centerpieces and decor items we need!

Schedule dress fitting- My dress is set to arrive next month, so I need to figure out exactly when and make an appointment for a fitting and alterations. I'm a little anxious about that, since there will be about 6 weeks between receiving my dress and my wedding day. No pressure.

Veil and accessories- Um, yea. I need to get on this! I'm going to attempt to make my own veil since they are SO expensive to buy. I want to try to make it soon, and if it doesn't work out, I'll bite the bullet and buy one. I also need jewelry, undergarments, hair accessories, and a purse I guess? 

Dresses upon dresses- I need to get a dress for the rehearsal dinner, the bridal shower, the bachelorette party, the 2 other weddings I have this year... Here, just take all my money.

Get legally wed- Our wedding ceremony will only be symbolic, so we are going to city hall (or something) to be legally married. We need to do this sorta soon, since some over-eager bozo decided to book a ticket in her new married name, thinking it would be really easy to do a name change. Yeaaaa.

If you want to learn more about planning a Pinterest worthy party, be sure to sign up to get your FREE Anatomy of a Pinterest Worthy Party guide! It's full of helpful hints on how to pick a theme, the little details that will make your event unique, and tips to take great photos of your event. And, there's even a checklist so you don't forget anything! So what are you waiting for? Get yours now!

Although I am pretty overwhelmed with all the stuff I need to do, I like these updates because it shows me that although the To Do List is still reaaaally long, it's actually getting shorter and things are getting done. So, what's your favorite part of weddings? Is there something you saw once that you thought was great, or terrible? Any tips to make a wedding the BEST WEDDING EVER?! Let me know in the comments below!

Defining WellKeptChaos- Finding Yourself by Embracing Your Flaws

When I first started my blog, I intended for it to be an organization blog. I had just bought a house, and I really wanted to blog about it. It was going to be a lifestyle blog, but I’d provide all these handy tips to get your stuff organized. Hence the (old) name, WellKeptChaos. Learn more about the name change to Party HarDIY here.

DSCF8098.jpg

As it sometimes goes, the blog got reworked and reformed. I realized I didn’t have a passion for organization (and my house on any given day can prove that…) so I decided to go for my next passion- party planning. I did that for a bit, but then my other passion came out, which was crafting. And the blog went in that direction. I even thought about changing the name of the blog. I lined up my new social media channels, bought the domain, and just about everything else! But everyone told me they liked the old name, and so there it stayed. Somehow the name seemed perfect, but also like it didn’t fit either. (UPDATE: You can read about the name change here)

The truth is that through all these transitions, I never really felt like I found my niche or my audience. I, like my blog, wasn’t any one thing. I like to do a whole lot of everything. I have ADD and it was, again, rearing its ugly head. I wanted to do #allthethings and trying to fit myself into a box of a “diy blogger” or a “party blogger” wasn’t really doing it for me. Because the truth is, I want to talk about everything. And I can talk A LOT.

So I sat here, on this chilly almost-June day, and I felt defeated. Not just with my blog, but in general. Who am I and what am I doing? What defines me? Is it my blog, my job, my life? And if any one part changes, do I change? And I thought about that name I created for my blog, and how off it seemed, and it finally clicked. The WellKeptChaos was ME. But not just me… in a way, WellKeptChaos is all of us. 

WellKeptChaos is trying to be an adult when you really still feel like a kid. It’s trying to get your finances in order when you just want to go shopping. It’s trying to hustle and start a business when you have absolutely no frickin idea what you’re doing, but you’re not going to let that stop you. It’s all the very many pieces of your life and how they fit together and make you YOU, when they don’t seem to even make sense together. How a person can be lazy in life but dedicated in their business. How a person can love food and hate cooking. How a person can be obsessed with becoming an adult but not feel ready once they are. These are our quirks, these are our personality traits, and this is our chaos. 

But despite the chaos, despite the pitfalls, and despite the world around us trying to change us, we are doing it. We are being ourselves, we are fighting the norm, and we are trying to find our way in the world. We are changing and adapting every single day, even if we don’t feel it, or sense it, or even believe it. Every day is a change, every day has potential, and every day we learn. And although we might be panicking inside, we put on our big girl (or boy) pants and we get through that day with a smile. We pretend we know what we are doing, we have a sureness in our voice that even we don’t believe, and we pretend we’ve got our shit together. That is our WellKeptChaos.

One thing I always liked to do, and wanted to do, was to help people. And I think that with all the very many things I do on my blog and in my life, I do help people. I’m not an art teacher, but I can sure as heck help you DIY almost anything. I’m not a party planner, but I can plan a shindig that looks like it came out of a magazine- and tell you how to do it too. I’m not a life coach, or google, or the town wiseman, but that doesn’t stop people from coming to me for advice, for someone to listen to them, or someone to encourage them to get their “show on the road”, so to speak. Throughout my life, my career, my jobs, I am that person that people go to for help. It’s something I always knew but also always overlooked. By not being perfect at any one thing, I was fairly proficient in a great many things. And this allows me to help a whole lot of different kinds of people.

So who is my target audience? Anyone that needs help getting their life together. Anyone who needs a girlfriend to tell it to them straight, but with kindness. Anyone that needs help doing this thing called adulting without going absolutely bonkers in the process. She’s probably a woman, she’s probably in her 20’s-30’s, and she’s probably like me. Maybe she’s someone that wants to laugh at her failures while she cries, maybe she wants to dress better but she’s SO bad at it, or maybe she just got her apartment and she’s broke. None of these things are bad, but they aren’t what you see on the internet, or in magazines. Everything looks perfect on there, but I can assure you, it.is.not. And that’s ok, because no one is perfect. That’s a fact, and you can quote me on that.

So you do you, boo. Be weird, be crazy, be broke, be stylish, be lazy. Be everything that you are, that makes you who you are. Keep improving, keep striving, and keep navigating your way through adulthood. We’ll all figure it out someday, someway, and at our own pace. But for now, let’s figure out where the heck to start. And let's do it together.

So, let's get this helpful thing started. Tell me your #1 challenge right now, and I'll do my best to give advice, help you out, or create a blog post about it. Is it something simple, like how to refinish your dresser? Something harder, like how to update your wardrobe on a budget? Or something really tough, like how to move forward when your mind is filled with doubts? Let me know in the comments below, or contact me.

I can't wait to go on this journey with you!

In a world of photoshop, social media, and unrealistic expectations, it can be hard to feel like you're good enough. Click to learn how a particularly bad day helped me find myself- and how you can too!