
DIY Neon Popsicle Earrings
/This is a sponsored post written by me on behalf of Cricut. All opinions are 100% mine.
As you probably know, I’ve been having a LOT of fun making faux leather earrings lately! I’ve been using my new Cricut Maker and holy cow, it’s a game changer! My Explore Air was cool and all, but the Maker can keep up with anything I throw at it. Cutting felt? Yep! Fabric! Thin balsa wood! Chipboard! It feels like the possibilities are endless.
To share my newfound love, I decided to show you guys a fun DIY project using faux leather, and also answer your questions about cutting faux leather with the Cricut Maker! If you’ve never cut faux leather before, head down to the FAQ before beginning this project! It’s full of helpful tips so that you can get started on the right foot. I love faux leather earrings because they weigh practically nothing- perfect for making an impact without saggy ear lobes!
*This post contains affiliate links.

You will need:
Cricut Maker
Faux Leather- Beige
Strong Grip Mat & Standard Grip Mat (or Variety Pack here)
Iron-on Vinyl- Neutrals Sampler and Neon Glow Sticks Sampler
Cricut EasyPress Mini
EasyPress Mat
Basic Tool Set
Brayer or Applicator and Remover Set
Washable Fabric Pen (optional)
Self-Healing Mat
True Control Knife
18” Cutting Ruler
High Temp Tape and Teflon Sheet
Earring Kit
Directions:

Gather your supplies, then open up the project in Cricut Design Space.
Press the “Make It” button and see what size you’ll need for your materials. I like to cut the pieces before running it through the machine to save some time. I use my cutting mat, ruler, and True Control Knife. This thing is amazing- it cut through 3 layers of vinyl at the same time!
First up, cut your faux leather using the Strong Grip Mat. Be sure to place your leather face-down (aka, leather down and fabric backing up). Smooth it down with your brayer to ensure it’s pressed down securely.
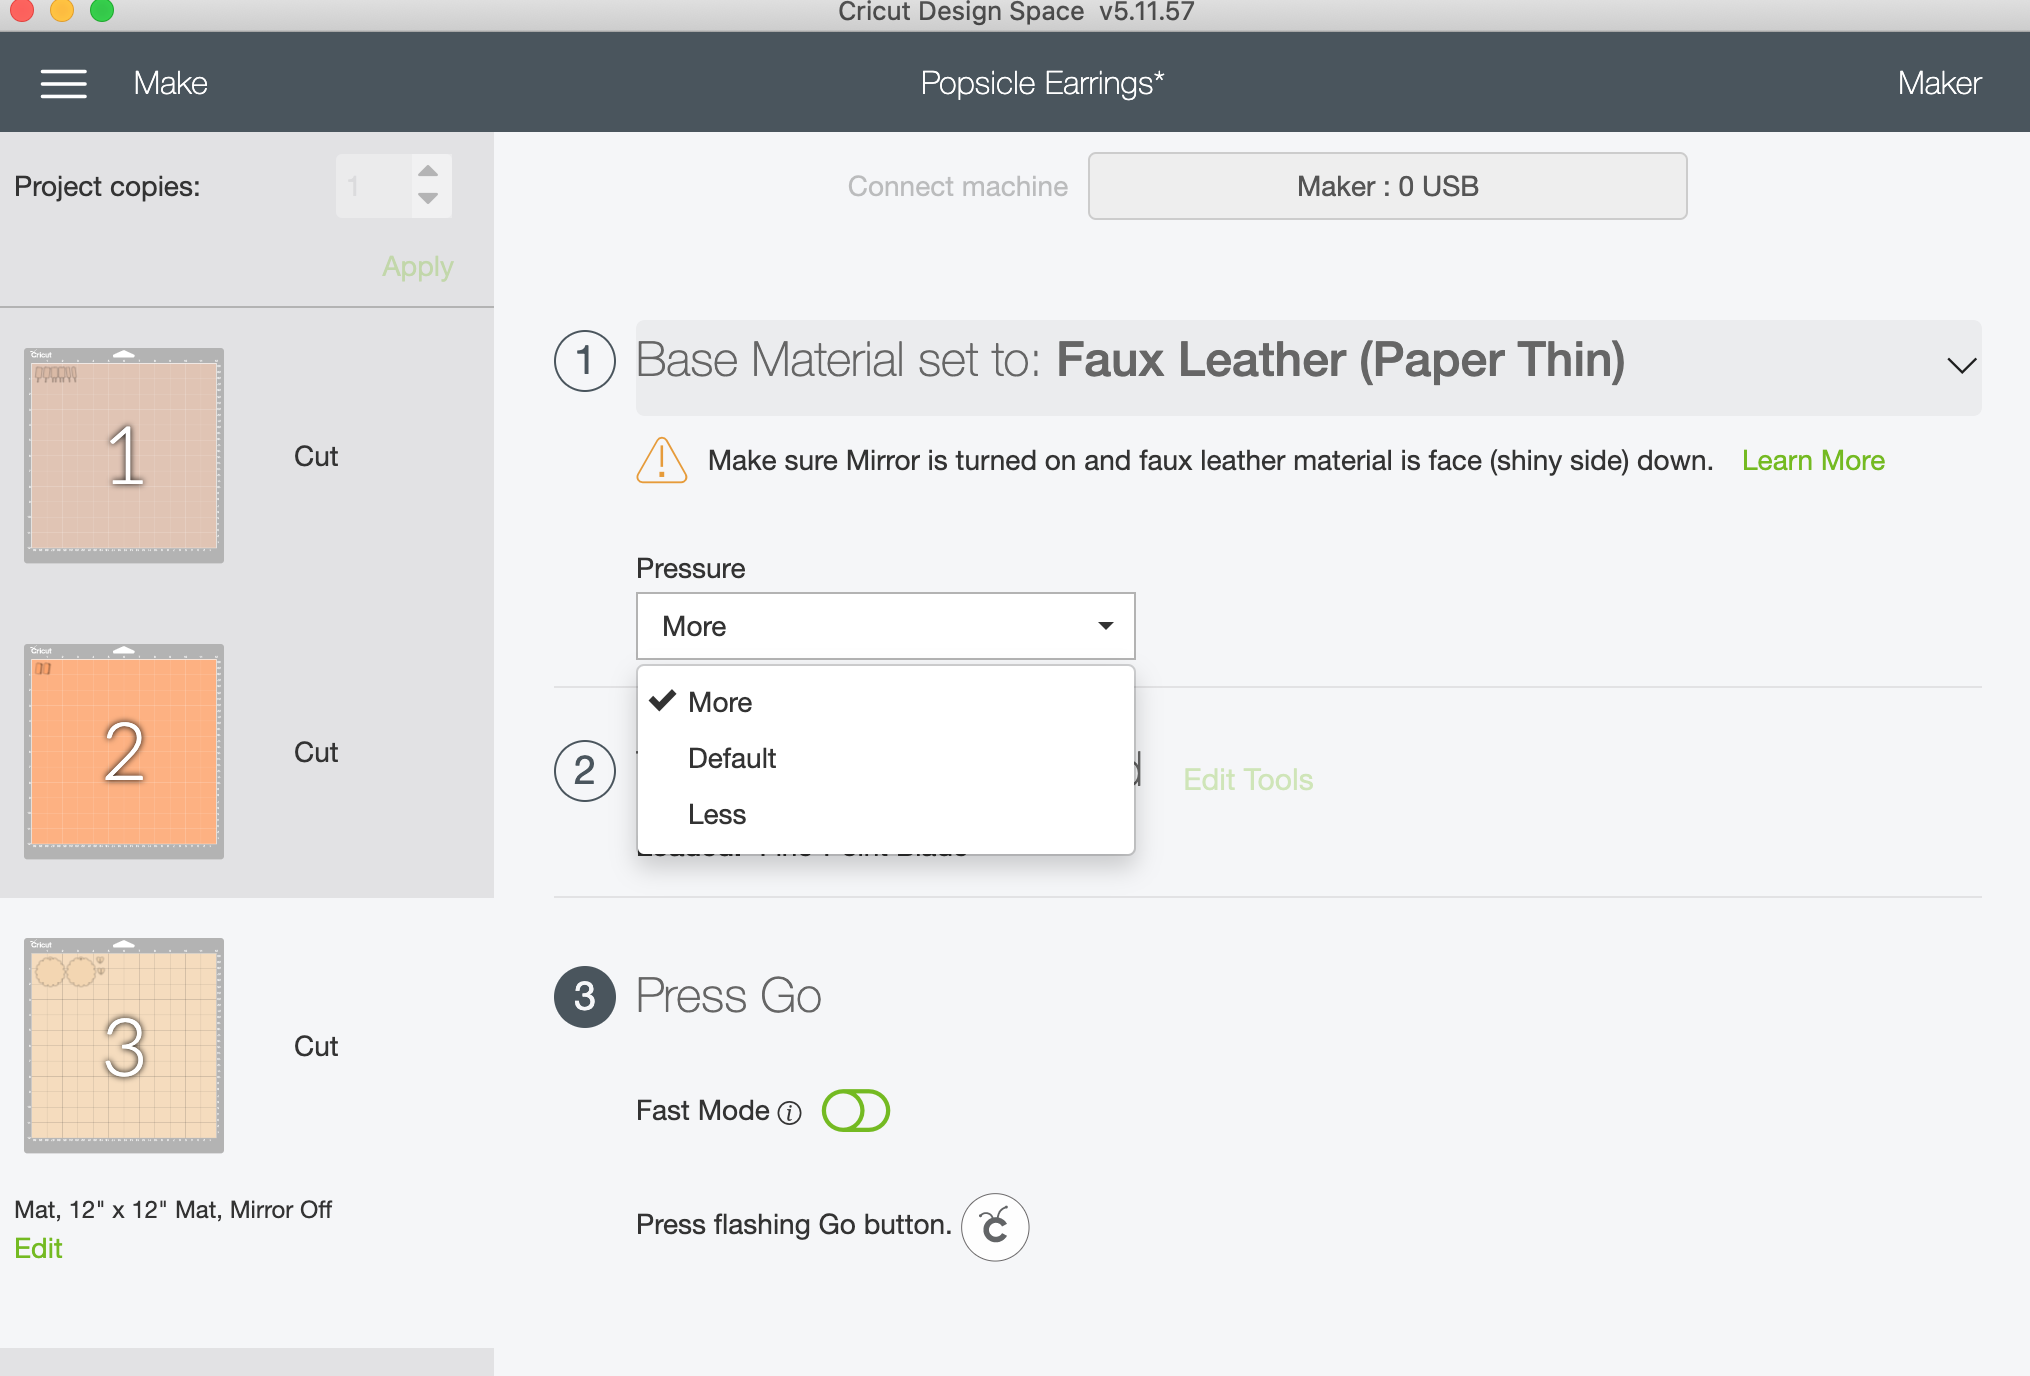
Load your mat into your Cricut Maker. Select the material (faux leather- paper thin) and set the pressure to “MORE”. Once it’s cut, don’t peel it off yet! Test that it comes out easily and smoothly. If not- run it through again.
Cut your vinyl using the standard grip mat. I put all my little pieces of vinyl on the same mat, and just ran it through in order. Weed your vinyl to get it ready for ironing.
Place your faux leather earrings on the EasyPress Mat. Follow the directions for the Easy Press Mini which in this case is 30 seconds on the lowest setting. I used a teflon sheet to protect my faux leather while using the iron. As per the instructions, peel off the protective layer while it’s still warm. I did the brown popsicle pieces first, then the neons after. Use heat-resistant tape to keep things in place so they don’t slide!
Add a jump ring and then an earring hook to your faux leather. Wear them with pride!


Now, let’s get into some FAQ about cutting faux leather:
Why is the Maker better than the Explore for faux leather cutting?
This is a great question! Before I got my Maker, I did use my Explore to cut faux leather. And it worked, for the most part. But, the Explore has to go over the leather twice to cut it. This can lead to the faux leather getting tangled up, especially if certain pieces cut well and then it slides over again and dislodges it. It’s also more time consuming! We know that us crafters have limited time as it is, haha.
How do I keep my leather from moving and sliding while cutting?
There are a few tricks to keep that pesky faux leather in place! First, use a Brayer to smooth the leather down and ensure a good adherence. Then, if you really want to keep it in place, add a bit of tape. I use painter’s tape and that works perfectly.
What blade do I need to cut faux leather?
You can make perfect, precise cuts using the fine-point blade.
How do I cut faux leather?
It’s really easy! Just place your leather face down on the mat- I use the purple heavy grip mat. You want to have the fabric backing facing up and the leather on the sticky side of the mat. Don’t worry- it won’t get ruined! Then, I like to use “more” pressure setting. Do your cuts, and then check that the cuts went all the way through. If they didn’t, run it through again and it’ll go over the same cuts, allowing your shapes to break free!
Can I add vinyl to my faux leather?
Yep! Cricut Iron-Ons work perfectly for this. You just want to take some precautions. Remember, faux leather is artificial- aka plastic and melts easily. So, you want to protect it as much as possible before adding your vinyl. Use a teflon sheet to avoid directly touching the leather with your heat source. Second, be efficient. I love to use my Easypress Mini because I know the exact settings. This means I can go quick and avoid unnecessary heat on my faux-leather. It’s also the PERFECT size for earrings! Cricut recommends using their EasyPress Mat which is the perfect size for laying out a few earrings and getting all that iron-on vinyl secured!

My faux leather just won’t cut- now what?
This is what’s great about the Cricut- it has a drawing feature! Switch your designs to DRAW, then load the fabric pen. This amazing pen has disappearing ink, so after you’re done trimming, use some water and the marks are gone! Allow the Cricut to do it’s thing, and you’ll have a precise template that you can now hand-cut.
Oh and PS- this GORGEOUS set of Cricut Pens is the Fine Point Pen Set- Sorbet. What dreams are made of!

I hope this post inspired you to make some faux-leather earrings too! I am LOVING my new Cricut Maker, so if you have any questions or if you’re on the fence about getting one, let me know! I can help you decide if it’s the right move for you :) I think one of the best things about the Cricut Maker is that you can create projects that you can sell, which helps you earn your money back that you spent on it! It’s really an investment piece, and a total necessity for any crafter out there!
In case that wasn’t enough, here are 5 things I love about my Cricut:
I can cut faux leather with ease to make gorgeous earrings.
The Cricut design space has thousands of amazing graphics, images and fonts that I can use to customize my projects. It’s SO easy to do, and I love that I can design then cut, all in one place!
I can cut a variety of materials, including paper, vinyl, leather, felt even balsa wood!
The Cricut is perfect for tiny details. I can draw or cut something and it’s precisely like it looked on my screen.
It’s really easy to go from an idea to a finished project. Everything comes out perfectly!


