Hailey’s Happy Half- A Confetti Carnival Half Birthday Party

On March 28, Hailey officially became 6 months old! I truly cannot believe how quickly time flew by, but it’s true! I love a good party (surprise surprise!) so I decided to throw Hailey a small (but adorable) half birthday party to mark the occasion. I knew the party had to be cheap, because our budget is a little tight these days. I also knew it had to be simple so my husband wouldn’t get annoyed at me for having an unnecessary party. And I knew it had to be cute, because IT’S ME and I wouldn’t have it any other way. The result was an adorable little party on a budget that any mom can throw for their baby!

Hailey-Half-Party-18.jpg

Picking a Half Birthday Party Theme 

The first thing I had to do was pick a theme for the party. I was a bit stumped at first, but I knew I wanted something colorful and maybe with confetti. I browsed Pinterest for ideas, then I looked up the silly holidays and found that March 28 is food on a stick day. My mind instantly went to carnival food like corn dogs, and that’s how the confetti carnival theme came about! I created a mood board for the party (more on that coming to the blog soon!) and I began planning my purchases and menu. 

One of my goals for this party was to not generate a ton of trash afterwards. So, I purchased reusable supplies like the honeycombs instead of balloons. I decided not to use cute patterned paper/plastic plates because we had enough everyday plates for the guests. I also used our turquoise footed glass goblets that we never get to use with company and regular silverware. The only plates I got where these half circle plates because they just fit with the theme wayyyy too well, and I knew there was no way I’d find that affordably for a reusable set. I skipped paper straws altogether because no one really uses them anyway. 

Hailey-Half-Party-2.jpg

Carnival Party Crafts 

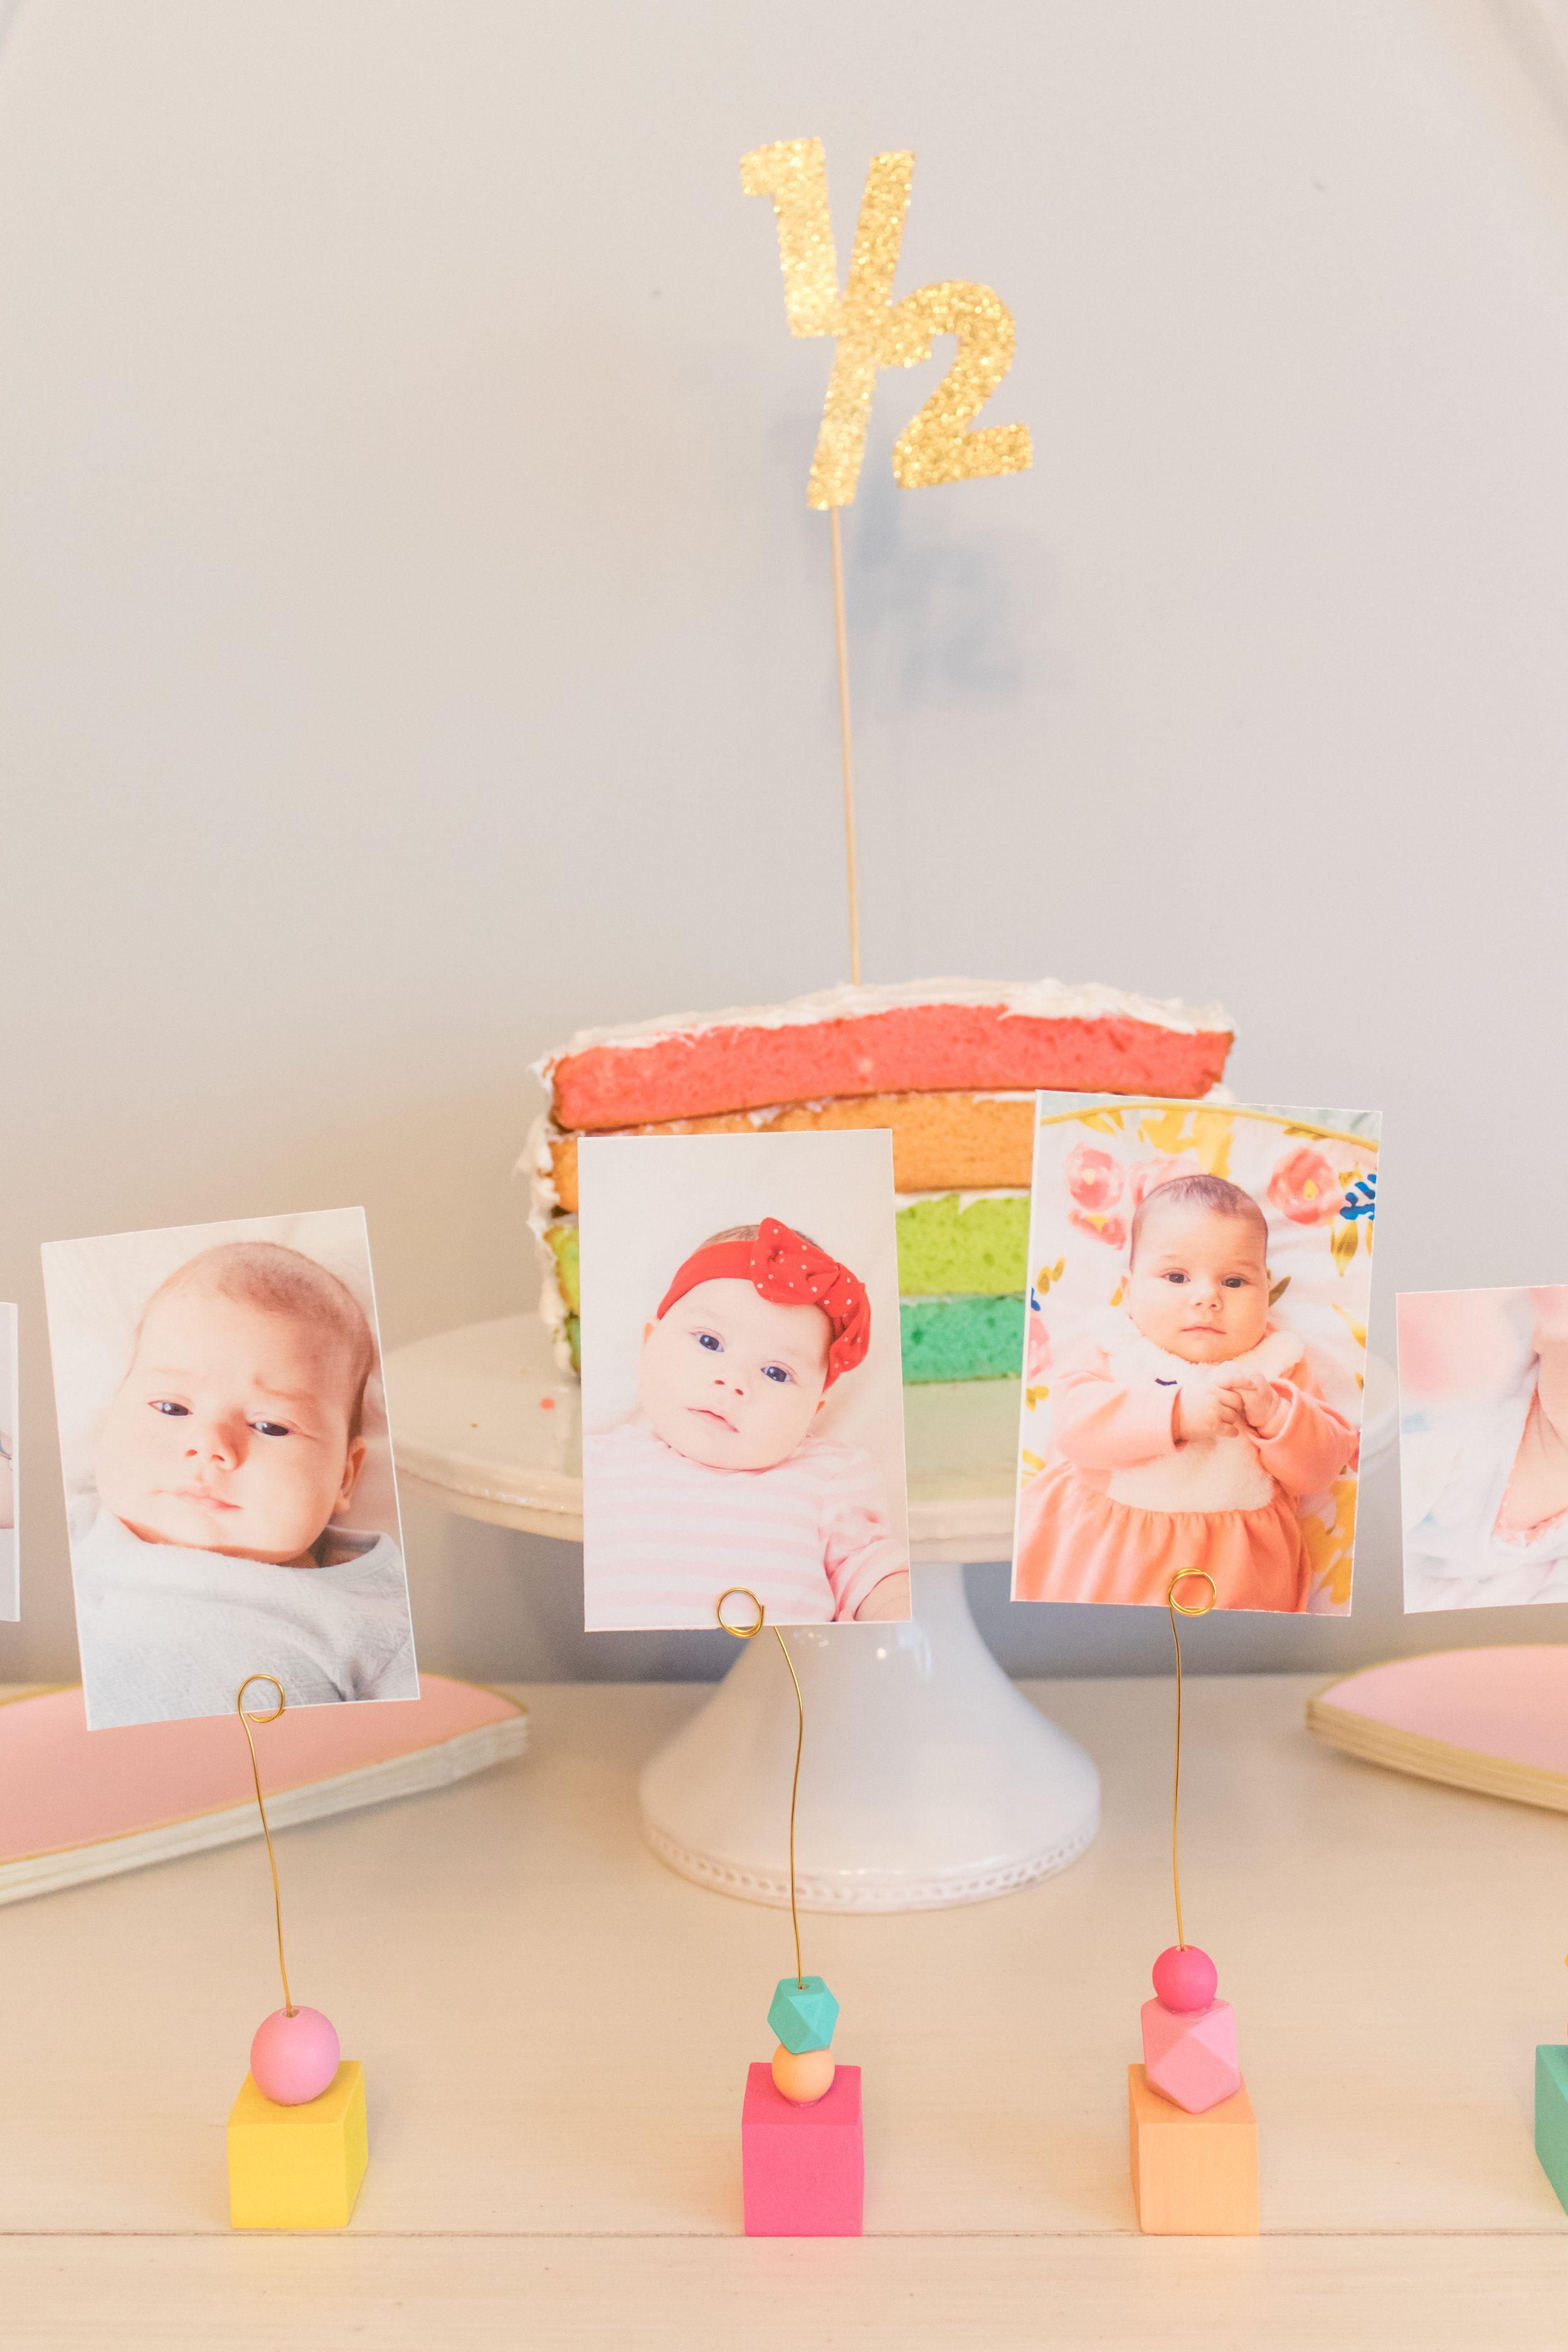
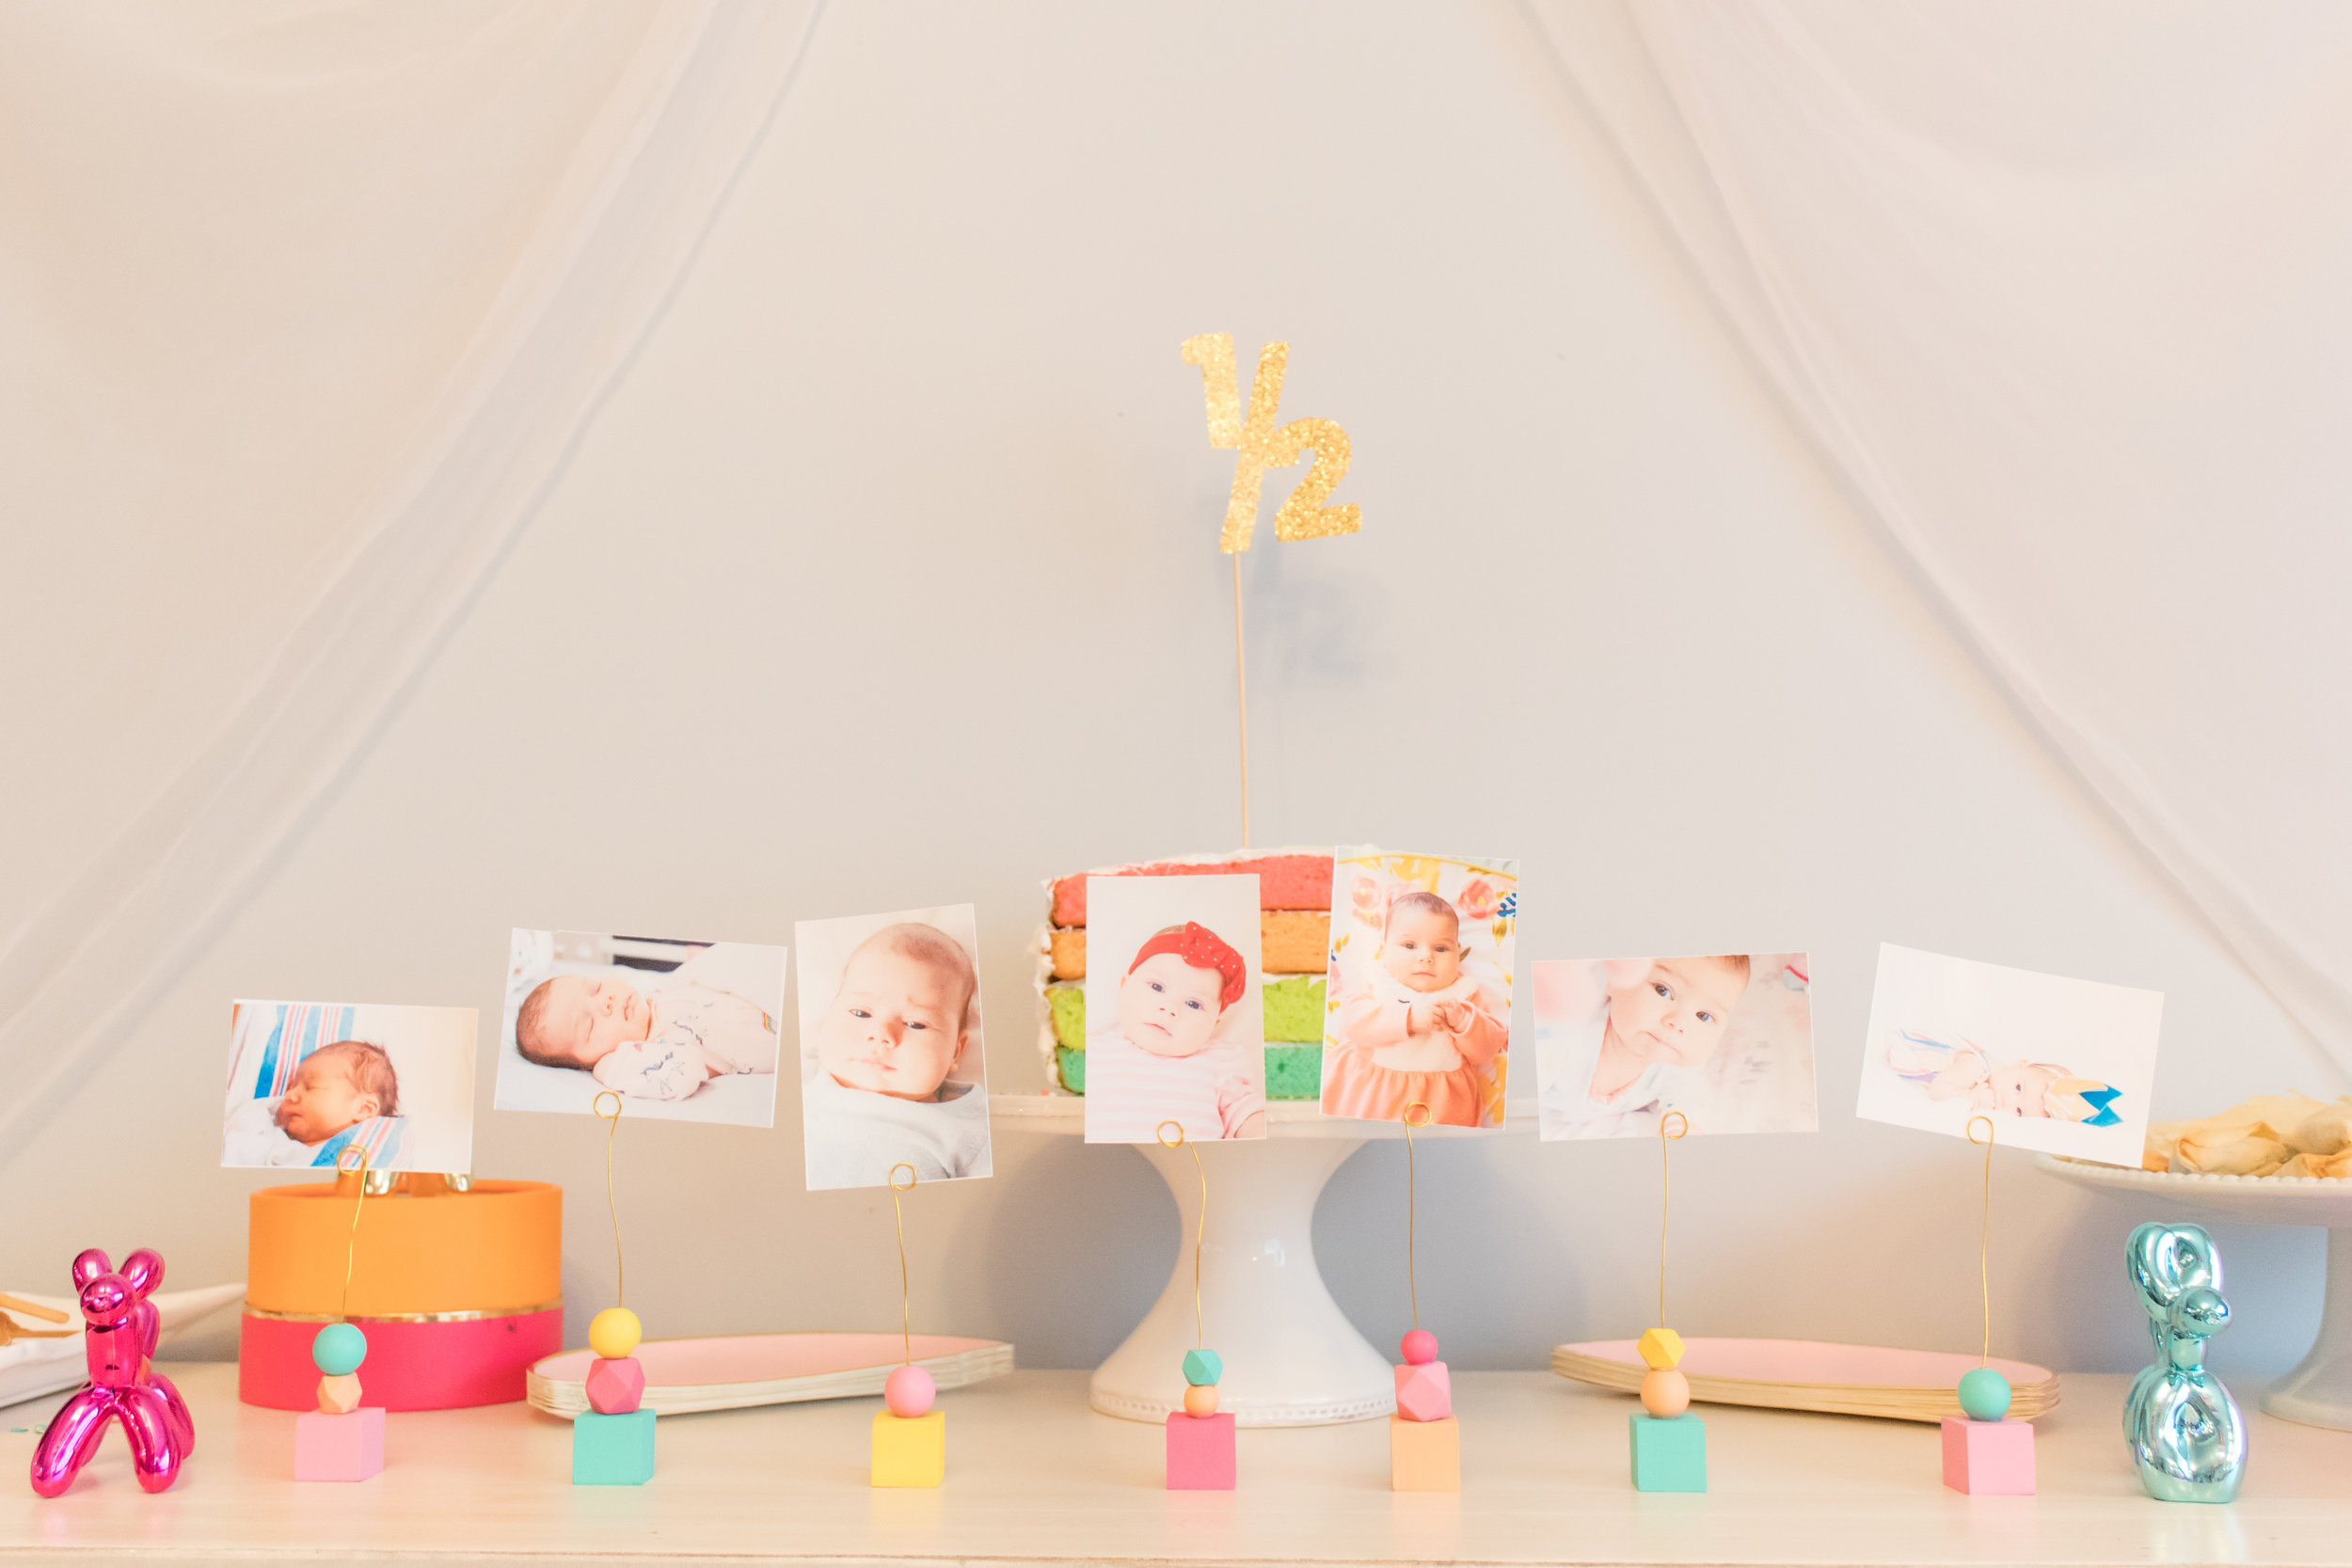
The good news is that all the fun DIYs that I did will be coming to the blog soon! I wanted to get this party post up before Hailey turned 9 months (or 9 years!) old. Like I said, I kept it simple and only did a few diy projects. I made Hailey a crown to wear with a 1/2 on it which at first seemed a little big but looked pretty cute overall. She wore it comfortably for most of the party! Then, I made a 1/2 cake topper. I had big plans for it with hanging ribbons but it looked funny, and 9pm the night before means you just gotta move on. I kept it simple with just glitter paper and a skewer stick. And lastly, I really wanted to display the photos I’ve been taking of Hailey each month so I made some picture holders! I picked my favorite photo from each month plus one from when she was first born.  It was really amazing being able to capture her growth each month because I can’t believe how big she’s gotten already and it hasn’t even been a year yet! I think I’m going to look back at these with such appreciation.

Psst- I made a baby photography course so that you can learn how to take better baby photos too! Learn more about Dreamy Baby Photography here.

Hailey-Half-Party-16.jpg
Hailey-Half-Party-47.jpg
Hailey-Half-Party-22.jpg

Carnival Party Decor

I knew I wanted to make a tent (even though it’s more circus than carnival) so I raided my fabric stash and found some tulle that I had bought for my veil, but it was too narrow. I would have preferred something bolder but hey, sometimes you just gotta move on! I also knew I wanted to have balloon animals, so I used these figures I had and put them around the house. Finally, I wanted to add some pizzazz to the party area so I purchased a set of tassel garlands and a pack of honeycombs and lanterns. I made some of the garland tassels thicker and some thinner (2 pieces of tissue paper vs 4) so I was able to make a ton of tassels and hang them up around the party area. I also used the tassels and the honeycombs to decorate the tent and give it more of a carnival feel. I also added my DIY cotton candy garland which is so fun and complimented the theme!

Hailey-Half-Party-27.jpg
Hailey-Half-Party-4.jpg
Hailey-Half-Party-8.jpg
Hailey-Half-Party-3.jpg
Hailey-Half-Party-14.jpg
Hailey-Half-Party-1.jpg

Carnival Party Menu

You can’t have a party without food! Well, you can but it wouldn’t be as good haha. We decided to keep the menu really simple (and cheap!) with traditional carnival fare. 

Popcorn chicken
Corn dogs
Mexican street corn (elote)
Loaded tot kabobs (recipe here)
Cotton candy
Cake pops
Popcorn
Buffalo wings (brought by family)
Spinach pies (common at Greek fairs!)

Hailey-Half-Party-13.jpg

Rainbow Layer Cake 

I decided that I wanted to do a layer cake and make it rainbow. I’ve never made a layer cake before nor a rainbow cake so I was a little worried. But it came out soooo cute! Since it was her half birthday I cut the cake in half, which left the layers out for everyone to see. The cake was actually really easy to make but in case you want a “tutorial”, here’s what I did. I used 2 white cake mix boxes and dyed them using neon McCormick dye. I sprayed the pans with flour spray which helped the cake not to stick to the pan. After they baked and cooled, I took them out of the pans and cut them flat using a long sharp knife. Then, I cut them in half and assembled the cake with a layer of frosting in between. Hailey was too young to eat the cake, but we took some pretty cute photos of her with the cake!

Hailey-Half-Party-32.jpg
Hailey-Half-Party-35.jpg
Hailey-Half-Party-36.jpg
Hailey-Half-Party-40.jpg
Hailey-Half-Party-46.jpg

I mean…. look at that rainbow gorgeous goodness! Not bad for my first attempt at rainbow cake and a layer cake. I served the cake on the half circle plates, because what better to eat half a cake on than half a plate?! Once the cake and dessert was served, Hailey opened a few gifts from my mom. We requested no gifts but she said she had purchased the items months ago and since my parents were moving, she didn’t want to lose them. Fair enough! Most of those toys ended up being some of her favorites.

Hailey-Half-Party-52.jpg
Hailey-Half-Party-62.jpg
Hailey-Half-Party-63.jpg

Such a fun and simple way to celebrate Hailey’s Half Birthday! Most of those decorations are still up, 2 months later. I love how festive the honeycomb balls and lanterns are! Even the circus tent is still up, although that’s probably due to laziness more than anything else. It’s hard to believe that in less than 4 months, we’ll be celebrating her first birthday. Seriously, where has the time gone and how do I stop it?!

Hailey-Half-Party-23.jpg
Hailey-Half-Party-24.jpg

Well, that’s all folks! I’ve got the individual DIY projects for this party (including the crown and photo holders!) coming to the blog soon, as well as Hailey’s monthly updates. It’s been a little busy around here and sadly I’m slacking on those! Part of me was thinking maybe I shouldn’t bother with them anymore but I think someday I’m going to look back at them longingly so I’m going to keep going! Keep an eye out for the DIY projects and don’t forget to follow me on Instagram for more behind-the-scenes plus reminders for new posts!

Colorful Easter Brunch Party Idea

Welcome everyone, to what is probably the last Easter party/DIY of the season. In all fairness, I’m Greek Orthodox so my Easter is next Sunday (April 8) and so for that I’m right on time! It’s always weird to get the timing right, since I’m always thinking I have an extra week. For this reason, I wanted to keep this Easter table really simple and colorful. And best of all, affordable! I realized a lot of blog posts and parties can break the bank, and I know us millennials are on a budget. Like, always... so, here’s a very cheap, easy, and gorgeous Easter setup made for any budget! 

*This post contains affiliate links.

A lot of blog posts and parties can break the bank, and I know us millennials are on a budget. Like, always... so, here’s a very cheap, easy, and gorgeous Easter setup made for any budget! 

I kept the table setup simple and glam by using this sequin table cloth. My sister got it for my bridal shower, and I’ve been using it ever since! It’s seriously gorgeous while not being too expensive. If you want to keep it even more budget friendly, opt for a white tablecloth (or whatever pastel color you have, really) and add a sequin table runner. At only $9 it’s a steal! All the glam, a fraction of the price. 

A lot of blog posts and parties can break the bank, and I know us millennials are on a budget. Like, always... so, here’s a very cheap, easy, and gorgeous Easter setup made for any budget! 

For the table settings, I stacked some inexpensive plastic plates as sort of “charger plates” and added a cute Easter plate on top. This plate was from the dollar store! Holla for a dolla!! I’m sure you could find something equally cute in your local dollar store but if not check Target or even Party City for another option. I got my napkins from Home Goods. Did you know they have a party supplies section?! With some awesome, hard to find brands as well. These are from Meri Meri and only cost me 5 bucks. Score! I added some gold utensils to make the polka dots pop and I just love how they pick up all the rainbow colors. 

A lot of blog posts and parties can break the bank, and I know us millennials are on a budget. Like, always... so, here’s a very cheap, easy, and gorgeous Easter setup made for any budget! 

Speaking of rainbow colors... how cute is this streamer paper backdrop?! It’s so easy and cheap to make. I got my crepe paper from, you guessed it, the dollar store! Then I measured out one piece to find the length, went color by color and cut out a whole roll of each. I had a lot extra (like, a lot...) so unless you’re doing a big wall, you may only need half a roll. Mine didn’t go all the way down either, so that would affect how much you need as well. Once I tore all the pieces to the right length (that’s right, tore with my hands... like an animal) I taped them up in color order. Super cute, super easy, super colorful. 

A lot of blog posts and parties can break the bank, and I know us millennials are on a budget. Like, always... so, here’s a very cheap, easy, and gorgeous Easter setup made for any budget! 

Now, to spruce up that table! I added some dollar store flowers I got last year and added the bunny ears I made last Easter. I put them in a simple milk jug vase that I got from (you guessed it!) the dollar store and placed that on a “placemat” that’s actually artwork! You can find the easy DIY for that here. I added some holographic Easter eggs (what?!) from Target filled with smaller Easter eggs. A small white crate from my wedding was filled with colorful rainbow Easter eggs and honeycomb balls. And, we can’t forget about bunny ears! A pile of headbands ensures that everyone is in the holiday spirit. 

A lot of blog posts and parties can break the bank, and I know us millennials are on a budget. Like, always... so, here’s a very cheap, easy, and gorgeous Easter setup made for any budget! 

And, let's talk about those blocks! I really wanted a set of pastel rainbow blocks for an Instagram project I was going to do. Unfortunately, they were impossible to find so I made my own! I have a DIY for these coming soon, but I couldn't resist adding them to my Easter post. 

A lot of blog posts and parties can break the bank, and I know us millennials are on a budget. Like, always... so, here’s a very cheap, easy, and gorgeous Easter setup made for any budget! 

And that’s all there is to it! A simple, affordable Easter table setup that will wow your family without breaking the bank. A lot of the items I either had on hand, used last year, or purchased very inexpensively. 

Pssst. Looking for some assistance planning your next big event? I can help! Visit my virtual party planning services page for more info and pricing.

DIY Paper Fan Christmas Tree

Merry (almost) Christmas! I'm trying to add some fun color to my decor this year! I wanted something really simple that had a great impact. It's no secret that I love paper fans, so I figured they would be the perfect focal point for my ornament making party! I teamed up with Oriental Trading to get all the supplies I needed. This DIY only takes a few minutes to put up, and it can be used again and again. It would look really cute starting lower and being a photo prop or even as a Christmas tree alternative for a small space. Let's get started!

*This post was sponsored by Oriental Trading. All projects and opinions are my own.

This DIY backdrop only takes a few minutes to put up, and it can be used again and again. It would look really cute starting lower and being a photo prop or even as a Christmas tree alternative for a small space. #paperfans #partybackdrops #christma…

You will need: 

This DIY backdrop only takes a few minutes to put up, and it can be used again and again. It would look really cute starting lower and being a photo prop or even as a Christmas tree alternative for a small space. #paperfans #partybackdrops #christma…

Paper fans (pink, red, blue, light green, dark green)
Tape
Stapler
string or similar

Directions

This DIY backdrop only takes a few minutes to put up, and it can be used again and again. It would look really cute starting lower and being a photo prop or even as a Christmas tree alternative for a small space. #paperfans #partybackdrops #christma…

1. Grab a few different colors and sizes of your paper fans. Lay them out on a floor, table, or other large surface.

This DIY backdrop only takes a few minutes to put up, and it can be used again and again. It would look really cute starting lower and being a photo prop or even as a Christmas tree alternative for a small space. #paperfans #partybackdrops #christma…

2. Open each paper fan and thread the string through the hole at the top. Then, place a small staple just under the hole. I know that the paper fans come with double sided tape, but sometimes it doesn't stick well, and better yet, this method allows you to re-use them! Reduce, reuse, recycle :)

This DIY backdrop only takes a few minutes to put up, and it can be used again and again. It would look really cute starting lower and being a photo prop or even as a Christmas tree alternative for a small space. #paperfans #partybackdrops #christma…

3. Start arranging your fans into a tree shape, starting at the bottom. I tried a few different color combos, and I found that using a pattern was better than going totally random. My pyramid (starting from the bottom) went 3 large fans, 1 large 2 medium, 3 medium, 2 small 1 medium.

4. Once you like your shape and color combo, take a string and roughly measure up the height of the tree and cut. I found that a pair of headphones I had was the exact height of the tree. You might be wondering, why are we doing this? We are using this string as a guide so we can make sure the tree is centered where we want it, and so that we can maintain the right distance between the levels! It's hard to tell when it's laying on the floor, and you don't want to tape everything up and realize it's all wrong.

5. Tape up your guide string, and take a look to make sure it's in the right place and the right height for your space. I placed mine high because I wanted it to be a backdrop for a table. 

This DIY backdrop only takes a few minutes to put up, and it can be used again and again. It would look really cute starting lower and being a photo prop or even as a Christmas tree alternative for a small space. #paperfans #partybackdrops #christma…

6. Starting at the bottom center, tape your first fan, making sure to move the guide string out of the way. Then, tape the next 2 on either side. I fit mine "together", like a zipper, since the pieces went into each other. This made the shape tighter and neater.

7. Go up the rows, adding the center fan and moving outwards. I also tried to cover the hanging string and cardboard of the one below whenever possible. Remember that the shape you created on the floor was an estimate. When you get it up on the wall, it might not look quite as good as it did on the floor. I ended up switching out the top levels and liked the shape much better.

8. You can add a star at the top, or even some small ornaments, like these holographic paper ornaments or quirky animal ornaments if you wanted to decorate it a bit.

This DIY backdrop only takes a few minutes to put up, and it can be used again and again. It would look really cute starting lower and being a photo prop or even as a Christmas tree alternative for a small space. #paperfans #partybackdrops #christma…

I think this backdrop is a great, easy addition for any holiday party! If you wanted to save some money, pick two main colors and alternate them for each row. You can also add a stem/base if you want, but mine would have interfered with the chairs so I left it off. Christmas is fast approaching, so head on over to Oriental Trading now to place your orders!

This DIY backdrop only takes a few minutes to put up, and it can be used again and again. It would look really cute starting lower and being a photo prop or even as a Christmas tree alternative for a small space. #paperfans #partybackdrops #christma…

How do you plan on using your tree? Christmas tree alternative? Door decoration? Photo Booth backdrop? Kids room decor? Let me know in the comments below!