DIY & Affordable Photo Backdrops

Today I want to talk about something a little different- photography backdrops! As you know, good photography is very important (especially here at Party HarDIY!) and sometimes you need to be creative about your photo backdrops. I had written a blog post about my favorite photography items a few months ago, so I wanted to follow up with some other backdrop options that you can try! These backdrops come in a variety of prices from all sorts of places. I hope it helps you to think about your photos in a new way!

*This post contains affiliate links

DIY & Affordable Photo Backdrops. Sometimes you need to be creative about your photo backdrops. These backdrops come in a variety of prices from all sorts of places. I hope it helps you to think about your photos in a new way! #backdrops #photob…

Paper Backdrops

DIY & Affordable Photo Backdrops

DIY Polly Pocket Iron-On Tee with Backdrop Paper in No. 37 Tulip

Backdrop Paper 
Probably the easiest to use, this backdrop paper is meant for photography! It's got a wide variety of colors and it's matte, so you don't need to worry about weird reflections in your photos. Also, it comes on super wide rolls, so you can have a seamless backdrop without having to photoshop out weird edges or seams. I even used it to make my wall look pink once! It can be a bit pricey but if you're careful, you can get maximum usage out of it.

Scrapbook Paper 
Available at any craft store or online, in literally any color or pattern you can think of, scrapbook paper is an affordable way to create a backdrop for small items. You can also layer the paper in interesting ways or angle it, etc.

Colored Cardstock
Colored cardstock is great for photographing small items like jewelry. I made a small hole in mine for the earrings, and I was able to keep the earrings in place while also keeping the look consistent across the different colors of paper and style of earrings. 

DIY & Affordable Photo Backdrops

DIY No Sew Embellished Shirt with wrapping paper backdrop

Wrapping Paper 
A nice mix of the papers above, I think wrapping paper is a great way to add some color or pattern affordably. It does have a slight sheen to it, so it can add a colorful "glow" to your items, but it's cheap enough to get tossed away. I love using it for DIY posts, which can get pretty messy. You can easily gather up the paper and toss it out- barely any cleanup needed!

Easel Paper Roll
Again, this type of paper is great for when you're making a mess! I used it when I was painting my colorful blocks and I wanted to keep the backdrop neutral. It allowed me to paint freely without having a bunch of cleanup after. It's also great for making a clean white backdrop or covering a table with some scratches on it.

Wood & Paint

DIY & Affordable Photo Backdrops

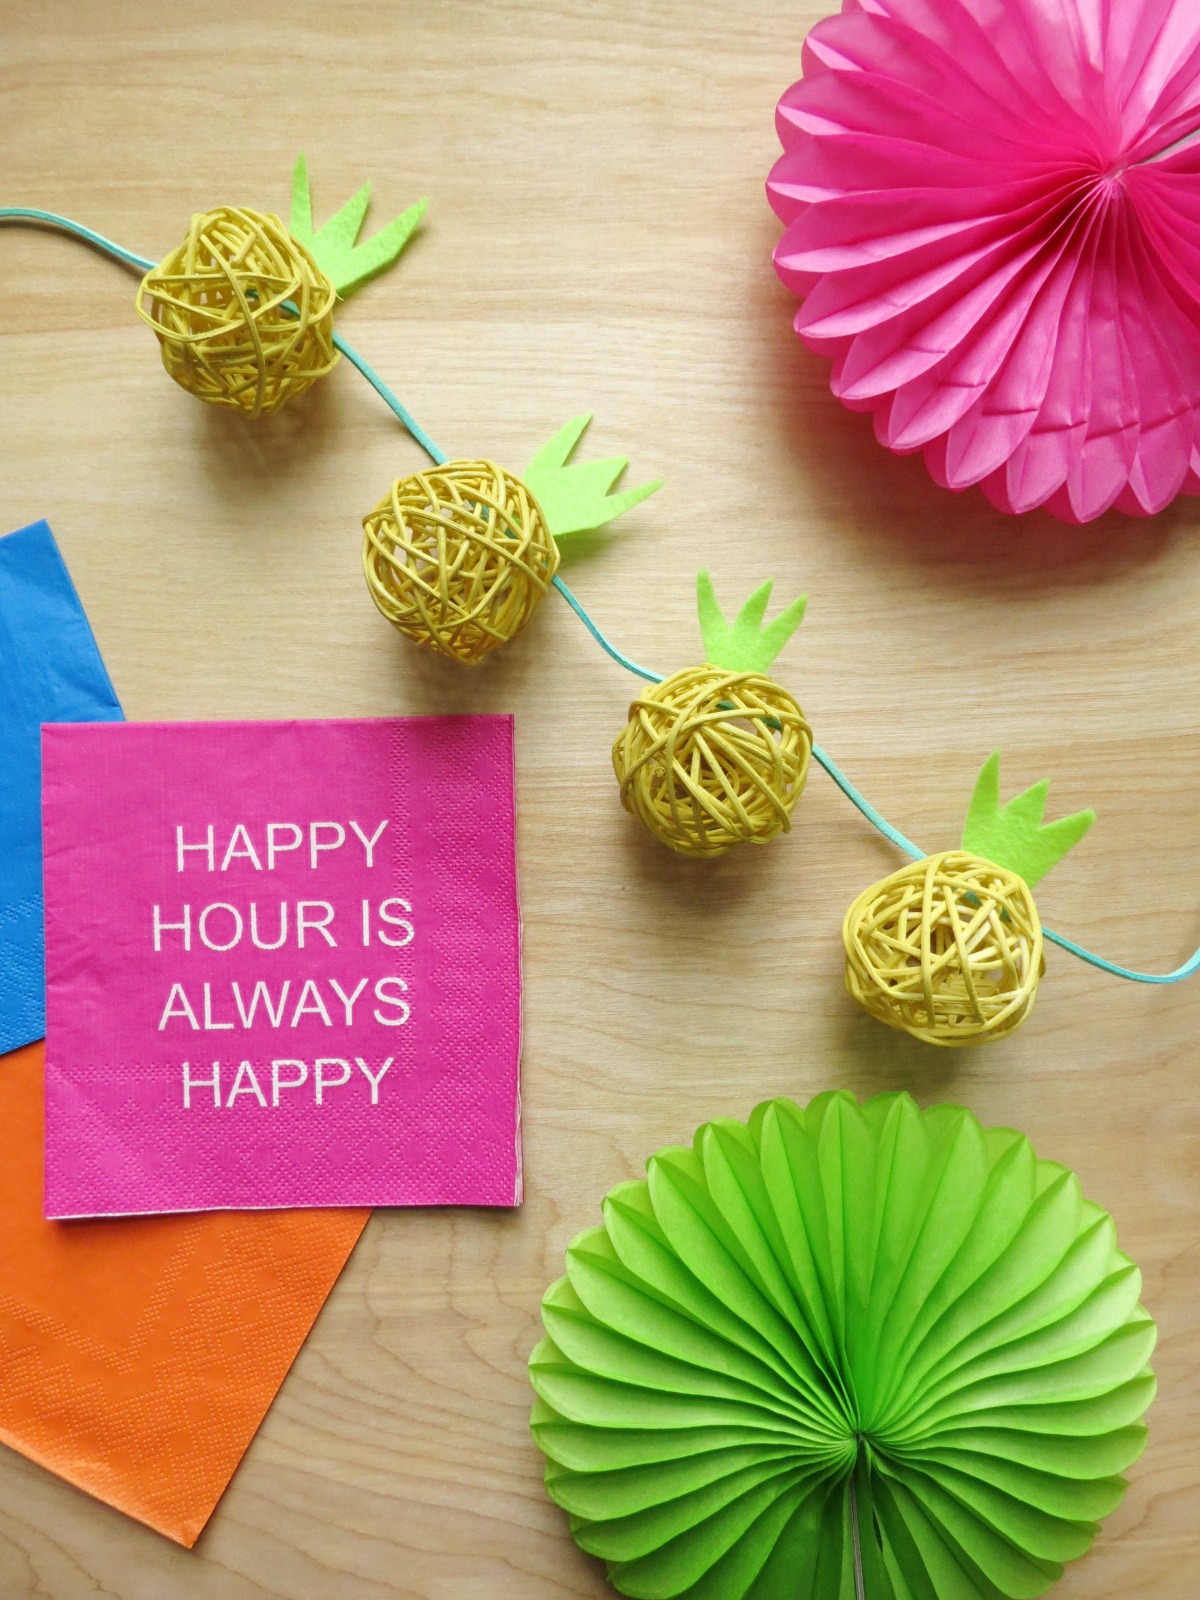
Pineapple Garland DIY with a Wood Backdrop

Painted Abstract Backdrop
If you're looking for something quirky and fun, this painted backdrop is for you! Damask Love used it as a large backdrop for portraits but you could totally make a smaller tabletop version if you wanted! 

Solid Color Photo Backdrops
If durable but simple is more your jam, try this painted wood backdrop! It's really easy to make using plywood panels and house paint samples. 

Stained Wood Backdrop
If you like something a little more rustic, try a stained wood backdrop! This tutorial shows you how to whitewash as well as how to add a colored tint to your wood. 

Colored Wood Paneling
If you like the look of paneling, or if you want it to look like a floor/wall, try this colored paneling DIY. This one is so cute, I think I may just have to make one for myself!
 

Party Backdrops

DIY & Affordable Photo Backdrops

Hey Girl: Ryan Gosling Gender Reveal with Paper Fan Backdrop

Paper Fans
Paper fans are such a cool and easy way to make a statement! I have used them countless times, as both a small photo backdrop or a large scale party table backdrop. I never use the glue it comes with and instead prefer to paper clip them or staple them so that they're reusable! More info on that here.

Balloons
Although they aren't great for the environment, balloons can be such a cool way to make a statement! You can do a balloon arch, make them into letters or numbers... the possibilities are endless! Check out my Balloon Pinterest board for some fun ideas.

Sequin Tablecloths & Runners
If you've got a sequin table runner or tablecloth, they make a PERFECT sparkly backdrop for your pics! You can see how I used it here and here (scroll down).

DIY & Affordable Photo Backdrops

DIY Disco Ball Earrings with Fringe Curtain Backdrop

Fringe Curtains
These are a super cheap and easy way to transform an ordinary wall. They're fairly large and come in all sorts of colors, so they make the perfect backdrop! They're sold everywhere- Amazon, Party City, even the dollar store!

Crepe Paper Streamers
Another dollar store staple, these party streamers make a really cool backdrop! You can mix and match colors, do various shades of the same color, or do all one color to create some depth as a backdrop. You can use them hanging on the wall with a piece of tape, or you can lay them down on a tabletop and place your item on top of them. Works either way!

Misc

DIY & Affordable Photo Backdrops

Mean Girls Conversation Hearts and Fabric Backdrop

Fabric
Although it can be wrinkled sometimes, a piece of fabric is a great way to add a pop of color to your photos. It comes in all sorts of colors, patterns adn textures, plus everyone has it lying around their house somewhere. For one post, I even used the fabric from my ironing board as a backdrop! You can also grab a curtain, a blanket or a tablecloth too!

Foam Boards
In what is probably the easiest and cheapest backdrop of all, you can grab some foam boards from your local dollar store or Target and use those for a backdrop. They're also great for bouncing light, so be sure to place them around your subject while facing the window (aka... don't block the window light with a foam board!) to maximize the light coming in.

DIY & Affordable Photo Backdrops

Tissue Paper
I think I've only used tissue paper as a backdrop once, but I really liked the look so I have to try it again! Since tissue paper is somewhat sheer, it can give you an interesting look if you layer it over another pattern/paper. Mine had some folds, and it made for a great, lightly textured background. And best of all, it's cheap!

Vinyl Backdrop & Stand
I have my vinyl backdrop and stand permanently set up in my attic studio. Since the walls are sloped up there, it acts as a "fake wall" so that there isn't a giant shadow where the ceiling bends (see before pics here). It's large and wide, and can be even wider if you placed it the other way! I've used it on nearly every  and you can't even tell it's a fake wall most of the time!

DIY & Affordable Photo Backdrops

Cutting Mat
If you're a DIY blogger, chances are you'll be cutting something at some point! If you use a cutting mat, why not incorporate it as the backdrop of a photo? Mine is this really cool, bright pink color and it really adds a pop of color to a photo.

Matte PVC Backdrop
I saved the best for last! This is my most used backdrop, hands down. It's literally the backdrop in nearly every single photo I have. It cleans easily, it's bright white, and it's the perfect size for nearly every flatlay and DIY shoot I do. I purchased the entire collection of them, but I really only use the white one. I've had it for nearly 2 years now and I only had to replace it once because I spilled oil paint on it and it just wouldn't come off. After that, I made sure to use a cover in case things got too messy.

Well, there you have it! Tons of backdrop options for your next photo shoot. If you're looking to improve your photos further, I'm creating a FREE photography e-course to help you do just that! Be sure to sign up and get your workbook by clicking the photo below!

My Favorite Photography Items for Beginners

One of my favorite parts about blogging has become photography. I love seeing my DIY ideas come to life through my tutorials. I imagine people seeing the photo on Pinterest or Instagram, getting that excited feeling in their chest, and excitedly clicking on the link to see more. I remember the days before I had a blog, going onto Pinterest for hours and browsing all the amazing ideas on there. I also remember wishing I could have my projects on there too. The fact was though, my photos were NOT good enough to be on Pinterest. I'm a bit of a perfectionist, and I didn't want to be up there unless I could be as good as everyone else. I knew my craft ideas were good enough, but my photos were not.

I had a few skills I had learned over the years, including some from an intro to photography summer course in college. We learned a bit about the features of the camera, but we only used auto mode, and were told never to use flash. The class focused on teaching us about the composition of a photo (and what makes a good one) rather than really getting into the nitty gritty of how to use the camera. So while I took some really cool photos in this class, I found that my skills were really only good for taking cool photos outdoors.

When I started working on my blog around April of 2016, I used a few of my basic skills to take my first set of photos. Now, while the photos weren't necessarily bad, they weren't good either! They were dark, unevenly lit, and a bit blurry too. Not exactly the makings of a professional blogger! While they say comparison is the thief of joy, for me it was the catalyst to improve my photos...Right away. I upgraded all my equipment and finally started to see some major changes in my blog photos.  

Since I had a very limited budget for my photography upgrades, I found some decent equipment (mostly on amazon!) and made the most of it. I have to say though, these upgrades, along with new editing skills, took my photography game to a whoooole 'nother level. So, without further adieu, here's what I use (and love) for my blog photography.

Looking to improve your photography? I’ve got my essential items for beginner photographers that are super affordable! #photographytips #photography101 #betterphotography

Backdrop Stand- Since my attic has some lovely sloped walls, I needed something to give the illusion that they were totally normal, flat walls. I decided the easiest and probably cheapest solution was to go with one of these backdrop stands. It's been helpful for so many posts in conjunction with a seamless vinyl backdrop. I used to put it up only when I needed to take pics, but since I have the space, I just keep it up all the time. Sometimes I trip over it (ugh) but it's worth it to have the photo studio ready to go at any moment. This set comes with fabric backdrops, but I use a vinyl one which doesn't have wrinkles. See below for that!

Softbox Lights- In my honest opinion, these have been the most helpful change I made to my photo setup. Before I bought these lights, I couldn't take bright, evenly lit photos no matter how hard I tried. I was rejected from craft sites due to my photos and I didn't understand how I could possibly fix it, until I started using these lights. They are seriously a game changer, and they do fold down pretty small, so they can be stored in a closet or something. If you're serious about photography, I highly recommend getting them and finding a place to store them. I also suggest buying an extra set of bulbs. I accidentally knocked my lamp over and shattered a bulb and couldn't work for a few days while I waited for the replacement!

Seamless Vinyl Backdrop- This seamless vinyl backdrop is perfect for using as a backdrop on photos! I've used it for DIY's with larger items like my Cricut and for photos of myself. It's most useful for party posts, because my studio is in the attic with sloped walls, which don't look fab in photos. 

White Backdrop - for small desktop items, I purchased this small white backdrop. I put it on my desk/folding table to have a crisp white surface for photos. It's easy to clean and reusable, so it's perfect for craft projects. I do recommend covering it if you're doing something really messy though. One time I spilled oil paint on it and the stain couldn't be cleaned. But, for everyday stuff like glue, acrylic paint, or glitter, it's perfect!

Step Stool- If you are taking any kind of overhead photos, please oh PLEASE invest in a small step stool. DO NOT USE A CHAIR. I used a chair at first, whatever, I don't want to go downstairs and get the step stool. However, I did fall down and fractured my toe, and couldn't walk for a month! Then I had a walking cast for another month. Not worth it. Chairs are meant for sitting. So park your butt in your chair and order the step stool :p

Desk/folding table- To take all these photos, you'll need a nice, empty surface. I recommend having a dedicated desk for photos if you have the room. Otherwise, purchase a folding table so that you can have a dedicated surface when you need it, then put it away when you're done. Don't go too cheap with a folding table, because you don't want it to tip sideways or fall over if you accidentally bump it. This folding table is cool because the height adjusts! 

Canon Eos Rebel T6- In December 2016, I switched to this camera and it made a huge difference! This camera packs a lot of bang for your buck and it's a nice size. I didn't have a huge budget, so I use the 18-55mm lens it came with. Somewhere down the line, I hope to get a fancier lens, but this one works just fine for now. I hoarded gift cards for a while to buy this camera! If you've got a gift-giving occasion coming up (Christmas, birthday, graduation) be sure to spread the word that there's a camera you've got your eye on, and that all you really want is some assistance to purchase it! Or, have a family member (like a sibling or husband) suggest Visa/Mastercard gift cards to family members so that you can purchase it. If there's a will, there's a way.

Adobe Cloud- Aside from using Photoshop to edit photos (which works amazingly!) I use Bridge to sort my photos and Lightroom to do a tethered capture. This allows me to see my photos on my laptop screen and be able to assess them before I need to edit them! Since I'm usually doing DIY posts, my camera is way up and I can't see the viewfinder or screen at all. For only 10 bucks a month, these programs have made a world of difference for me!

Horizontal Camera Mount- ok DIY bloggers, this one is going to blow your mind!! You honestly need this if you're doing overhead shots! It's perfect for recipes, step by step tutorials, party setups, or any type of flatlay you can imagine. It's lightweight and perfect for getting a shot with your hands in it! 

Seamless Backdrop Paper- I purchased some backdrop paper in Tulip and Baby Blue and I want all the colors now! it's great for changing up the look of your photos or even your room. I used it for my Pink Disco NYE Party and my Polly Pocket Iron On Tee pics. It's not super cheap, but it comes with quite a bit of it!

Lens Cleaning Wipes- These are amazing for cleaning your camera lens, laptop screen, or even your cell phone. They don't leave streaks, dry quickly, and are lint-free. Plus, since they're individually wrapped, you can pop them in your camera, purse, laptop bag, desk... anywhere you may find yourself needing a screen wipe!

Mouse & Keyboard- When I use my laptop, I usually use it on my lap (hah) and use the trackpad to get everything done. But, when I'm taking photos, I use the tethered capture and have my laptop across the desk from me. So, I use the mouse to get everything done! I use it to click open apps, zoom in, and press the button on Lightroom to actually take the photo. The keyboard is obviously used for typing, but it's also good for zooming into pics with the space bar, or for rotating images without needing to right click and squint to see the options.

Inexpensive Tripod- If you're just getting started, I recommend starting out with an inexpensive tripod. I used this one for months while I browsed Ebay to find an affordable fancier one. But honestly, this one did a great job! It was able to hold my horizontal camera mount, and was perfect for taking photos horizontally. I mostly upgraded because I wanted to get a camera mount to take vertical headshots and photos.

Wrapping Paper- For smaller items or messy craft projects, I like to use some cheap wrapping paper to add a pop of color. It's easy to throw away and cheap enough that I don't mind. I buy mine at the dollar tree, but you can find them almost anywhere. I recommend something slightly matte so that it doesn't reflect too much of the item on it.

If you're looking to improve your photos, I've created a FREE photography e-course to help you do just that! Be sure to sign up by clicking the photo below!

So, there you have it. My favorite photography items for beginners and bloggers! What are your must-haves for your photos? Did I miss anything? Any questions I can answer? Let me know in the comments below!