Toddler Valentine Basket Ideas (On A Budget!)
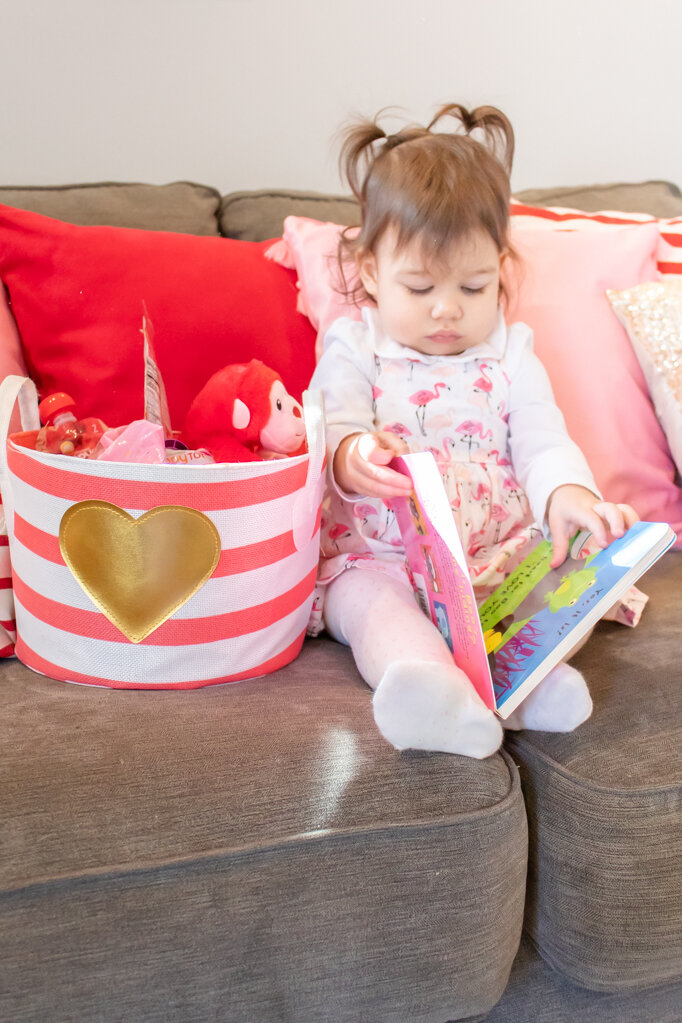
/While I was browsing the Valentine section at Target, I got the bright idea to make a Valentine’s day basket for my daughter, Hailey. I know that a Valentine basket technically isn’t a thing, but I love holidays and will take any excuse to celebrate. I started to ponder what I would put in my basket, and I was pretty bummed that I thought of the idea as we were essentially leaving the store. So, I made a list and decided to go back and grab what I needed another time (you know… before the inevitable meltdown began). I knew that I wanted my basket to be Valentine-themed, but I didn’t want to waste money on cheap crap or novelty items that she would only use for a day. This momma is on a budget and every purchase counts. So, I filled up Hailey’s basket with a few items that were fun, but could be used year round. Pretty much everything came from either Dollar Tree or Target!
*This post contains affiliate links
Here’s what I put in my Toddler Valentine Basket:
Red and pink snacks- Since Hailey is only 16 months old, I didn’t want to fill her basket with chocolates or candy. So, I grabbed some of her fave snacks and some new ones for her to try. She loved it and wanted her pouches and yogurt bites right away!
One stuffed animal- She’s not big on stuffed toys, so I grabbed this monkey from the dollar tree. She’s having a monkey moment since she knows how to make the sounds!
Bubbles- Hailey LOVES bubbles, so this big pack from the dollar store was perfect for her basket!
Toddler paint and paint brushes- I love to paint, so I decided to get a wooden heart from the Dollar Tree and some paints to go along with it. I can’t wait to paint with her again- we haven’t done it since she was a tiny baby!
Hershey Kisses- I had to give her some kind of chocolate! It’s a Valentine’s Day tradition. And what’s sweeter than a kiss?
Crayola Bath Items- I found these paint soaps at the dollar tree and I thought they would be a fun addition. At first she was very confused and even got mad at us for putting the paint soap on her! After a few tries, she realized she loved them and kept asking for more paint.
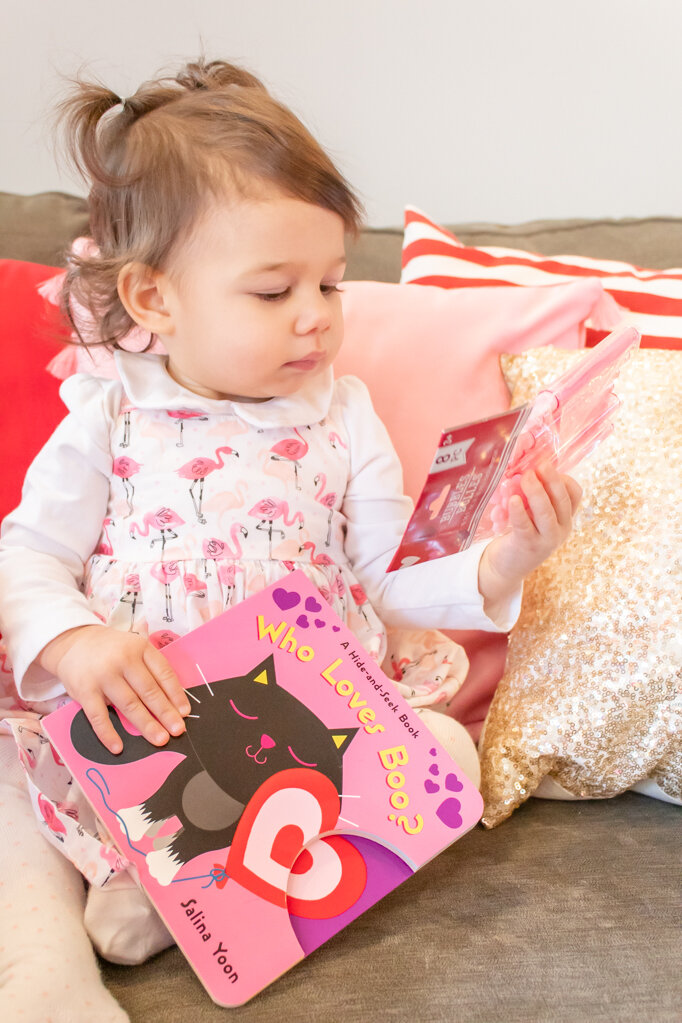
Valentine Book- Hailey loves the Halloween version of this book, so I decided to get her the Valentine version too! We’ve been reading it at night and she seems to like it.
Valentine Basket- This was actually something I had laying around the house if you can believe it! I was going to buy a basket but I figured I’d save the money. I have plenty at home I can use! Maybe next year (or for an older child) it would make sense to get a basket just for this- especially for a kid that likes to play with them.
Well, that’s all there is to it! There are so many items that you can add to a basket for your kids. You just need to be creative and think about what they like! Pick 2-3 colors for your basket that you’d like to stick to and it’ll be perfectly pretty. Or, just grab their favorite items and make it a “love” basket- you know, full of things they LOVE!


What would you put in your child’s basket? Let me know in the comments below!