Colorful Easter Brunch Party Idea

Welcome everyone, to what is probably the last Easter party/DIY of the season. In all fairness, I’m Greek Orthodox so my Easter is next Sunday (April 8) and so for that I’m right on time! It’s always weird to get the timing right, since I’m always thinking I have an extra week. For this reason, I wanted to keep this Easter table really simple and colorful. And best of all, affordable! I realized a lot of blog posts and parties can break the bank, and I know us millennials are on a budget. Like, always... so, here’s a very cheap, easy, and gorgeous Easter setup made for any budget! 

*This post contains affiliate links.

A lot of blog posts and parties can break the bank, and I know us millennials are on a budget. Like, always... so, here’s a very cheap, easy, and gorgeous Easter setup made for any budget! 

I kept the table setup simple and glam by using this sequin table cloth. My sister got it for my bridal shower, and I’ve been using it ever since! It’s seriously gorgeous while not being too expensive. If you want to keep it even more budget friendly, opt for a white tablecloth (or whatever pastel color you have, really) and add a sequin table runner. At only $9 it’s a steal! All the glam, a fraction of the price. 

A lot of blog posts and parties can break the bank, and I know us millennials are on a budget. Like, always... so, here’s a very cheap, easy, and gorgeous Easter setup made for any budget! 

For the table settings, I stacked some inexpensive plastic plates as sort of “charger plates” and added a cute Easter plate on top. This plate was from the dollar store! Holla for a dolla!! I’m sure you could find something equally cute in your local dollar store but if not check Target or even Party City for another option. I got my napkins from Home Goods. Did you know they have a party supplies section?! With some awesome, hard to find brands as well. These are from Meri Meri and only cost me 5 bucks. Score! I added some gold utensils to make the polka dots pop and I just love how they pick up all the rainbow colors. 

A lot of blog posts and parties can break the bank, and I know us millennials are on a budget. Like, always... so, here’s a very cheap, easy, and gorgeous Easter setup made for any budget! 

Speaking of rainbow colors... how cute is this streamer paper backdrop?! It’s so easy and cheap to make. I got my crepe paper from, you guessed it, the dollar store! Then I measured out one piece to find the length, went color by color and cut out a whole roll of each. I had a lot extra (like, a lot...) so unless you’re doing a big wall, you may only need half a roll. Mine didn’t go all the way down either, so that would affect how much you need as well. Once I tore all the pieces to the right length (that’s right, tore with my hands... like an animal) I taped them up in color order. Super cute, super easy, super colorful. 

A lot of blog posts and parties can break the bank, and I know us millennials are on a budget. Like, always... so, here’s a very cheap, easy, and gorgeous Easter setup made for any budget! 

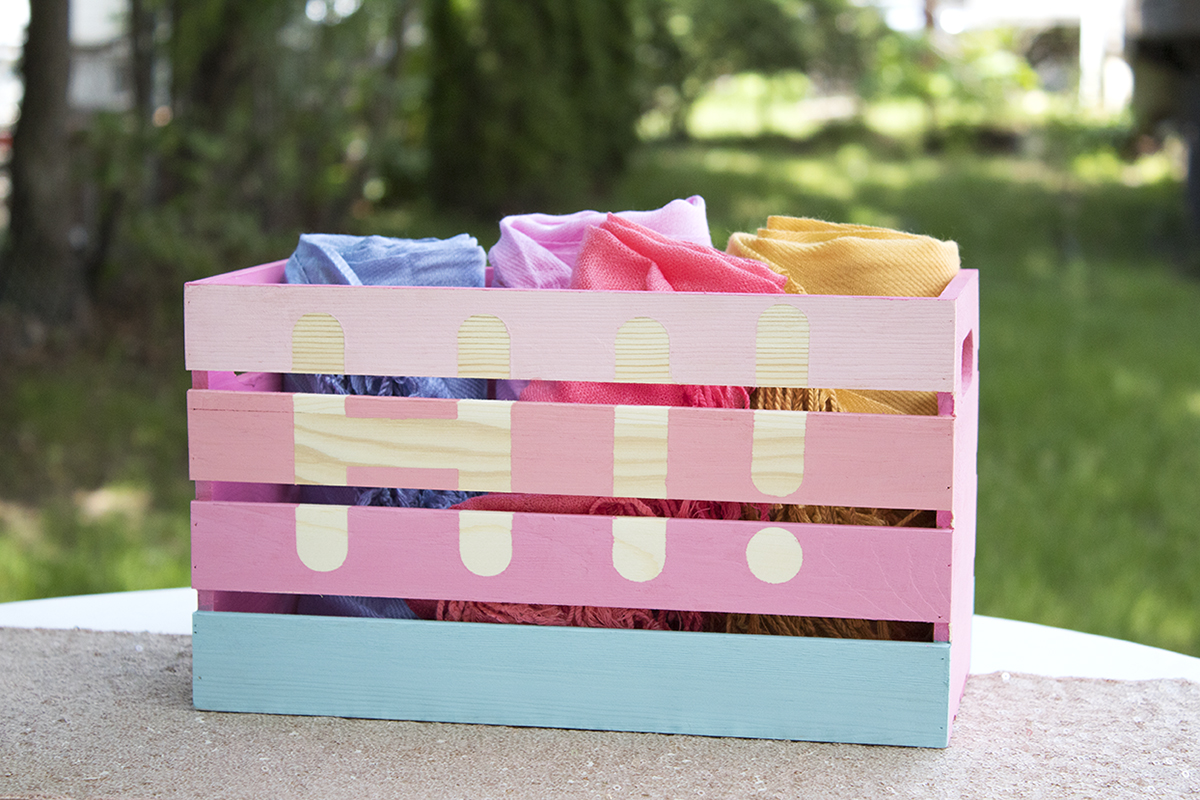
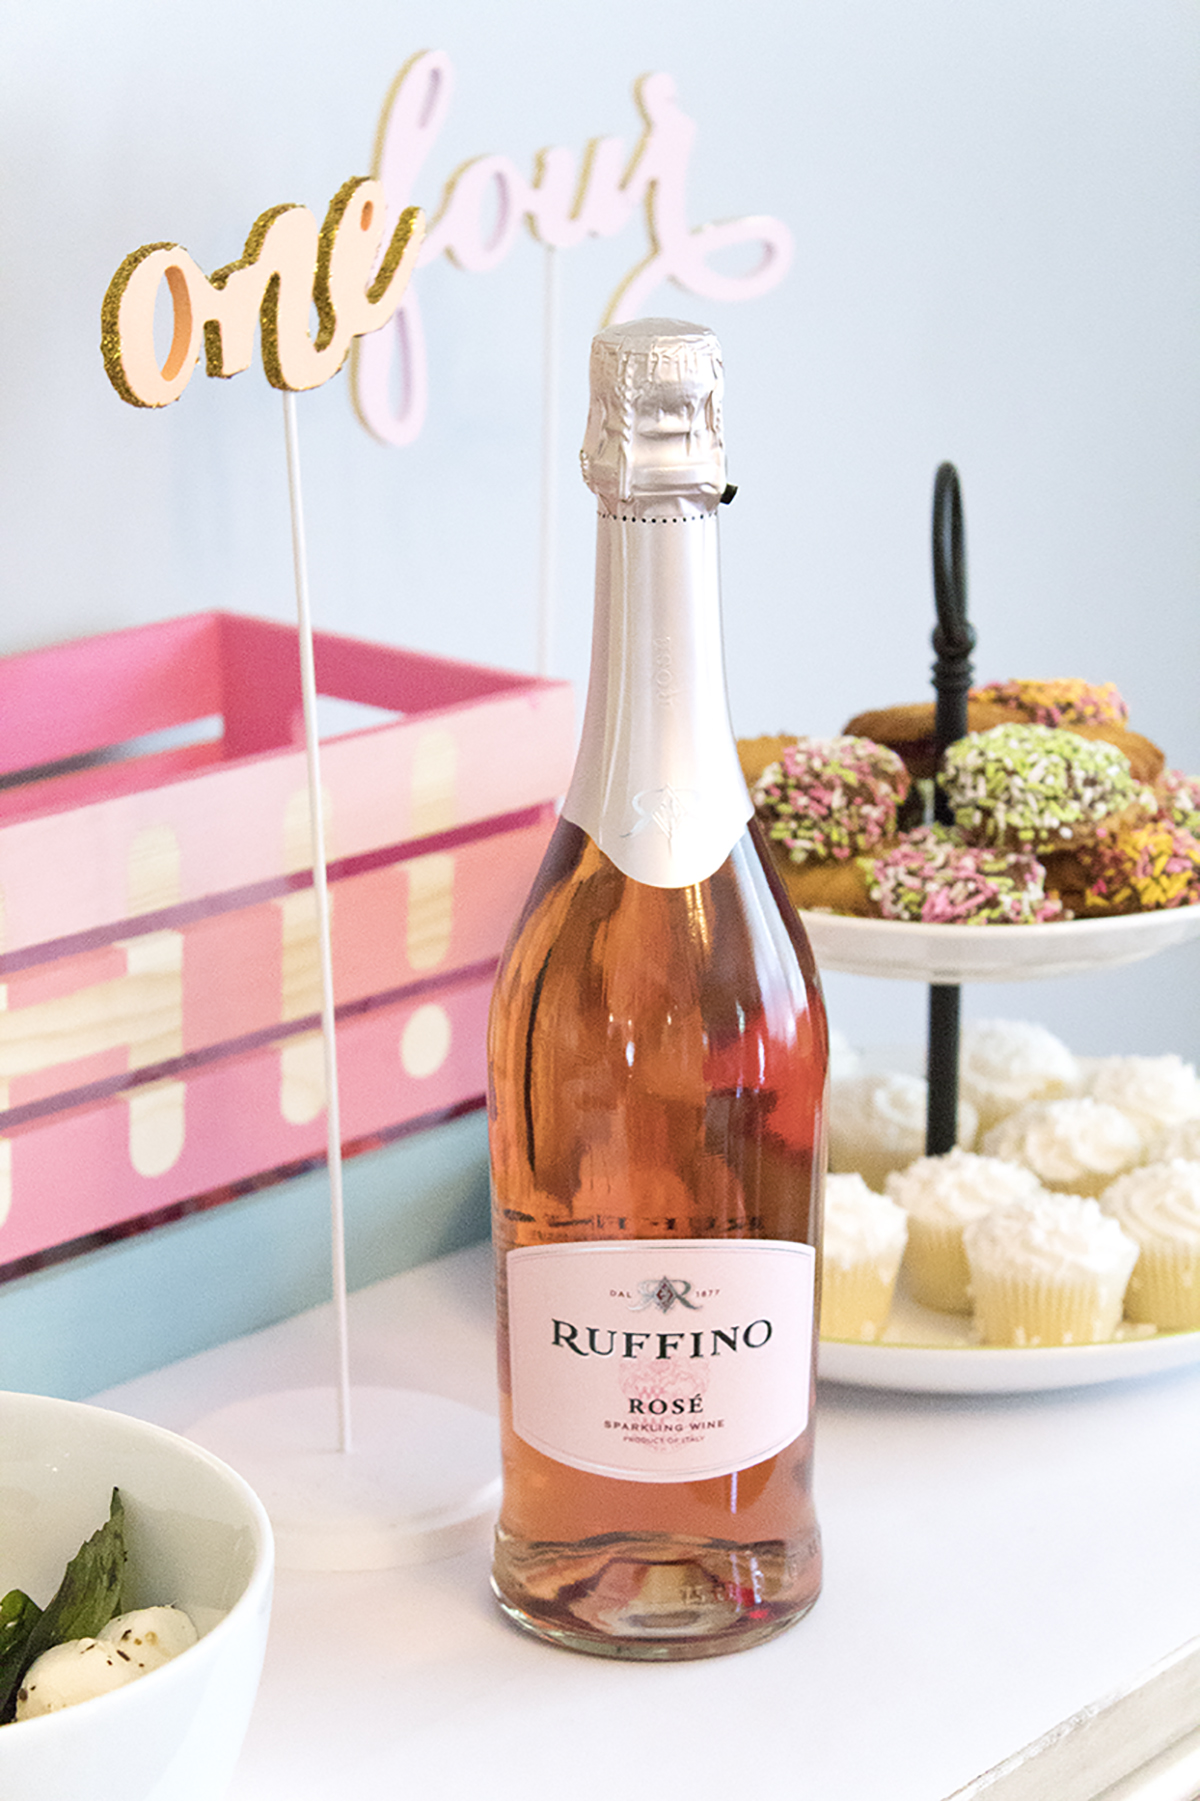
Now, to spruce up that table! I added some dollar store flowers I got last year and added the bunny ears I made last Easter. I put them in a simple milk jug vase that I got from (you guessed it!) the dollar store and placed that on a “placemat” that’s actually artwork! You can find the easy DIY for that here. I added some holographic Easter eggs (what?!) from Target filled with smaller Easter eggs. A small white crate from my wedding was filled with colorful rainbow Easter eggs and honeycomb balls. And, we can’t forget about bunny ears! A pile of headbands ensures that everyone is in the holiday spirit. 

A lot of blog posts and parties can break the bank, and I know us millennials are on a budget. Like, always... so, here’s a very cheap, easy, and gorgeous Easter setup made for any budget! 

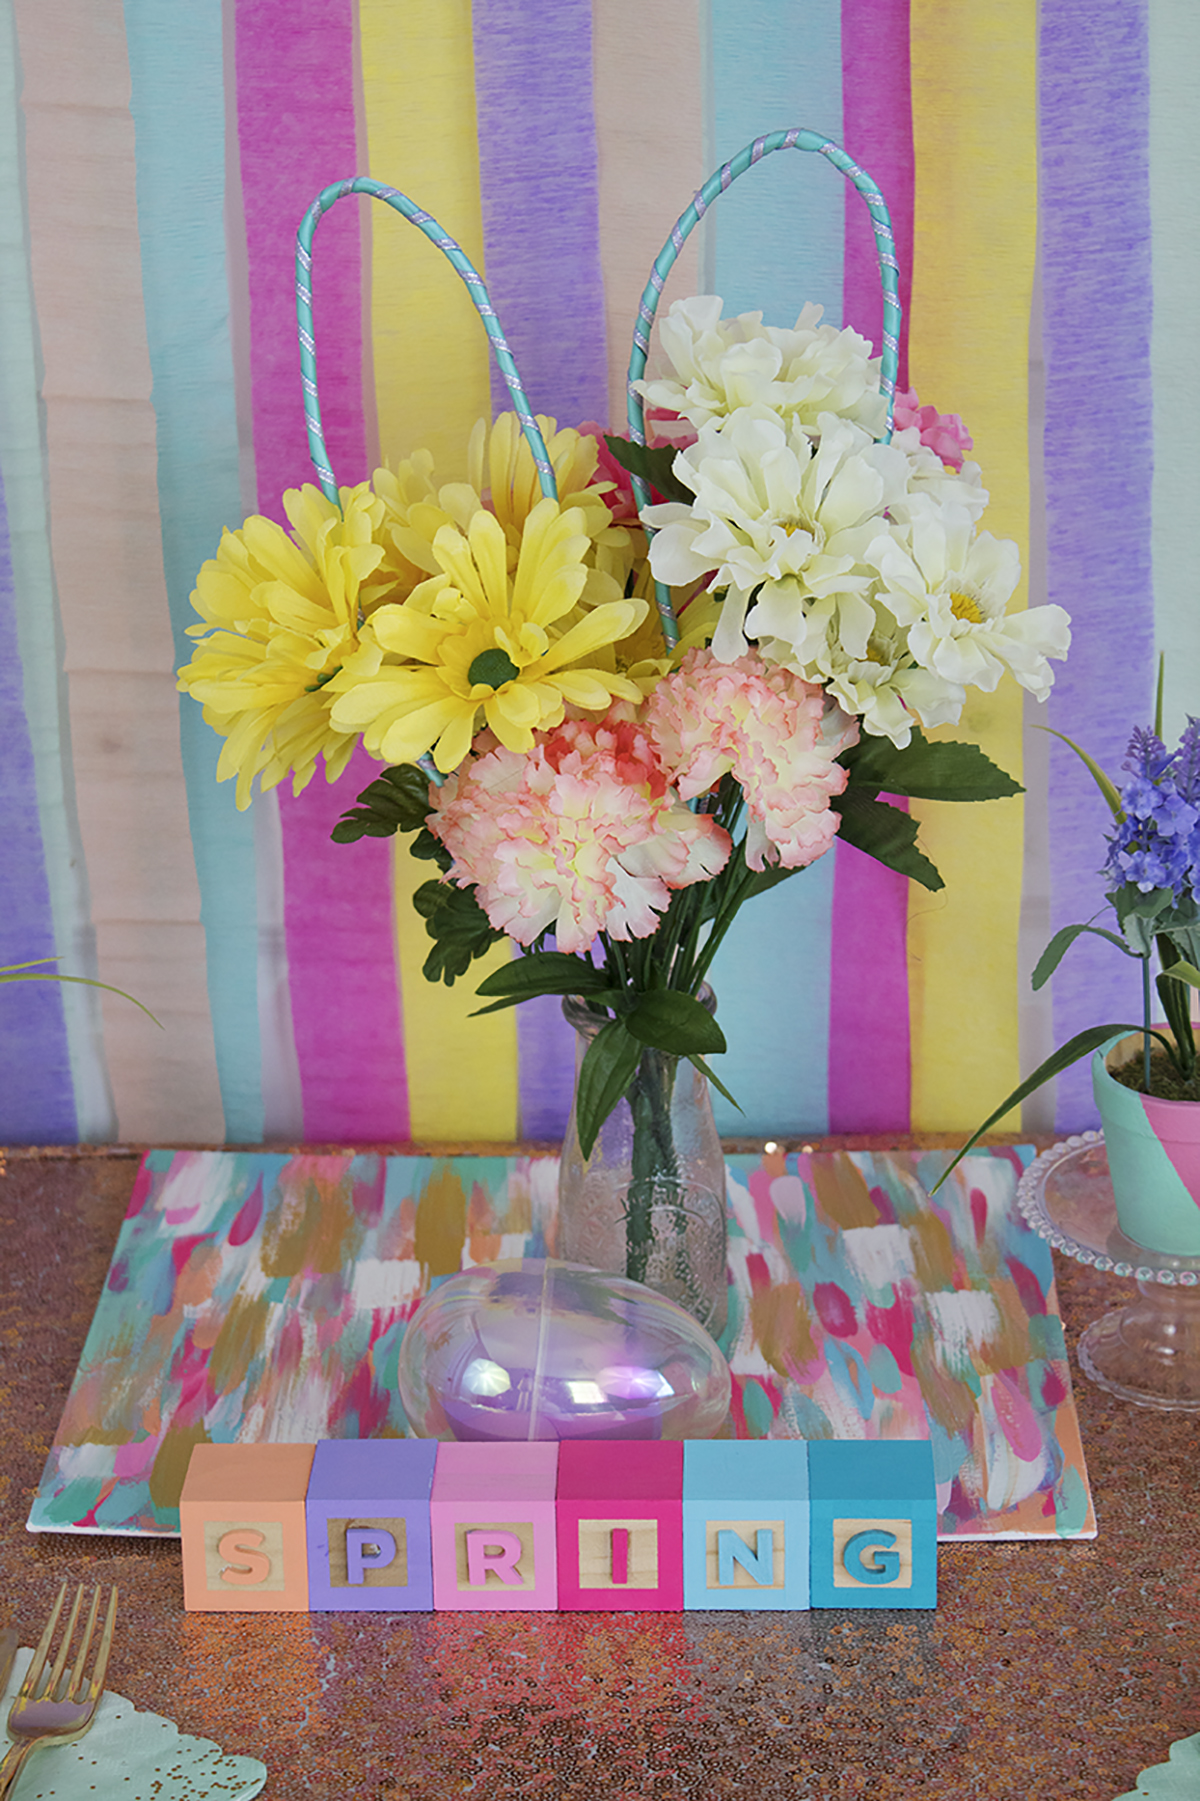
And, let's talk about those blocks! I really wanted a set of pastel rainbow blocks for an Instagram project I was going to do. Unfortunately, they were impossible to find so I made my own! I have a DIY for these coming soon, but I couldn't resist adding them to my Easter post. 

A lot of blog posts and parties can break the bank, and I know us millennials are on a budget. Like, always... so, here’s a very cheap, easy, and gorgeous Easter setup made for any budget! 

And that’s all there is to it! A simple, affordable Easter table setup that will wow your family without breaking the bank. A lot of the items I either had on hand, used last year, or purchased very inexpensively. 

Pssst. Looking for some assistance planning your next big event? I can help! Visit my virtual party planning services page for more info and pricing.

Adding a Pop of Color to Your Wedding

When you think of weddings, you think of white. While some may see that as very limiting, I see it as a blank canvas to incorporate any color you wish. Often, people add "wedding colors" and it's usually one shade of a color, like a deep purple or emerald green or blush pink. What if, instead of focusing on one color, you added shades of many colors? I think it would be a lot more fun (and a lot less stressful) to fill your wedding with complimentary hues. 

When it comes to adding some color (and fun!) to your wedding, look no further than Oriental Trading. They've got everything you need for weddings, whether you want to do a few crafts projects, get something that's personalized, or something that's ready to go out of the box. Plus, with their new Marry Me page of their website, all the wedding items are in one easy to find place. I call that a win-win.

*Note: This post is a collaboration with Oriental Trading, but all opinions are my own. My love affair with them started way back when I first got their catalogs as a kid!

Let those table numbers stand out! Click to see how I added a modern twist to this traditional wedding element, along with 2 other ideas to add a pop of color to your wedding!

Oriental Trading has everything you need to craft any project for a wedding or a party. Today, I've got 3 fun and easy projects you can make using Oriental Trading products and craft supplies. I've linked all the products I've used, so you've got everything you need in one easy-to-find place! Ok, enough with my blabbing... Let's get crafting!

Jordan Almonds 

Jordan Almonds don’t have to be boring! Click to see how I added a modern twist to this traditional wedding element, along with 2 other ideas to add a pop of color to your wedding!

You will need:

Jordan Almonds in your wedding colors (I used coral, light blue, and pink)
White Tulle (here)
Contrasting Ribbon (here)
Thank You Charms (here)
Spoon (here)

Jordan Almonds don’t have to be boring! Click to see how I added a modern twist to this traditional wedding element, along with 2 other ideas to add a pop of color to your wedding!

In many cultures, it's traditional to give out Jordan Almonds at a wedding. I'm Greek, and I can tell you for a fact that you can't attend a Greek wedding without receiving one of these bombonieres! For more info on Jordan Almonds, check this out.

How To:

Jordan-Almonds-GIF2.gif

1. Pick Jordan almonds in colors that match your theme.

2. Place 5 almonds in the tulle. I started by mixing my colors, but I realized I preferred all one color with a contrasting ribbon.

Jordan Almonds don’t have to be boring! Click to see how I added a modern twist to this traditional wedding element, along with 2 other ideas to add a pop of color to your wedding!

3. If you want the bow in the back, loop your tag onto the ribbon. If you want your tag in the front, add it as you're making the loop of the bow. Oriental Trading also offers personalized ribbon, which would be even better to add! 

4. Once you've decided how you want your bow, slide your almonds into the middle of your tulle, grab the sides, and tie your ribbon around it in a bow.

Jordan Almonds don’t have to be boring! Click to see how I added a modern twist to this traditional wedding element, along with 2 other ideas to add a pop of color to your wedding!

Table Numbers

Let those table numbers stand out! Click to see how I added a modern twist to this traditional wedding element, along with 2 other ideas to add a pop of color to your wedding!

You will need:

White Table Numbers (here)
Paint or Spray Paint (here)
Paint Brushes and Palette (similar here and here)
Gold Foil (here)
Gold Foil Adhesive (I used this one)
Gold Glitter (here)
Mod Podge (here)

Let those table numbers stand out! Click to see how I added a modern twist to this traditional wedding element, along with 2 other ideas to add a pop of color to your wedding!

People need to know where they're sitting, right? Why not lead them there in the brightest, glitziest way possible?!

How To:

1. Paint or spray paint your table numbers, but leave the edges blank. Do 2 coats, or as many as it takes to get smooth coverage, and let dry. (FYI- I used paint).

2. Paint the white edges of your numbers with foil adhesive. Work carefully so that you don't get it off the white edge. It sticks to anything with adhesive, so heed my warning and be careful!

3. Wait about 20 minutes for it to cure and be slightly tacky. Fun fact- this stuff dries sticky, so even if you wait a little too long, it'll still be sticky for the foil.

Let those table numbers stand out! Click to see how I added a modern twist to this traditional wedding element, along with 2 other ideas to add a pop of color to your wedding!

4. Take your foil and cut/rip to size, then attach it to the edges of the numbers. Take your stiff brush and brush off any extra foil. This stuff gets messy, so put a paper or a plate underneath so you don't make a huge mess :)

5. To do the glitter edge, mix gold glitter with mod podge. Using a paintbrush, paint the mixture onto the edges in small sections. Before the mixture dries, sprinkle some glitter onto the wet glue to cover any bald spots. Continue until you've done the whole perimeter, then go back and fill in any bare spots.

6. To travel to the venue, wrap each with white tissue paper to prevent scratches. Do not assemble them until you arrive, as they are fragile and may snap in transit. 

Let those table numbers stand out! Click to see how I added a modern twist to this traditional wedding element, along with 2 other ideas to add a pop of color to your wedding!


Welcome Basket

Your welcome basket doesn’t have to be formal! Click to see how I added a modern twist to this traditional wedding element, along with 2 other ideas to add a pop of color to your wedding!

You will need:

Wooden box (I used this one, but this one is better!)
Acrylic Paints (here)
Paint Brushes and Palette (similar here and here)
Self Adhesive Letters (here)

Your welcome basket doesn’t have to be formal! Click to see how I added a modern twist to this traditional wedding element, along with 2 other ideas to add a pop of color to your wedding!

Show your friends and family that this is bright occasion from the start with this fun welcome basket! You can also re-use it after the wedding to hold mail or greet guests in your entryway!

How To:

1. Take your letters and put your message on the box. I chose to keep it simple and write "Hi!" You can also do the couple's initials or a monogram.

2. Mix up your paints until they are the right color. Use a toothpick or a thin paintbrush to stir. If the paint is too light, it'll make it hard to read the Hi, so be aware of that when painting your box.

Your welcome basket doesn’t have to be formal! Click to see how I added a modern twist to this traditional wedding element, along with 2 other ideas to add a pop of color to your wedding!

3. Carefully paint your basket. I did a different color for each bar to keep it interesting.

4. While your paint is still wet, carefully peel off your stickers using tweezers. If your box is like mine, I recommend you actually don't paint the inside of the box. It got really tricky with all the little rungs. Especially since I made my own colors, because I found that I would run really low and have to try really hard not to run out before I finished. 

5. Place your box on your welcome table and fill it with pashminas, ceremony programs, or bubbles!

Your welcome basket doesn’t have to be formal! Click to see how I added a modern twist to this traditional wedding element, along with 2 other ideas to add a pop of color to your wedding!

With a little bit of crafting, and a whole lot of imagination, you too can make your wedding unique with a fun pop of color. I've got a follow-up post coming with ideas for getting your gals together for a fun crafternoon, so stay tuned!

Be sure to visit Oriental Trading and their Marry Me page to start customizing your own wedding!

So what do you think? Will you be adding a pop of color to your wedding? How do you plan to do it? Let me know in the comments below!

Comfy Spring Outfit Tips

I've been trying to dress better these days,  since I think "yoga chic" could be used to describe my usual fashions. Sneakers are my best friends, and I'm in a committed relationship with leggings, long shirts and oversized sweaters. I've been feeling super comfy, but looking pretty darn frumpy. In the winter it's perfect, because if I have to go outside in 20-degree weather, you best bet I'm gonna be comfy! However, it's warm and it's spring. Time to ditch that workout wear and put on something a little more festive. Easter seemed like the perfect opportunity to switch up my wardrobe. 

*This post contains affiliate links.

Dressing cute for spring doesn't have to mean being uncomfortable! We're sharing our tips for finding your new spring look, including colorful clothes, trying new trends, and, most importantly, shoes! Click for the full post.

Even though I decked out my table with dollar store goodies, I ended up going to my uncle's house for Easter. It was a beautiful, warm day that turned into a rainy and cloudy one. There was an egg hunt, bible bingo (not my idea!) and some egg dyeing. Overall, it was a pretty relaxed but fun day. Since my uncle's house is known for being laid back, I decided to go with cute but comfy for my Easter outfit. 

Dressing cute for spring doesn't have to mean being uncomfortable! We're sharing our tips for finding your new spring look, including colorful clothes, trying new trends, and, most importantly, shoes! Click for the full post.

For starters, I really wanted to wear my new pink jeans from Old Navy. I bought them during their half off promotion, so they were a steal at less than $18. I wanted to add some color to the top of my outfit as well, and I thought the teal peplum added a fun vibe without being too childish. I'm whimsical, what can I say! I decided to keep my shoes neutral and wear my crocs wedges. You guys... if you think crocs are for old people or gardeners, you really need to go check out their website. Forrealz. Do it now, I'll wait. They have so many great shoe options nowadays. Wedges, sneakers, rain boots, flip flops, sandals, even heels! You name it, they've got it. I know you're wondering if I have a pair of those atrocious clogs. The answer is yes, but they're the slim ones and I only wear them in my yard or for grabbing the mail. I swear. Scouts honor! 

Dressing cute for spring doesn't have to mean being uncomfortable! We're sharing our tips for finding your new spring look, including colorful clothes, trying new trends, and, most importantly, shoes! Click for the full post.

Anyway, back to my outfit. At this point I was a little skeptical of my outfit. I kinda felt like an Easter egg, so I went down and asked my fiancé if I was too colorful. And he said something like "Is that even a question? Of course you are, but that's you." I found this answer to be pretty awesome (he's not classically, poetically romantic, so this was a compliment) so I felt brave enough to add on my tassel necklace. It makes every outfit way more fun! I seriously love this necklace. I feel like it's hit or miss- some people love it, some people... don't. Alas, it brings me joy and frankly the haters can keep sipping on that haterade. Yea, I'm talking to you John! (Ps, John is my fiancé. And in case you're wondering, no, he never reads my blog). 

Dressing cute for spring doesn't have to mean being uncomfortable! We're sharing our tips for finding your new spring look, including colorful clothes, trying new trends, and, most importantly, shoes! Click for the full post.

Speaking of John.. here he is dressed in his Easter best. A few weeks back, I saw this shirt at Target and was instantly drawn to it. I pulled it off the rack and brought it over to him and asked if he liked it. He said it made a good Easter shirt. I swear that this guy must have only owned grey, blue, and black before he met me. I really appreciate that he wears things like coral, aqua, and even pink now that we're together. In case you're wondering, this is his "why are you photographing me, I'm just eating a hot dog" face. And why am I photographing him while he eats a hot dog, you ask? Because I'm kinda clingy, had a camera in my hand, and really like to unintentionally annoy him. Whoops. 

Dressing cute for spring doesn't have to mean being uncomfortable! We're sharing our tips for finding your new spring look, including colorful clothes, trying new trends, and, most importantly, shoes! Click for the full post.

I gave John a break and went to hang out with my sister, Irene. I thought she really nailed the lazy-Sunday-meets-Easter outfit, so I decided to snap some photos of her. I love how quirky she is, and how she can look so good making the most ridiculous faces. When we were younger she always wanted to be just like me, but now I want to be like her. She's the ying to my yang. 

Dressing cute for spring doesn't have to mean being uncomfortable! We're sharing our tips for finding your new spring look, including colorful clothes, trying new trends, and, most importantly, shoes! Click for the full post.

Irene kept it comfy with jeans and a tank top. Her kimono was perfect for adding a pop of color while keeping it light. It was pretty hot earlier in the day, so it was perfect for covering up without feeling warm. Plus, it dresses the outfit up without being uncomfortable. She wore leather slip-on vans, which were comfy but a little fancier than wearing sneakers or cloth shoes. Her necklace is a fake pocket watch I bought her years ago. The lid came off and the clock stopped working, but she still loves it and wears it frequently. 

Dressing cute for spring doesn't have to mean being uncomfortable! We're sharing our tips for finding your new spring look, including colorful clothes, trying new trends, and, most importantly, shoes! Click for the full post.

Looking to upgrade your wardrobe now that spring has arrived? It's not too difficult!

Tips for a Comfy Spring Wardrobe 

  • Mix in dressier pieces with more comfortable ones. You don't want to be pulling at your outfit all day, so if your pants are slightly dressier or less comfortable, try pairing them with a comfy t-shirt for an effortless chic look.

  • Color is your friend! Don't be scared of it. Start small, like a colorful pair of shoes, jeans, or an accessory. You'll probably get loads of compliments on it, because people are automatically drawn to color! This should give you the confidence to mix it up a little more next time.

  • Wear layers. Most of the spring is a fluctuation between a warm morning, a hot afternoon, and a cool evening. Even if your outfit isn't totally pajama-comfy, it should at least be temperature happy. Be sure to check your weather app too!

  • Play with patterns. Try romantic florals, classy lace, and fun polka dots. I also love silky shirts with really fun and silly patterns like umbrellas, dogs, or pineapples! A fancier fabric will prevent it from looking too juvenile.

  • Go thrifting. This is a great way to try new styles and patterns without breaking the bank. I recently got a pink coat from the thrift store. After sewing on some new buttons and getting it dry cleaned, it's practically brand new! The best part is that it only cost me $15. It definitely would've cost way more at a department store, plus it's better for the environment. Reduce, reuse, recycle!

  • Try a new trend. I feel like every spring, something kinda ridiculous but comfy comes out that becomes the newest fad. Like the gypsy skirts, or gauchos, or skorts. Although you might cringe someday when you see photos of yourself in these items, it's worth trying something new and trendy. Plus it makes looking back at photos of yourself so much more fun.

  • Wear comfortable shoes. If there's one thing that should always be comfortable in warm weather, it's your shoes. First off, you're walking around A LOT. You want to be as comfortable as possible when you do so. Also, a lot of spring and summer shoes require you not to wear socks. Your shoes may be cute, but those blisters won't be. And neither will that hammer toe you're likely to get from cramming your foot into tight shoes. Skip the pain and go for something cute but doable. And, be sure to bring a cute tote to carry around your flats!

Dressing cute for spring doesn't have to mean being uncomfortable! We're sharing our tips for finding your new spring look, including colorful clothes, trying new trends, and, most importantly, shoes! Click for the full post.

1. Peplum Top 2. Bold Necklace 3. Ring 4. Comfy Wedges 5. Plaid Shirt 6. Pink Jeans 7. Floral Kimono 8. Tank Top 9. Dark Jeans 10. Vans Slip-Ons 11. Watch Necklace 12. Black Bracelet

I'm thinking I'll focus on finding some really cute but comfy shoes. I've already purchased 2 pairs so far! 

What's going to be your go-to item this spring? Do you like to switch to a colorful wardrobe in the spring, or keep it neutral? Let me know in the comments below!

DIY Zebra Party Tray

Did you know that in high school, there was a period of time that I wanted to be an interior decorator? I imagined myself creating gorgeous, perfectly curated homes filled with amazing goodies. I was eventually talked out of it, but I still have a desire to create a unique and beautiful home for my fiancé and myself. Although it's been a learning curve, I'm starting to figure out my style and realizing what works and what doesn't. I love to fill my home with one-of-a-kind, whimsical purchases. The kind of stuff that makes people want to look around and wonder where the heck I found this amazing item. But, my absolute, very FAVORITE thing to put inside my home is anything I made myself. I love telling people I made things. There's no better feeling in the world.

DIY Zebra Party Tray. Click for the full how-to!

The reason I love this zebra tray is because there really isn't anything else like it out there! I think it adds such a fun feel to any room. You can use it on your desk to hold your paperwork, on your coffee table to hold magazines, or in your kitchen to hold flowers and a notepad. It's also a great party tray for holding cocktails! The best part of all is that it's super easy (and cheap!) to make.

*This post contains affiliate links.

DIY Zebra Party Tray. Click for the full how-to!
DIY Zebra Tray. Click for the full how-to!

You will need:

DIY Zebra Tray. Click for the full how-to!

Aluminum baking tray (mine was from the dollar store, similar here)
Spraypaint (similar here)
Primer & gloss top coat (similar here and here)
Zebra figurines (here
E6000 glue (here)

How To:

DIY Zebra Tray. Click for the full how-to!

1. Purchase a tray. You'll want to look for something with a wide handle on either side, so that you can adhere your plastic animal. Also, be sure to avoid any trays with holes for hanging or too much branding. If you want to save a step, purchase a tray that you don't need to spray paint. For me, purchasing a baking tray ended up being the cheapest route.

DIY Zebra Tray. Click for the full how-to!

2. Spraypaint your tray using the color of your choice. I chose a glossy medium pink, but I think this tray would look AH-MAZING in yellow. I just didn't have any yellow spray paint on hand, and it was one of those rare 60 degree days in February, so I had to work with what I had. Be sure to prime it first and use a topcoat. If not, it'll be easy to scratch, and the paint won't adhere as well. Trust me... I speak from experience!

DIY Zebra Tray. Click for the full how-to!

3. Using E6000 glue, put a drop of glue on each hoof/foot, and wait for it to cure for 2 mins. Then place it down on the widest part of your handle. Let dry 24-48 hours before handling.

DIY Zebra Tray. Click for the full how-to!

This tray is the perfect size for holding paperwork on your desk! I have a love/hate relationship with paper, so I love that this cute tray keeps everything organized while making me smile.

Psst- Interested in the printable above? Just fill out this form to get our FREE Anatomy of a Pinterest Party guide!

DIY Zebra Tray. Click for the full how-to!

And, when it's time to party, you can kick those papers out and grab your drinking glasses! Let's take a moment to say RIP to the adorable pink ombre cup. My fiancé's brother accidentally broke one yesterday :(

DIY Zebra Tray. Click for the full how-to!

The teal glasses are from Pioneer Woman and are awesome! The cotton candy garland, party hats, and animal drink stirrers are all projects from the blog.

DIY Zebra Tray. Click for the full how-to!
DIY Zebra Party Tray. Click for the full how-to!

So what do you think of this zebra tray? You can create it with any animal. I also bought some schnauzers, and can't waittt to make another tray with them! Do you have any DIY projects in your home decor? Let me know about them in the comments below!

Colorful Home Accessories

I'm a little bit afraid of color. I know that seems surprising, considering my blog and crafts are pretty darn colorful, but it's true. My closet is pretty monotone, my artwork is dull, and even when I wanted the bright blue iPod, I went for the gray one. I tend to play it safe when it comes to color, because what if I get tired of the bright one? I always picked the neutral option. The safe one. It's for this exact reason that my house is now gray. My dad jokingly nicknamed my house 50 shades of grey. Everyone warned me, but I didn't listen. "Don't you guys get it? It's neutral! This means I can add in any color I want and switch up the decor, without having to repaint!" Um... no, it means your house is gray, Cathy, and it looks like a black and white movie. 

To remedy the fact that my house is now the first ten minutes of The Wizard of Oz, I've decided to inject color into it any way I can. I suspect this will lead my house to be a mish mosh of color soon, but trial and error is my friend, right? I've rounded up some colorful but whimsical home finds that are sure to brighten up even the most monochromatic home. 

I've rounded up some colorful but whimsical home finds that are sure to brighten up even the most monochromatic home. Click for the full list!

1. Yellow Brick Road Doormat- Let's start with a doormat that will remind us to keep it colorful. This doormat is bright, but subtle. It'll always remind you there's no place like home, to follow your dreams, and that everything you need to succeed can be found within you. Plus I guess it's a reminder to travel more? Haha.

2. Cat Candle- I love cats. I have 3 of them, which I used to think was weird, but now I get why people do it. What's the perfect way to show off your love of cats? How about this candle?! It's pretty darn amazing, but what's even better is what happens when you light it! Click the link to check it out.

3. Vases- this little vase collection would make such a cute table accent. I can see it with some small blooms, making everyday feel like spring. Plus, the mixed pinks and corals make it perfect for both the spring and fall!

4. Pink Vase- this vase is pretty, inexpensive, and a gorgeous color. Imagine it with some yellow flowers in the middle of a gray room?! So fresh and pretty. 

5. Utensils- I have these utensils and they're fabulous! My fiancé actually purchased them for me. We needed new ones and he said "I figured you'd like these". Why yes, yes I do. He's a man of few words, but I'm so lucky to have him. He gets me.

6. Balloon Animal- I guess we've established that I have an obsession with balloon animals, so clearly this is an obvious choice. It's whimsical, colorful, and adds a little party to the everyday. Win-win-win. 

7. Dog Bookends- Don't worry dog lovers- I have something for you too! These bookends will add a little extra color to a bland bookshelf. They'll take something serious like books and make it playful. Fun fact: I used to have 2 imaginary weiner dogs. I named them Princess and Pretzel.

8. Aromatherapy Diffuser- This little guy is perfect for adding a little bit of color to your home, but still keeping it simple. The wood is very neutral, and you can add essential oils to make your room calming! I think I need this in my life.

9. Rainbow Bowls- If you set your table and keep it that way as part of your decor, these would make it so cute and colorful! But if you've got 3 cats that love to lay across the table like mine do, these would look great on a shelf or in a glass cabinet. You can also spread them around the room with some candy inside. Since they're made of bamboo, they'll be less fragile than glass. 

10. Rainbow Jenga- Perfect for cheering up game night, this rainbow Jenga is so colorful, it can practically be decor! Plus, having it on display means you're WAY more likely to play it.

11. Umbrella Hooks- These are super silly, but for some reason I love umbrellas. Something about their shape I guess. Lucky for us, you don't have to worry about these umbrellas flipping upside down in a wind storm and getting yourself soaked. Not sure why opening umbrellas indoors is bad luck, but having them flip and fold outside in a rainstorm is not!

12. Orange Speaker- Both cute and practical, this speaker adds some charm without being too trendy. It reminds me of a tropical island, which is always a plus in my book. Turn it on, play some ocean sounds or tropical music, and drift away.

13. Bread Box- Having a bread box is pretty 1950's, HOWEVER, this one is aqua blue and perfect in every way. And, since bread doesn't really come in nice packaging and it'll stay fresher in the box than the bag, I think this is quite necessary for any kitchen. 

14. Yellow Cake Stand- I loveee cake stands. I have so many, but they're a great way to add a little something special to any room. Place this on your kitchen counter with cookies, on your dresser with some jewelry, or in your bathroom with some pretty soaps for a pop of color while staying classy.

15. Pantone Notebook- I know what you're thinking... a notebook isn't decor. And you're right. But it would look really cute on a coffee table, and if you ever need a reminder to keep it colorful, this notebook should do the trick! Embrace color, unleash your inner kid, and above all, have some fun! Use this notebook to jot down some decor ideas and get your colorful juices flowing.

Ok guys, now I need your help! What's your favorite way to add some color to a boring room?! Let me know in the comments below.