Striped Happy Halloween Sign

There's less than 2 weeks until Halloween, guys! This is not a drill!!

For some people, Halloween is a dark, spooky time of year where you get to proudly display your goriest items and scare the daylights out of people. For me, it's a time to be "spooky" by decorating with black, orange, green, purple and pink, with a touch of teal, because why not?  That's right, I'm that group that enjoys the cutesy side of Halloween- eating candy, dressing up in cute (and slightly sexy) costumes, and carving pumpkins. If you fall into that second group with me, you're going to LOVE this one!

Looking for a slightly creepy, slightly cute way to decorate for Halloween? You've got to see this striped sign! Click for the full DIY. #halloweencrafts #halloweenart #diyhalloween

I created this Striped Happy Halloween Sign for Giggles Galore and it's one of the easiest projects so far!  All you need for this DIY is a canvas, blue painter's tape, some black paint, and gold letters. It really pops in an entryway, and brings some fun, light-hearted humor to your home!

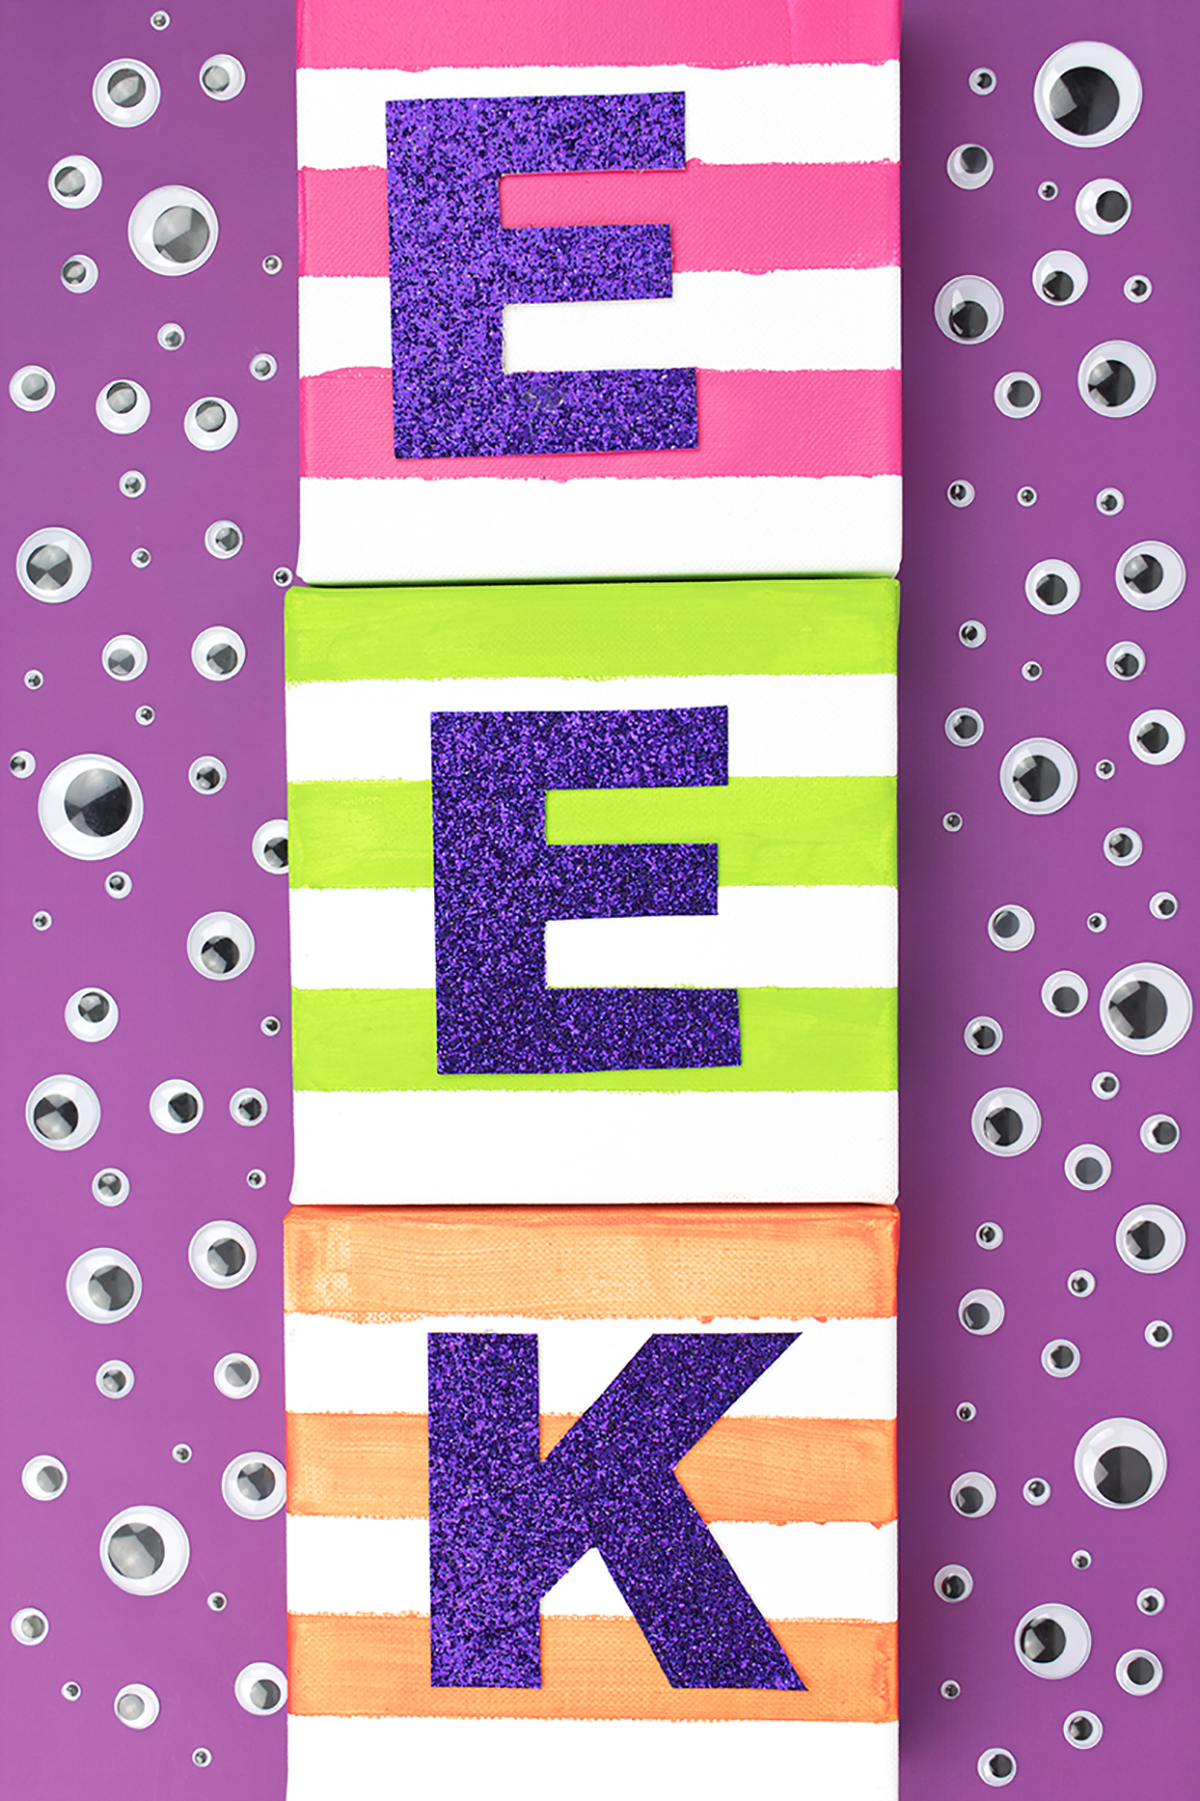
Head on over to Giggles Galore to see the full post! And, if your canvas needs a friend, try these EEK canvases too!

Looking for a slightly creepy, slightly cute way to decorate for Halloween? You've got to see this striped sign! Click for the full DIY. #halloweencrafts #halloweenart #diyhalloween

I hope you enjoyed this easy canvas DIY! Now, time for my question of the day that no one answers- what's your favorite part about Halloween? Is it dressing up, eating candy, scaring people, or staying home and hiding from everyone? Don't be shy! Let me know in the comments below.

Colorful Fall Pumpkin Wreath

Hey everyone! I'm back from my wedding and honeymoon, and suddenly it's fall. I mean, it feels like summer but the trees are changing colors, the kids are back in school, and I'm already working on my Halloween costume. 

In order to celebrate this weird Summer-Fall hybrid, I crafted a colorful pumpkin wreath to bridge the gap between the seasons. It's got a few of my favorite things- bright colors, pumpkins, and POM POMS!! It's a little kooky, but all the best people are ;)

You can find the full blog post over on Giggles Galore, so be sure to head over there and take a look!

In order to celebrate this weird Summer-Fall hybrid, I crafted a colorful pumpkin wreath to bridge the gap between the seasons. It's got a few of my favorite things- bright colors, pumpkins, and POM POMS!! It's a little kooky, but all the best peopl…

I used the spray painted pumpkins from my Glam Friendsgiving Party as inspiration for this wreath. I loved having some fun pumpkins around my house last year, so I wanted to create something that would show them off to everyone that passed by.

In order to celebrate this weird Summer-Fall hybrid, I crafted a colorful pumpkin wreath to bridge the gap between the seasons. It's got a few of my favorite things- bright colors, pumpkins, and POM POMS!! It's a little kooky, but all the best peopl…

I love how gorgeous and bright these pumpkins are! While I love traditional holiday colors, I also think it's really fun to break the mold and try to capture the spirit of the season with a completely different color palette.

In order to celebrate this weird Summer-Fall hybrid, I crafted a colorful pumpkin wreath to bridge the gap between the seasons. It's got a few of my favorite things- bright colors, pumpkins, and POM POMS!! It's a little kooky, but all the best peopl…

Be sure to head on over to Giggles Galore for the full tutorial!

DIY Zebra Party Tray

Did you know that in high school, there was a period of time that I wanted to be an interior decorator? I imagined myself creating gorgeous, perfectly curated homes filled with amazing goodies. I was eventually talked out of it, but I still have a desire to create a unique and beautiful home for my fiancé and myself. Although it's been a learning curve, I'm starting to figure out my style and realizing what works and what doesn't. I love to fill my home with one-of-a-kind, whimsical purchases. The kind of stuff that makes people want to look around and wonder where the heck I found this amazing item. But, my absolute, very FAVORITE thing to put inside my home is anything I made myself. I love telling people I made things. There's no better feeling in the world.

DIY Zebra Party Tray. Click for the full how-to!

The reason I love this zebra tray is because there really isn't anything else like it out there! I think it adds such a fun feel to any room. You can use it on your desk to hold your paperwork, on your coffee table to hold magazines, or in your kitchen to hold flowers and a notepad. It's also a great party tray for holding cocktails! The best part of all is that it's super easy (and cheap!) to make.

*This post contains affiliate links.

DIY Zebra Party Tray. Click for the full how-to!
DIY Zebra Tray. Click for the full how-to!

You will need:

DIY Zebra Tray. Click for the full how-to!

Aluminum baking tray (mine was from the dollar store, similar here)
Spraypaint (similar here)
Primer & gloss top coat (similar here and here)
Zebra figurines (here
E6000 glue (here)

How To:

DIY Zebra Tray. Click for the full how-to!

1. Purchase a tray. You'll want to look for something with a wide handle on either side, so that you can adhere your plastic animal. Also, be sure to avoid any trays with holes for hanging or too much branding. If you want to save a step, purchase a tray that you don't need to spray paint. For me, purchasing a baking tray ended up being the cheapest route.

DIY Zebra Tray. Click for the full how-to!

2. Spraypaint your tray using the color of your choice. I chose a glossy medium pink, but I think this tray would look AH-MAZING in yellow. I just didn't have any yellow spray paint on hand, and it was one of those rare 60 degree days in February, so I had to work with what I had. Be sure to prime it first and use a topcoat. If not, it'll be easy to scratch, and the paint won't adhere as well. Trust me... I speak from experience!

DIY Zebra Tray. Click for the full how-to!

3. Using E6000 glue, put a drop of glue on each hoof/foot, and wait for it to cure for 2 mins. Then place it down on the widest part of your handle. Let dry 24-48 hours before handling.

DIY Zebra Tray. Click for the full how-to!

This tray is the perfect size for holding paperwork on your desk! I have a love/hate relationship with paper, so I love that this cute tray keeps everything organized while making me smile.

Psst- Interested in the printable above? Just fill out this form to get our FREE Anatomy of a Pinterest Party guide!

DIY Zebra Tray. Click for the full how-to!

And, when it's time to party, you can kick those papers out and grab your drinking glasses! Let's take a moment to say RIP to the adorable pink ombre cup. My fiancé's brother accidentally broke one yesterday :(

DIY Zebra Tray. Click for the full how-to!

The teal glasses are from Pioneer Woman and are awesome! The cotton candy garland, party hats, and animal drink stirrers are all projects from the blog.

DIY Zebra Tray. Click for the full how-to!
DIY Zebra Party Tray. Click for the full how-to!

So what do you think of this zebra tray? You can create it with any animal. I also bought some schnauzers, and can't waittt to make another tray with them! Do you have any DIY projects in your home decor? Let me know about them in the comments below!