The Easiest (Reusable!) Packing List

I think there are several different opinions on the worst part about traveling. Some say it's packing, others say flying, or jet lag, or unpacking. Personally, I think the worst part (and my greatest fear) is forgetting something I needed. I have dreams, even when I'm not traveling, that I forgot to pack and therefore have to grab everything at the last minute. Also because in my dream I apparently "forgot" I had a trip too! Even if this were to happen someday, somehow, I'd be prepared. I have a packing hack that surpasses alllll the packing hacks. And the best part is that all you'll need is your iPhone or iPad. It's totally free, and really easy to use.

Never forget anything again! I have a packing hack that surpasses alllll the packing hacks. And the best part is that all you'll need is your iPhone or iPad. It's totally free, and really easy to use. Click to read more, along with some bonus featur…

All you need to do is go to the Apple pre-downloaded Reminders app. It comes standard on all iPhones and you’ve probably even used it before for something like a grocery list!

The first thing you want to do is open up your reminders app, press the (+) sign and create a new list. You can call it Packing List for now, or label it after the destination you are going to. Then, you're going to want to start typing out all the things you need to bring with you. I think the best way to do this is to use a laptop or other device to see a generic packing list online, and adapt it to your own items. Keep adding items, one at a time, until you have a completed list. Then, as you're packing, click each item to "check” it off your list.

Oh but wait. That's not all! This hack gets even better, because this list is reusable. Next time you are traveling, you can rename the list, click "show completed" and uncheck the items that you need to bring with you. You'll leave all the other stuff on there, but it'll be checked off so it doesn't show on your packing list. You can use this over and over, and you'll never have to worry about forgetting anything again! Plus, as long as you have your phone on you, you have your list. This makes it really easy to add things on the go!

Other features

If you want to be a little bit fancier, you can use one of these features as well.

1. Share with a friend/spouse. If you're traveling with a friend/spouse, chances are that they need the same items you do! So, create a list with all the items you both need and share the list so that they can be as organized as you are. This is perfect for avoiding double the items, so you can add things like a selfie stick, sunscreen, toothpaste, or even a portable speaker! Since the list is shared, this won’t be ideal for packing clothes because when they check the items off, your list will be checked too. But, this feature is great for a family because you can add all your kids’ items and know what exactly has been packed already!

2. Set a reminder for a location. This is perfect in case you need to get something from a certain store, pick up something a friend borrowed, or grab items from your storage unit. Or, you can set a reminder at the airport to grab a bottle of water, a magazine, or a snack.

3. Set a due date. You can set a deadline for the items that you don't use often, the ones you need to pack at the last second, and everything in between.

4. Add a priority. If you're an overpacker like me, this feature is great for prioritizing what needs to come, what you want to bring, and what to include only if you have room.

5. Add notes. You can use this section to list out the individual items (i.e., pink swimsuit, blue swimsuit, black one-piece). It's also handy for listing out a quantity (i.e., 6 pairs of undies) or a location (from garage).

Here’s a handy dandy video showing off the features! It doesn’t have sound, but you can see how I navigate around the app to get to the features and settings I mentioned above.

So what do you think? Will you be using this app for future trips? Do you know a better way? Let me know in the comments below!

Hailey's Nursery Organization Tour (Ideas On A Budget!)

I’m so excited to finally be sharing some sneak peeks of Hailey’s room! It only took 9+ months but hey, better late than never! I want to start by talking about how I organized Hailey’s room. My goal for her room was to be girly but pretty- something she could grow up with, instead of needing a total refresh as soon as she wasn’t a baby anymore. And, I wanted it to be fully functional, organized and GORGEOUS. I wanted everything to have a place and I wanted that place to be pretty. It definitely seemed silly at the time, and my husband thought it was ridiculous. However, every person that comes into her room comments on how pretty it is, including her closet. I leave the door open- it’s THAT nice! I even open up the drawers to show people how nicely everything is folded. My husband, who thought I was taking way too long to fold her clothes, recently said he wanted me to teach him how I fold her clothes because they definitely fit better when I do it. It’s the small victories.

Looking for some nursery organization ideas? Check out this colorful and affordable nursery tour! From the closet to the dressers, I’ll show you where to store all of baby’s essentials. #nurseyorganizationideas #nurseryorganizationhacks #nurseryorga…

I mean….. LOOK AT THAT CLOSET. It’s been several months and I still swoon over it. It’s gotten fuller since I took these photos a few months ago, but it still looks great. My favorite part of her whole room is those closet doors. I wanted to add a pop of color to her room without painting everything a bright hue. Originally, we were thinking to paint an accent wall but I couldn’t figure out which wall it should be. Mostly because I didn’t think any of them would be good for it! I remembered how much I loved the beautiful doors back in Greece and I decided to gather up some courage and ask my husband if we could paint the doors. Surprisingly, he agreed! I honestly think it was the best decision I could have made, because these doors make a statement without being cheesy.

Baby Closet Storage

Let’s venture inside the closet now. Hailey received a bunch of cozy blankets, so I decided to display them on the left side by hanging them in her closet. This area was pretty high up for anything other than blankets, since everything looked comically small in that corner. I folded the blankets in thirds to make them thin, then in half so they hung nicely off the hanger. Below all the blankets, I put this amazingly adorable pom pom basket (similar here) that I couldn’t resist getting! It holds miscellaneous breastfeeding items- nursing pads, my breast pump, etc. along with the chalk markers for her monthly updates. It’s essentially a catchall basket, which helps to keep the room tidy.

Looking for some nursery organization ideas? Check out this colorful and affordable nursery tour! From the closet to the dressers, I’ll show you where to store all of baby’s essentials. #nurseyorganizationideas #nurseryorganizationhacks #nurseryorga…

See those polka dot baskets there? Those are smack dab in the middle, and they hold all of Hailey’s clothes in bigger sizes. I put her 0-3 & 3-6 month clothes in her drawers, then made one cube of 6-9 and another of 9-12. Anything over 12 months was put into a giant storage bin for later and stored in the attic. These bins made it really easy to access new clothes as Hailey got bigger. I washed everything while I was pregnant and I’m sooooo glad I did. Those tiny clothes have more little plastic attachment pieces than should be legal. Plus, I can grab things from the bins without having to wash them, which is amazing now that I have a tiny human to care for. She makes more than enough laundry as it is!

Looking for some nursery organization ideas? Check out this colorful and affordable nursery tour! From the closet to the dressers, I’ll show you where to store all of baby’s essentials. #nurseyorganizationideas #nurseryorganizationhacks #nurseryorga…

At the top right, I have some transitional pieces. We plan to put some shelves up, so right now her decor and jewelry box are up there. The piggy bank was from her Oma (grandma) and belonged to her mom before that. When you put a coin in, it plays an Irish song! The jewelry box was a gift from my sister to me. I didn’t need it anymore, so instead of tossing it I decided it would be fun for Hailey to use. I can just imagine her storing her little plastic rings in there someday, and looking into the little mirror with lipstick smeared all over her face like a beauty queen.

Looking for some nursery organization ideas? Check out this colorful and affordable nursery tour! From the closet to the dressers, I’ll show you where to store all of baby’s essentials. #nurseyorganizationideas #nurseryorganizationhacks #nurseryorga…

Below those items is her fancy clothes- dresses, little coats, and tutus. All my favorite frilly things which are gorgeous! I couldn’t resist snapping a photo of just these little dressy items, because they’re that pretty! Everything is hung on tiny pink velvet hangers.

Looking for some nursery organization ideas? Check out this colorful and affordable nursery tour! From the closet to the dressers, I’ll show you where to store all of baby’s essentials. #nurseyorganizationideas #nurseryorganizationhacks #nurseryorga…

Let’s go down to the bottom of the closet. I used a structured bin or hamper (similar here, here and here) to hold even more of Hailey’s blankets. I had 2 comforters from her bedding set, plus her muslin swaddles and handmade blankets from family members. I folded everything up nicely and placed it in this bin for safekeeping. Above it, I have some of her extra hangers ready to go.

Looking for some nursery organization ideas? Check out this colorful and affordable nursery tour! From the closet to the dressers, I’ll show you where to store all of baby’s essentials. #nurseyorganizationideas #nurseryorganizationhacks #nurseryorga…

I knew we’d have to store Hailey’s bathtub in her room, since our bathroom is extremely small. I didn't want to remove it every time I wanted to shower, so it just made sense to keep it in her room. But again, I wanted everything to be pretty and this was no exception! So, I bought this oversize fabric hamper (similar here and here) to hold it when it’s not in use. After Hailey’s bath at night, I leave it in the tub to dry. Then, I put it back in the hamper until its next use. From the front, you can barely even tell what’s in there!

Looking for some nursery organization ideas? Check out this colorful and affordable nursery tour! From the closet to the dressers, I’ll show you where to store all of baby’s essentials. #nurseyorganizationideas #nurseryorganizationhacks #nurseryorga…

Now I’ll talk about all the other random bins I didn’t mention before. The pink striped bin at the top holds extra diapers and wipes, so we never have to worry about running out while she’s naked on the changing pad. The bins underneath it are her bath toys that she won’t be needing quite yet. The wooden box holds her very small shoe collection, and the pink bin at the bottom (similar here and here) is for clothes that no longer fit her. I get so sad when something has to go in that bin, but it means she’s happy and healthy which is a GREAT thing so I get over it fairly quickly.

Looking for some nursery organization ideas? Check out this colorful and affordable nursery tour! From the closet to the dressers, I’ll show you where to store all of baby’s essentials. #nurseyorganizationideas #nurseryorganizationhacks #nurseryorga…

The Book Shelf Storage

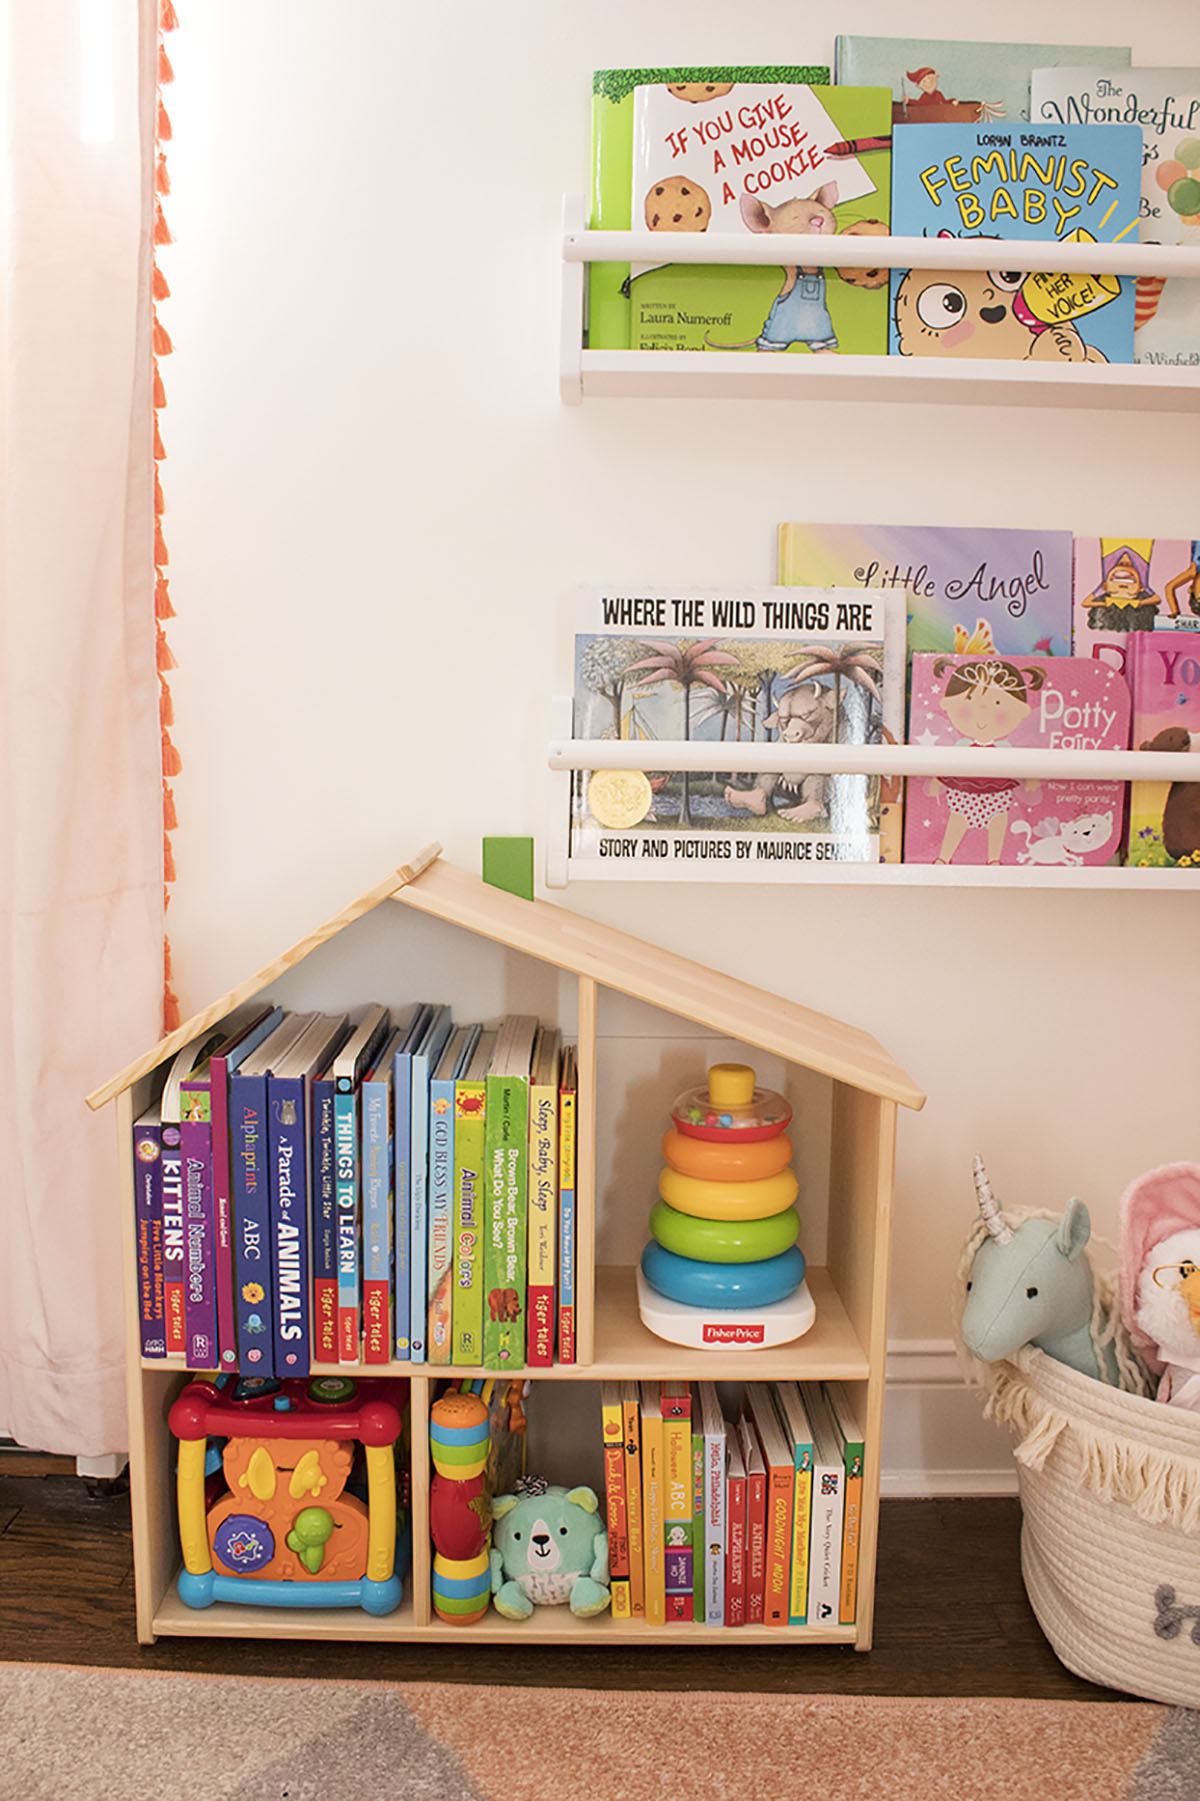
Over to the left of the closet is all of Hailey’s books! After seeing everyone else’s adorable book walls, I decided I wanted one for her room too. It fit perfectly on this narrow portion of wall underneath the AC, since anything bulky would block the closet. You can see a teensy portion of the door down there!

Looking for some nursery organization ideas? Check out this colorful and affordable nursery tour! From the closet to the dressers, I’ll show you where to store all of baby’s essentials. #nurseyorganizationideas #nurseryorganizationhacks #nurserybook…

I organized all the books by rainbow order, which made it visually appealing. These wooden book shelves from Ikea were painted white so that they provided a nice, simple place to hold the books. At the bottom, I placed my dollhouse bookshelf which houses some of her smaller books and toys, again in color order. Off to the right side, I have a small basket filled with some of her stuffed toys and dolls. Hailey has quite a few unicorn toys, along with a mermaid and singing Mother Goose!

Looking for some nursery organization ideas? Check out this colorful and affordable nursery tour! From the closet to the dressers, I’ll show you where to store all of baby’s essentials. #nurseyorganizationideas #nurseryorganizationhacks #nurserybook…

I can’t wait to show you the full room reveal, because those curtains are pretty epic too! This room is my favorite in the entire house.

Baby Dresser Storage

Off to the right of the closet is Hailey’s dresser! I chose this dresser because it was wide enough for our changing pad and was still a decent height for her changing pad. PS- I love this changing pad because you just wipe it clean if there’s a mess. No laundry needed. Just go ahead and order one now- you’ll thank me later!

Hailey’s dresser has 6 drawers. The top left holds her hats, headbands, and mittens along with her collection of socks. I kept everything neatly organized and accessible by putting in some smaller bins to help corral everything.

Looking for some nursery organization ideas? Check out this colorful and affordable nursery tour! From the closet to the dressers, I’ll show you where to store all of baby’s essentials. #nurseyorganizationideas #nurseryorganizationhacks #nurserydres…

The top right is where all of Hailey’s diaper changing supplies go. On top of the dresser, I have an organizer that holds diapers, wet and dry wipes plus all her ointments. There’s even a drawer for her brushes and combs! We use vaseline to prevent diaper rash, and put it on using this diaper cream brush. The drawer below this organizer contains spare diapers, wipes, and body lotions.

Looking for some nursery organization ideas? Check out this colorful and affordable nursery tour! From the closet to the dressers, I’ll show you where to store all of baby’s essentials. #nurseyorganizationideas #nurseryorganizationhacks #nurserydres…

Clothes Storage and Folding

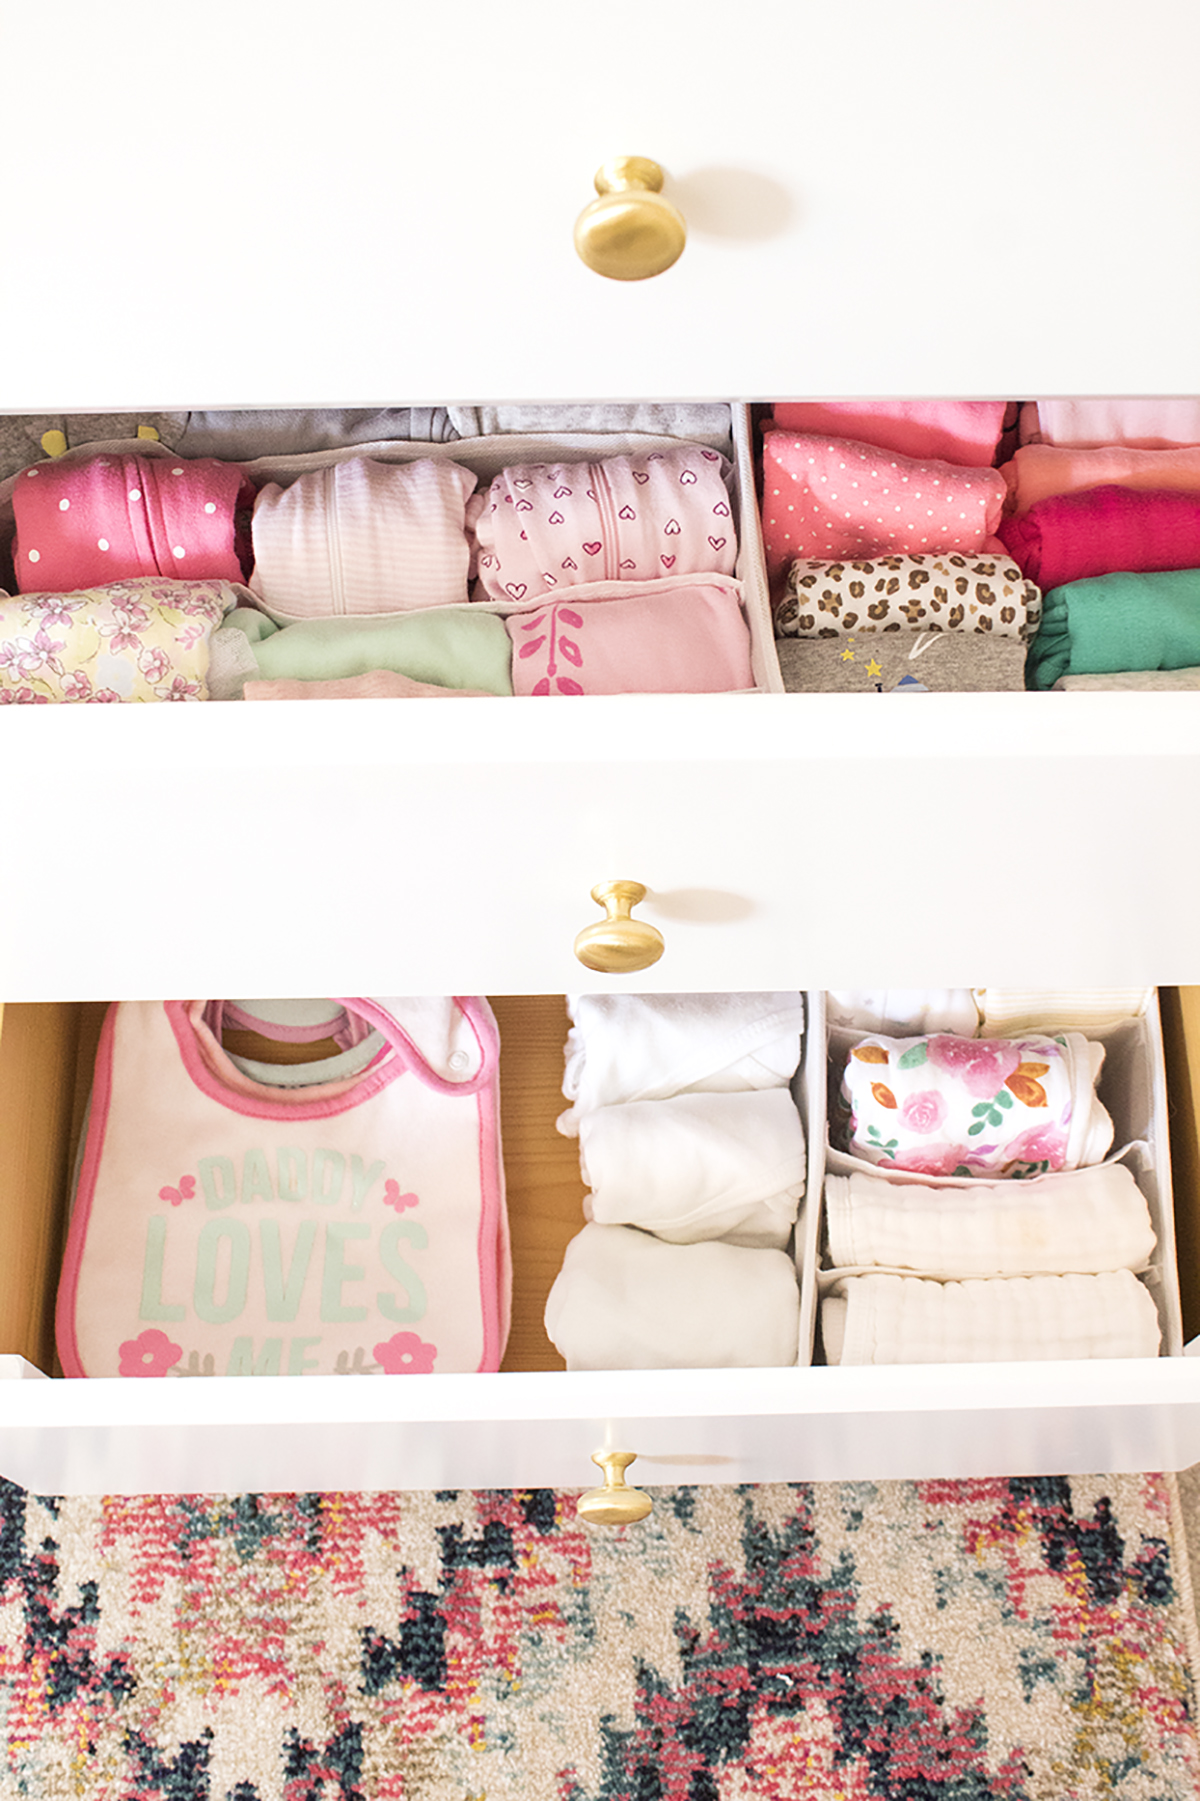
I folded all of Hailey’s clothes nicely and neatly into little cubes, and placed them into these drawer organizers to keep everything contained. Her clothes are so small that without the drawer organizers, they felt like they were flopping around in a giant drawer.

Looking for some nursery organization ideas? Check out this colorful and affordable nursery tour! From the closet to the dressers, I’ll show you where to store all of baby’s essentials. #nurseyorganizationideas #nurseryorganizationhacks #nurserydres…

The bottom 2 drawers hold Hailey’s blankets, bibs, and burp cloths. Again, I folded everything nice and neat and placed it into smaller bins. On the left side I placed all her blanket toys which she didn’t care about at first but now she LOVES them, especially the pink cat we nicknamed Kitty. Super creative, I know ;)

Looking for some nursery organization ideas? Check out this colorful and affordable nursery tour! From the closet to the dressers, I’ll show you where to store all of baby’s essentials. #nurseyorganizationideas #nurseryorganizationhacks #nurserydres…

The bottom right holds burp cloths and bins. Ironically, we got WAY too many bibs and not nearly enough burp cloths, which we definitely needed more! I ended up ordering most of them myself, so if you’re unsure what to get a new momma, try burp cloths. The bottom drawer also holds some wrap sweaters they gave us at the hospital which were essential in the chilly hospital where she only wore a swaddle. They became a little less necessary at home since she wore sleeper pajamas, but they are helpful when she’s wearing a t-shirt.

Looking for some nursery organization ideas? Check out this colorful and affordable nursery tour! From the closet to the dressers, I’ll show you where to store all of baby’s essentials. #nurseyorganizationideas #nurseryorganizationhacks #nurserydres…

Over on the other side of the room, I have fabric dresser drawer that matches the bin in her closet. It holds Hailey’s bath supplies like towels, soaps, and washcloths. It also holds all her medicines and personal care items like thermometers and nail clippers. There’s also a drawer that holds all her fitted sheets and bassinet pad covers. Can we talk about how neatly those fitted sheets are folded? Stand back folks- I’M A PROFESSIONAL!

Looking for some nursery organization ideas? Check out this colorful and affordable nursery tour! From the closet to the dressers, I’ll show you where to store all of baby’s essentials. #nurseyorganizationideas #nurseryorganizationhacks #nurserydres…

PS- I realized these pictures were taken when Hailey was only 6 weeks old. For reference, she’s now 9 months old! Look how tiny she was, my little lumpy baby.

Looking for some nursery organization ideas? Check out this colorful and affordable nursery tour! From the closet to the dressers, I’ll show you where to store all of baby’s essentials. #nurseyorganizationideas #nurseryorganizationhacks #nurserydres…

Flamingo Pool Party

Toady I did something that I have not done for a very, very long time. I did something just for fun, with the sole purpose of being the type of person I want to be. You see, I host a lot of parties and do a lot of projects on this blog, but I’ve gotten to the point where I feel a little glum about it. A lot of pretending happens here and while it can be really fun (and it truly fuels me, if I’m being honest!) sometimes I really want to have actual fun. I see a lot of other people going out to real events, with real people. So, while it can be fun to create my own events, actually having someone to celebrate them with is even better.

Looking to add a little bit more fun to your everyday blow-up pool? How about making a super easy Flamingo pool party for your kids for less than $100?! This setup took me about 10 minutes, so it’s perfect for an impromptu summer day. Click for the …

So, when my husband suggested we fill up the pool and take a dip with Hailey, I got super excited and decided that I didn’t need a huge pool or a bunch of friends over to enjoy a tropical/ flamingo pool float/ colorful adventure. I just had to grab my supplies, set them up, and enjoy a tiny party all for myself. 

Looking to add a little bit more fun to your everyday blow-up pool? How about making a super easy Flamingo pool party for your kids for less than $100?! This setup took me about 10 minutes, so it’s perfect for an impromptu summer day. Click for the …

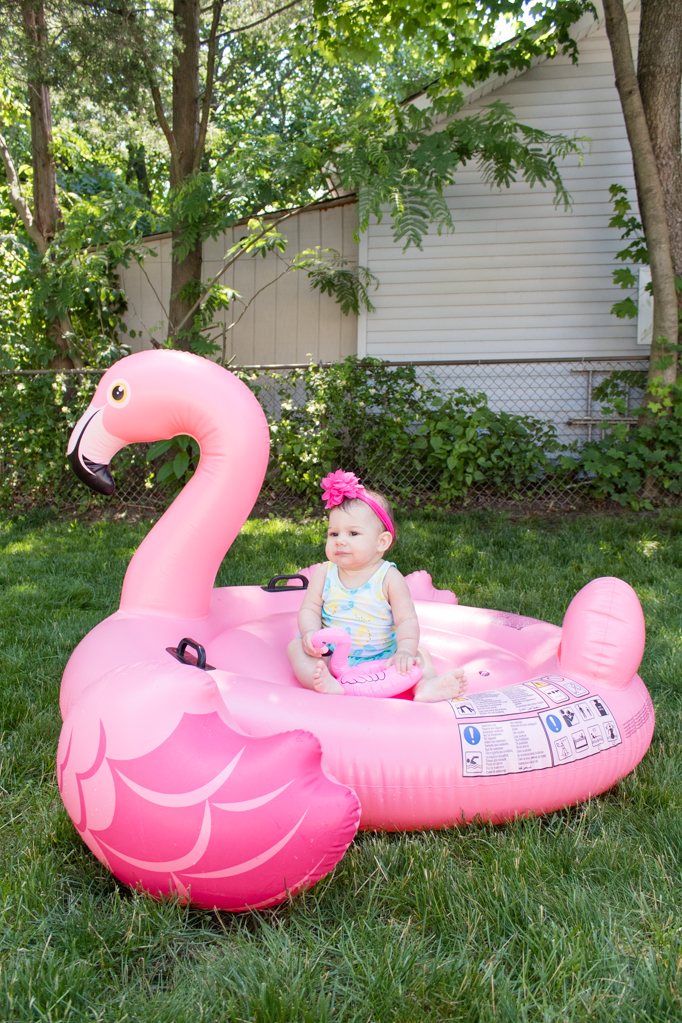
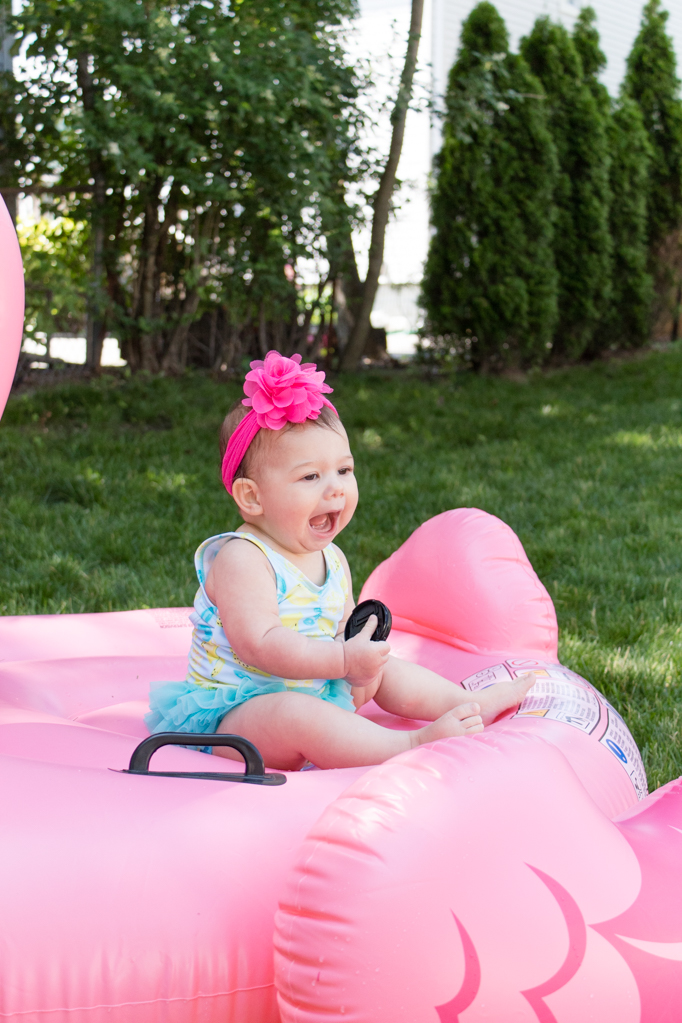
Our flamingo pool float, that my sister and I named Javier, was blown up as a chair to lounge on after a dip in the pool. It also provided a great photo op! Hailey wasn’t really in the mood to be in the pool for very long, so it was nice to have Javier for her to sit on and still have the pool party fun.

Looking to add a little bit more fun to your everyday blow-up pool? How about making a super easy Flamingo pool party for your kids for less than $100?! This setup took me about 10 minutes, so it’s perfect for an impromptu summer day. Click for the …

I used a small folding table next to the pool to hold the essentials- cell phones, glasses of water, and mini flamingo pool floats. I also dressed it up with some tassel garland (left over from Hailey’s half birthday party!) plus mini flamingo ornaments and tropical leaves from my baby shower. I’ve had these mini flamingo pool floats for so long- I’m not even sure when I first got them, but they came to my bachelorette party, Mexico, and even my wedding! I love keeping them in my purse and then blowing them up when the need arises. Which for me, is anytime!

Looking to add a little bit more fun to your everyday blow-up pool? How about making a super easy Flamingo pool party for your kids for less than $100?! This setup took me about 10 minutes, so it’s perfect for an impromptu summer day. Click for the …

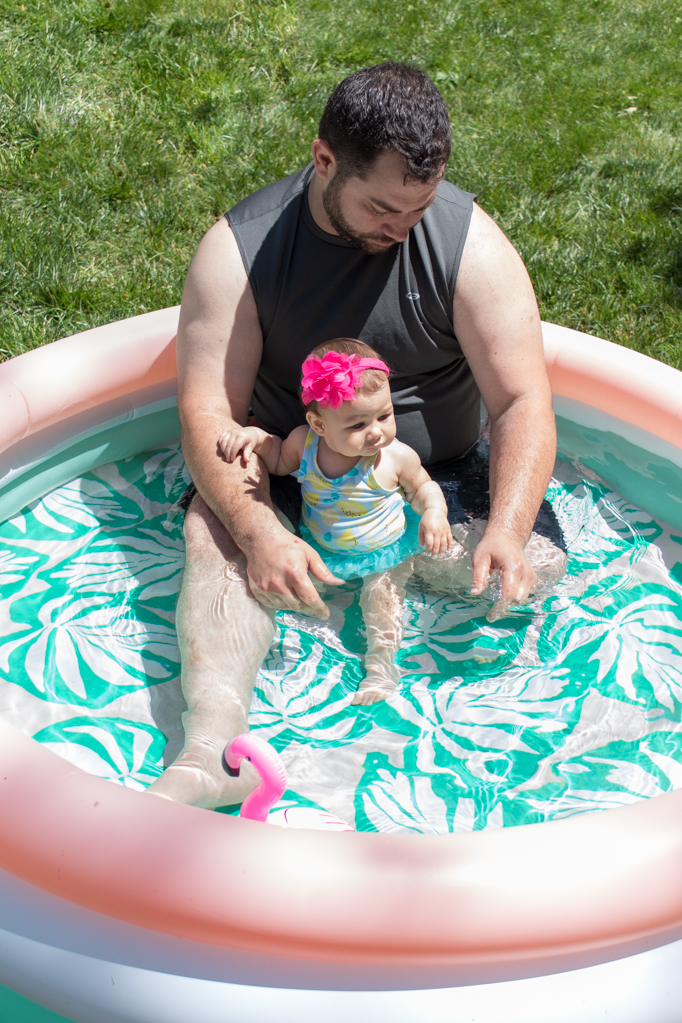
We don’t have a pool in our backyard, so I had purchased this mini one from Target that holds 3 adults. It was perfect for us and Hailey! I love the fun tropical pattern too. We keep ours inflated and store it in the shed, so it’s ready to go for the next pool party.

Looking to add a little bit more fun to your everyday blow-up pool? How about making a super easy Flamingo pool party for your kids for less than $100?! This setup took me about 10 minutes, so it’s perfect for an impromptu summer day. Click for the …

Hailey and I put on our fun, tropical bathing suits and added some festive accessories, like a big flower headband for Hailey and earrings and sunglasses for me. Everything was super easy to set up- it only took a few minutes to gather up all my supplies and then a few more to decorate the space. I was super happy while we splashed around in the pool- it was really fun to make an ordinary experience like hopping in the inflatable pool just a little but more festive.  

Looking to add a little bit more fun to your everyday blow-up pool? How about making a super easy Flamingo pool party for your kids for less than $100?! This setup took me about 10 minutes, so it’s perfect for an impromptu summer day. Click for the …

I know that to some having so many pictures of the impromptu pool party seems like I wasn’t in the moment truly having fun, but for me that’s how I celebrate! I love to look back and have nice photos of events. I could snap a few cell phone pictures but then I wouldn’t feel that moment of being back there. Hailey’s getting SO big and so quickly that I want to preserve every single moment with her. 

Looking to add a little bit more fun to your everyday blow-up pool? How about making a super easy Flamingo pool party for your kids for less than $100?! This setup took me about 10 minutes, so it’s perfect for an impromptu summer day. Click for the …

While an amazing, huge, Pinterest-worthy party can be fun and envy-inducing, it’s also important to enjoy the less noteworthy, everyday things that happen. By adding a little bit more fun to the everyday, you’ll be able to enjoy every minute instead of waiting for something important to happen. Well, my friends, YOU are important and that is worth celebrating!

Looking to add a little bit more fun to your everyday blow-up pool? How about making a super easy Flamingo pool party for your kids for less than $100?! This setup took me about 10 minutes, so it’s perfect for an impromptu summer day. Click for the …

What type of mini party will you be celebrating? Is there anything you want to see for inspiration? Perhaps a Christmas in July party? Halloween tea party? Face mask party? Let me know in the comments below and I’ll try to make it happen!

How I Find Time For Doing My Hair

For years, I’ve wanted to be the kind of woman who does her hair. You see, I have curly hair that I usually do nothing with. Sometimes I put some product in it when I’m going out. Most days, I just wash it and let it air dry with nothing in it at all, because I don’t go anywhere. This has been going on for years, and I can count on my hands how many times I’ve truly felt like I had a good hair day when my hair was curly. But that’s a somewhat separate issue. 

Despite not going anywhere, I’ve straightened my hair the last 3 months and I don’t regret it one bit. Here’s 7 reasons why I do it and how I find the time- all while taking care of a baby, a puppy, 3 cats, and trying to grow a business. Plus, the m…

While I’ve wished that I was one of those women who actually styled their hair, I spent years just going around with hair I hated. In high school, my hair was split right down the center and extraordinarily long. In college it was usually down or in a lazy bun. When I’d go out, I’d straighten my hair and make loose waves and I felt gorgeous. But aside from those days, I was basically living life on the curly side. 

When I started working full time, I became even lazier than I was in college. I went out less, aside from going to work every day. It seemed pointless to do my hair just to go to work- I wasn’t doing anything special. For the most part, I felt secure with how I looked even if that meant disliking how I looked most of the time. It just didn’t really matter THAT much to me. 

Well, let’s flash forward to a few months ago. The post-partum hair loss began. The pesky knot I always got at the base of my neck suddenly became 3 times as big. In fact, my hair was starting to tangle at the roots! I sat around at home all day on maternity leave, so that whole “not doing anything special” kicked in big time. I had my hair down a day or two then it would get super tangled and I’d just toss it into a bun, making it MORE TANGLED. Wash, brush, rinse and repeat. After spending 10+ minutes brushing out my hair in the shower a few times, I was tired of it. There had to be a better way. 

Despite not going anywhere, I’ve straightened my hair the last 3 months and I don’t regret it one bit. Here’s 7 reasons why I do it and how I find the time- all while taking care of a baby, a puppy, 3 cats, and trying to grow a business. Plus, the m…

Despite not going anywhere, I’ve straightened my hair the last 3 months and I don’t regret it one bit. Here’s 7 reasons why I do it and how I find the time- all while taking care of a baby, a puppy, 3 cats, and trying to grow a business. 

  1. I look good, so I feel good. Me lounging in my pjs with straight hair? I consider myself a 9. Pjs and curly hair? A solid 4, maybe. Some girls really rock the curly hair look. I don’t feel like I’m one of them. Feeling good (human, I should say) is essential when you’re home all day with a baby. It’s so easy to lose yourself and say you’re “too busy” for this or that (SHOWERING) so by doing my hair, it helped to remind me that I’m still a woman, a wife, and a sexy one at that!

  2. It prevents tangles. Although I don’t brush my hair when it’s straight (I guess that’s a curly hair habit that stuck with me) it just doesn’t tangle nearly as much. Even if I put it in a bun those last few days or sleep with it down, somehow it just doesn’t form that giant knot anymore. Hallelujah!

  3. It really isn’t as much work as I thought to blow dry my hair. It takes about 20 minutes using the Revlon One-Step Hair Dryer and Volumizer. That’s only 10 minutes more than it was taking me just to brush my giant curly knot. And my hair ends up looking 10x better. This magic tool leaves my hair looking smooth and full of body. I talk alllll about it here.

  4. It’s silly, but it’s important. You may be thinking that it’s pointless to style your hair when you’re home, or that you have better things to do, or you don’t have the time. And whatever you believe to be true... well you’ll convince yourself it is. I know I did, for years! I finally decided that I was going to prioritize my looks a little bit. You won’t see me in a full face of makeup anytime soon, but I can at least run a round brush through my hair to make myself feel presentable. 

  5. If you prioritize feeling good, you’ll find the time to do it. I blow dry my hair while Hailey takes her nap. If she wakes up after my shower but before I can do my hair, I’ll put her in her bouncer and pop on a Disney movie. She loves it and although I feel a little guilty sometimes, she never finishes the movie. It’s only for about 20 minutes and then I whisk her back into my arms. You can also do quiet time or activities with the kids, like having them do a puzzle. Or let them be kinda wild and play pirates or something together. 

  6. If all else fails, get your husband/partner involved. You may be thinking that your husband won’t understand why you even care about your appearance. It might be hard to justify at first, because it’ll seem so frivolous. I felt a little embarrassed the first time my husband came home and my hair was done. It seemed silly and unnecessary. But after a couple of weeks I don’t even care what he has to say. I care for Hailey all day long and this is my way of feeling sexy again. Once your partner sees how confident and sexy you feel, they’ll likely get on board with it. It’ll probably have some perks for them if you feel good too!

  7. Maybe you’re thinking that your husband is useless with the kids, so you can’t expect him to watch them while you do your hair. Um, girlfriend, that’s even more reason to get him involved. Your husband should be your partner, and there’s no reason why he shouldn’t be able to carry his weight with the kids. Even if you’re a stay at home mom, you deserve a break. Even if he acts like he doesn’t know what to do with the kids, this is how he’ll learn. I’m 1,000% blessed to have a husband who’s probably more useful than I am when it comes to running a home, but this is how the dynamic should be in every family. We all pitch in to help, and it’s much better for your kids when their dad is happily involved in all aspects of their lives.

Despite not going anywhere, I’ve straightened my hair the last 3 months and I don’t regret it one bit. Here’s 7 reasons why I do it and how I find the time- all while taking care of a baby, a puppy, 3 cats, and trying to grow a business. Plus, the m…

My motto for this year is “if not now, when?” I’m tired of living for “someday”. My entire life has been me putting off the things I truly want while waiting for me to magically be the type of person who did the things I wanted to do. You don’t magically become that person- you gotta do the things to actually… you know, do the things, and become the person. Whether it’s dressing better, being braver, being more present, or even just doing your damn hair.  If you keep living for “someday” you’ll die waiting for it. 

Hailey’s Happy Half- A Confetti Carnival Half Birthday Party

On March 28, Hailey officially became 6 months old! I truly cannot believe how quickly time flew by, but it’s true! I love a good party (surprise surprise!) so I decided to throw Hailey a small (but adorable) half birthday party to mark the occasion. I knew the party had to be cheap, because our budget is a little tight these days. I also knew it had to be simple so my husband wouldn’t get annoyed at me for having an unnecessary party. And I knew it had to be cute, because IT’S ME and I wouldn’t have it any other way. The result was an adorable little party on a budget that any mom can throw for their baby!

Hailey-Half-Party-18.jpg

Picking a Half Birthday Party Theme 

The first thing I had to do was pick a theme for the party. I was a bit stumped at first, but I knew I wanted something colorful and maybe with confetti. I browsed Pinterest for ideas, then I looked up the silly holidays and found that March 28 is food on a stick day. My mind instantly went to carnival food like corn dogs, and that’s how the confetti carnival theme came about! I created a mood board for the party (more on that coming to the blog soon!) and I began planning my purchases and menu. 

One of my goals for this party was to not generate a ton of trash afterwards. So, I purchased reusable supplies like the honeycombs instead of balloons. I decided not to use cute patterned paper/plastic plates because we had enough everyday plates for the guests. I also used our turquoise footed glass goblets that we never get to use with company and regular silverware. The only plates I got where these half circle plates because they just fit with the theme wayyyy too well, and I knew there was no way I’d find that affordably for a reusable set. I skipped paper straws altogether because no one really uses them anyway. 

Hailey-Half-Party-2.jpg

Carnival Party Crafts 

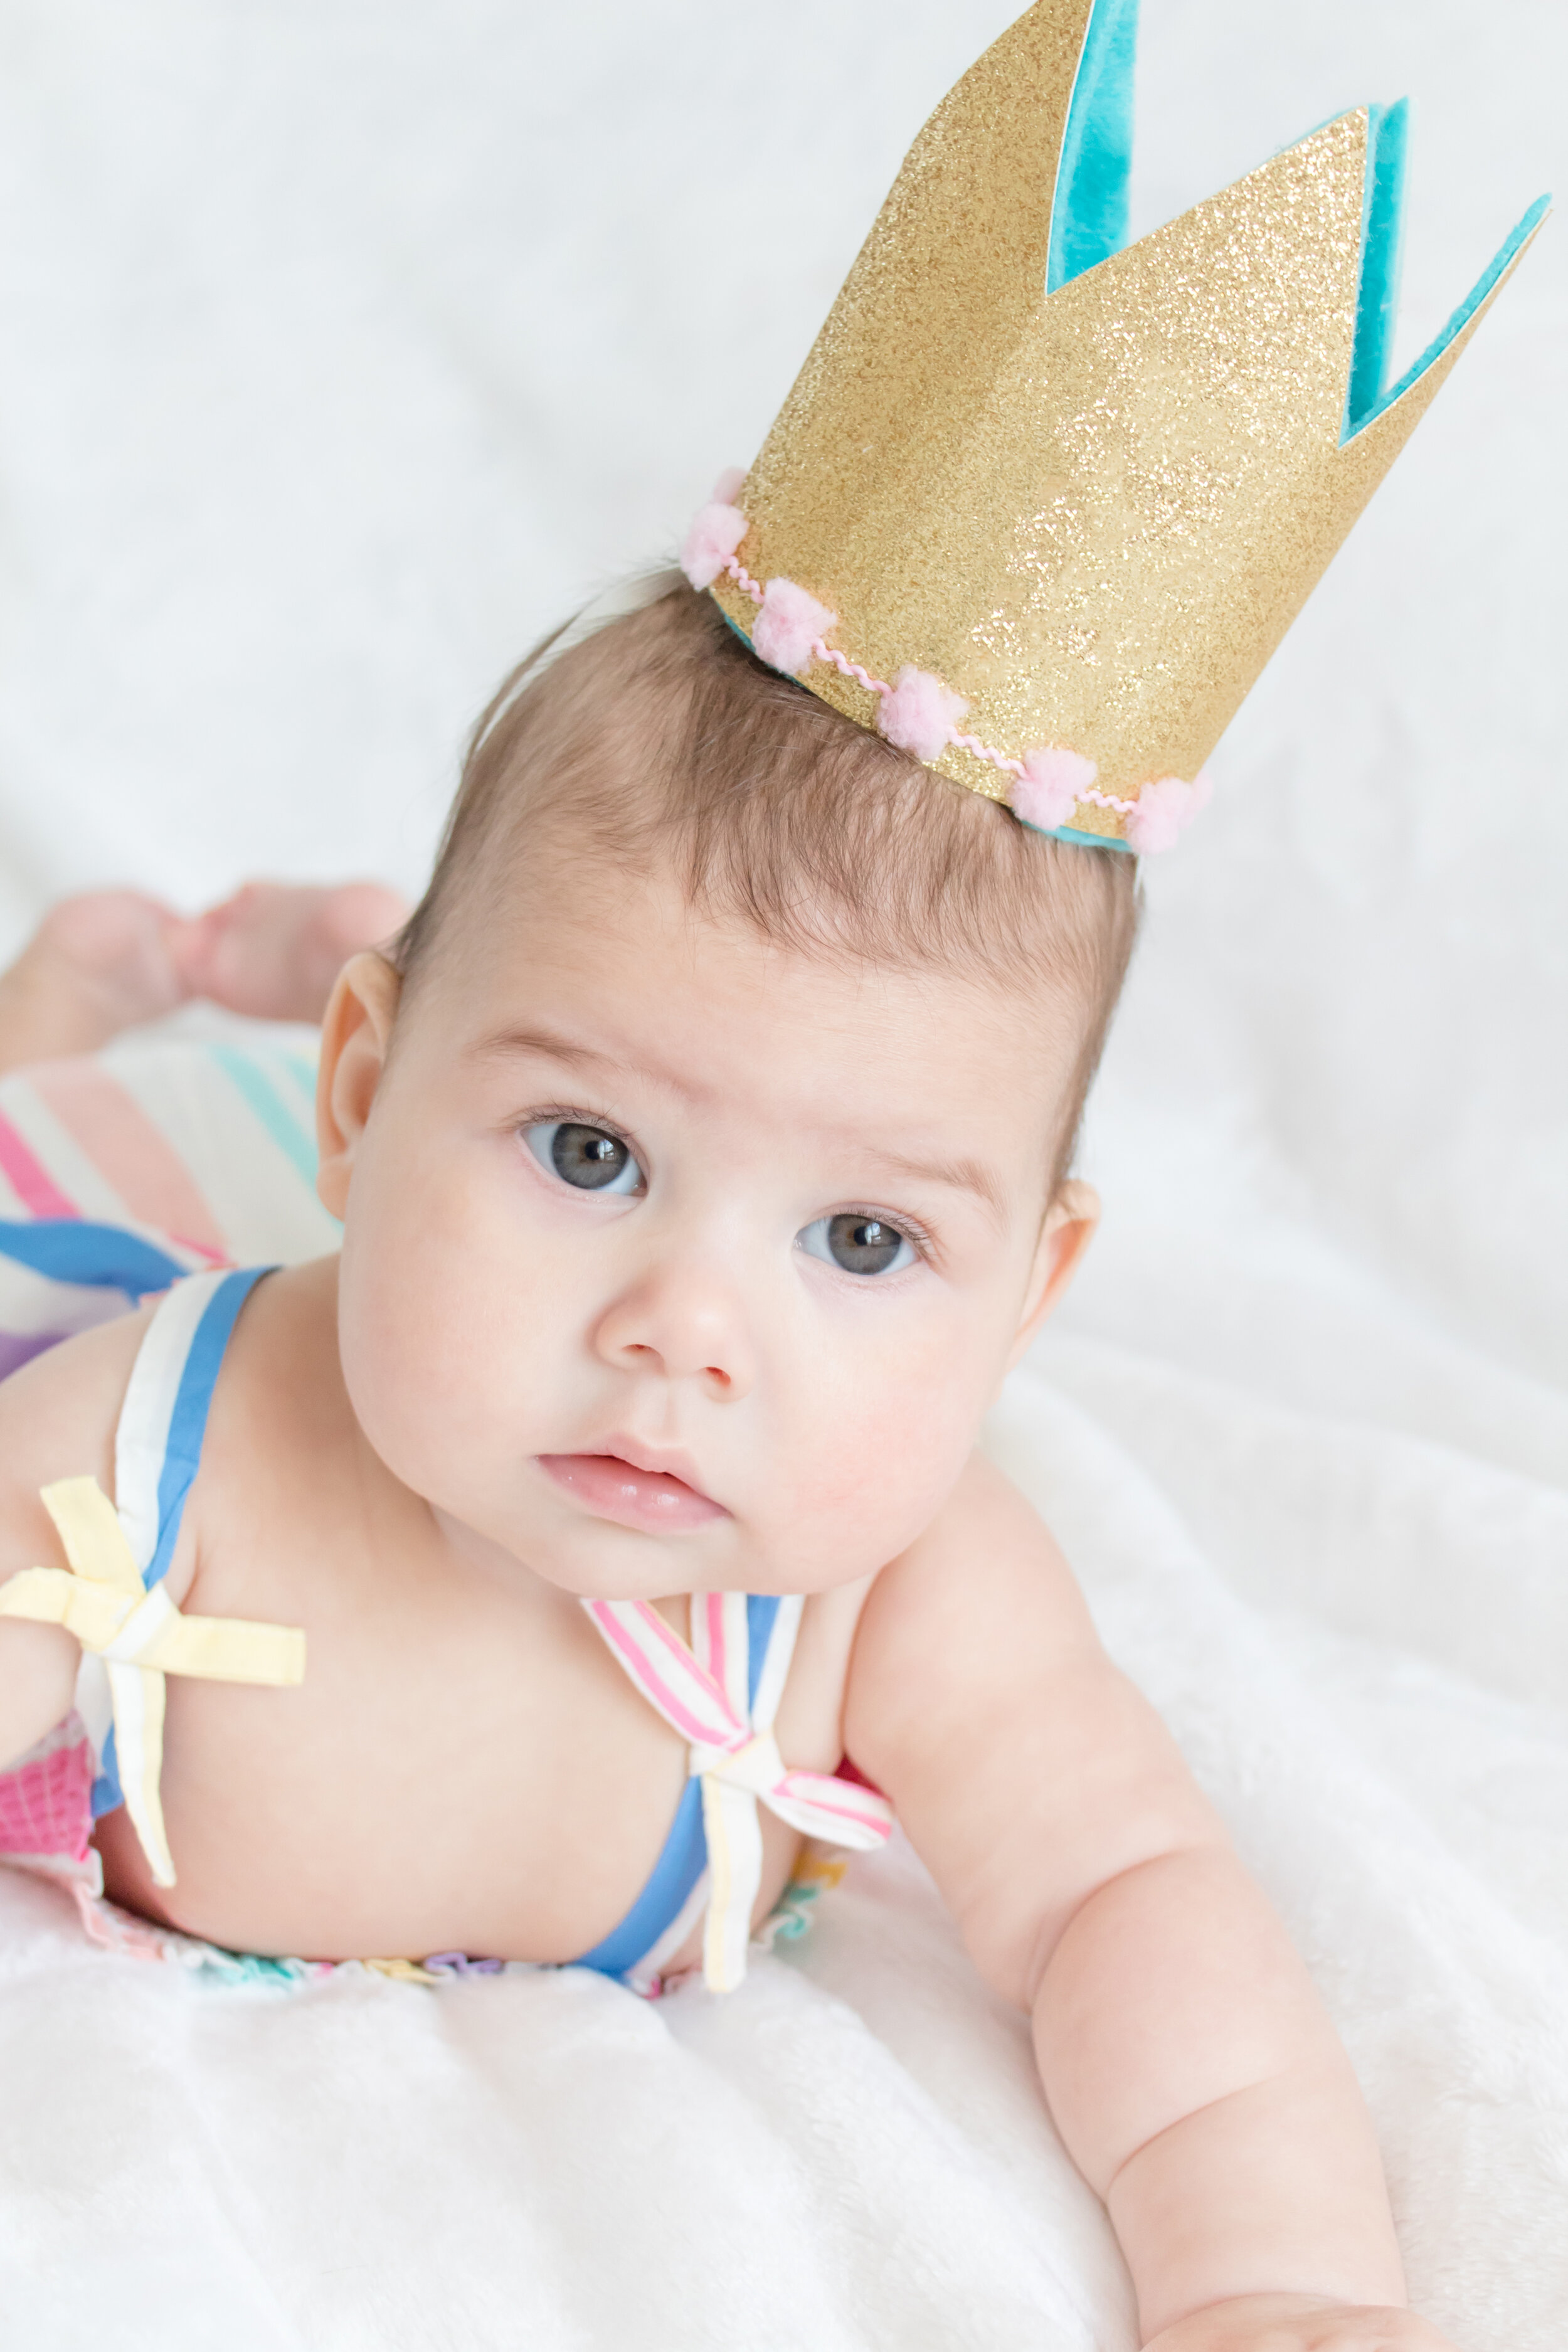
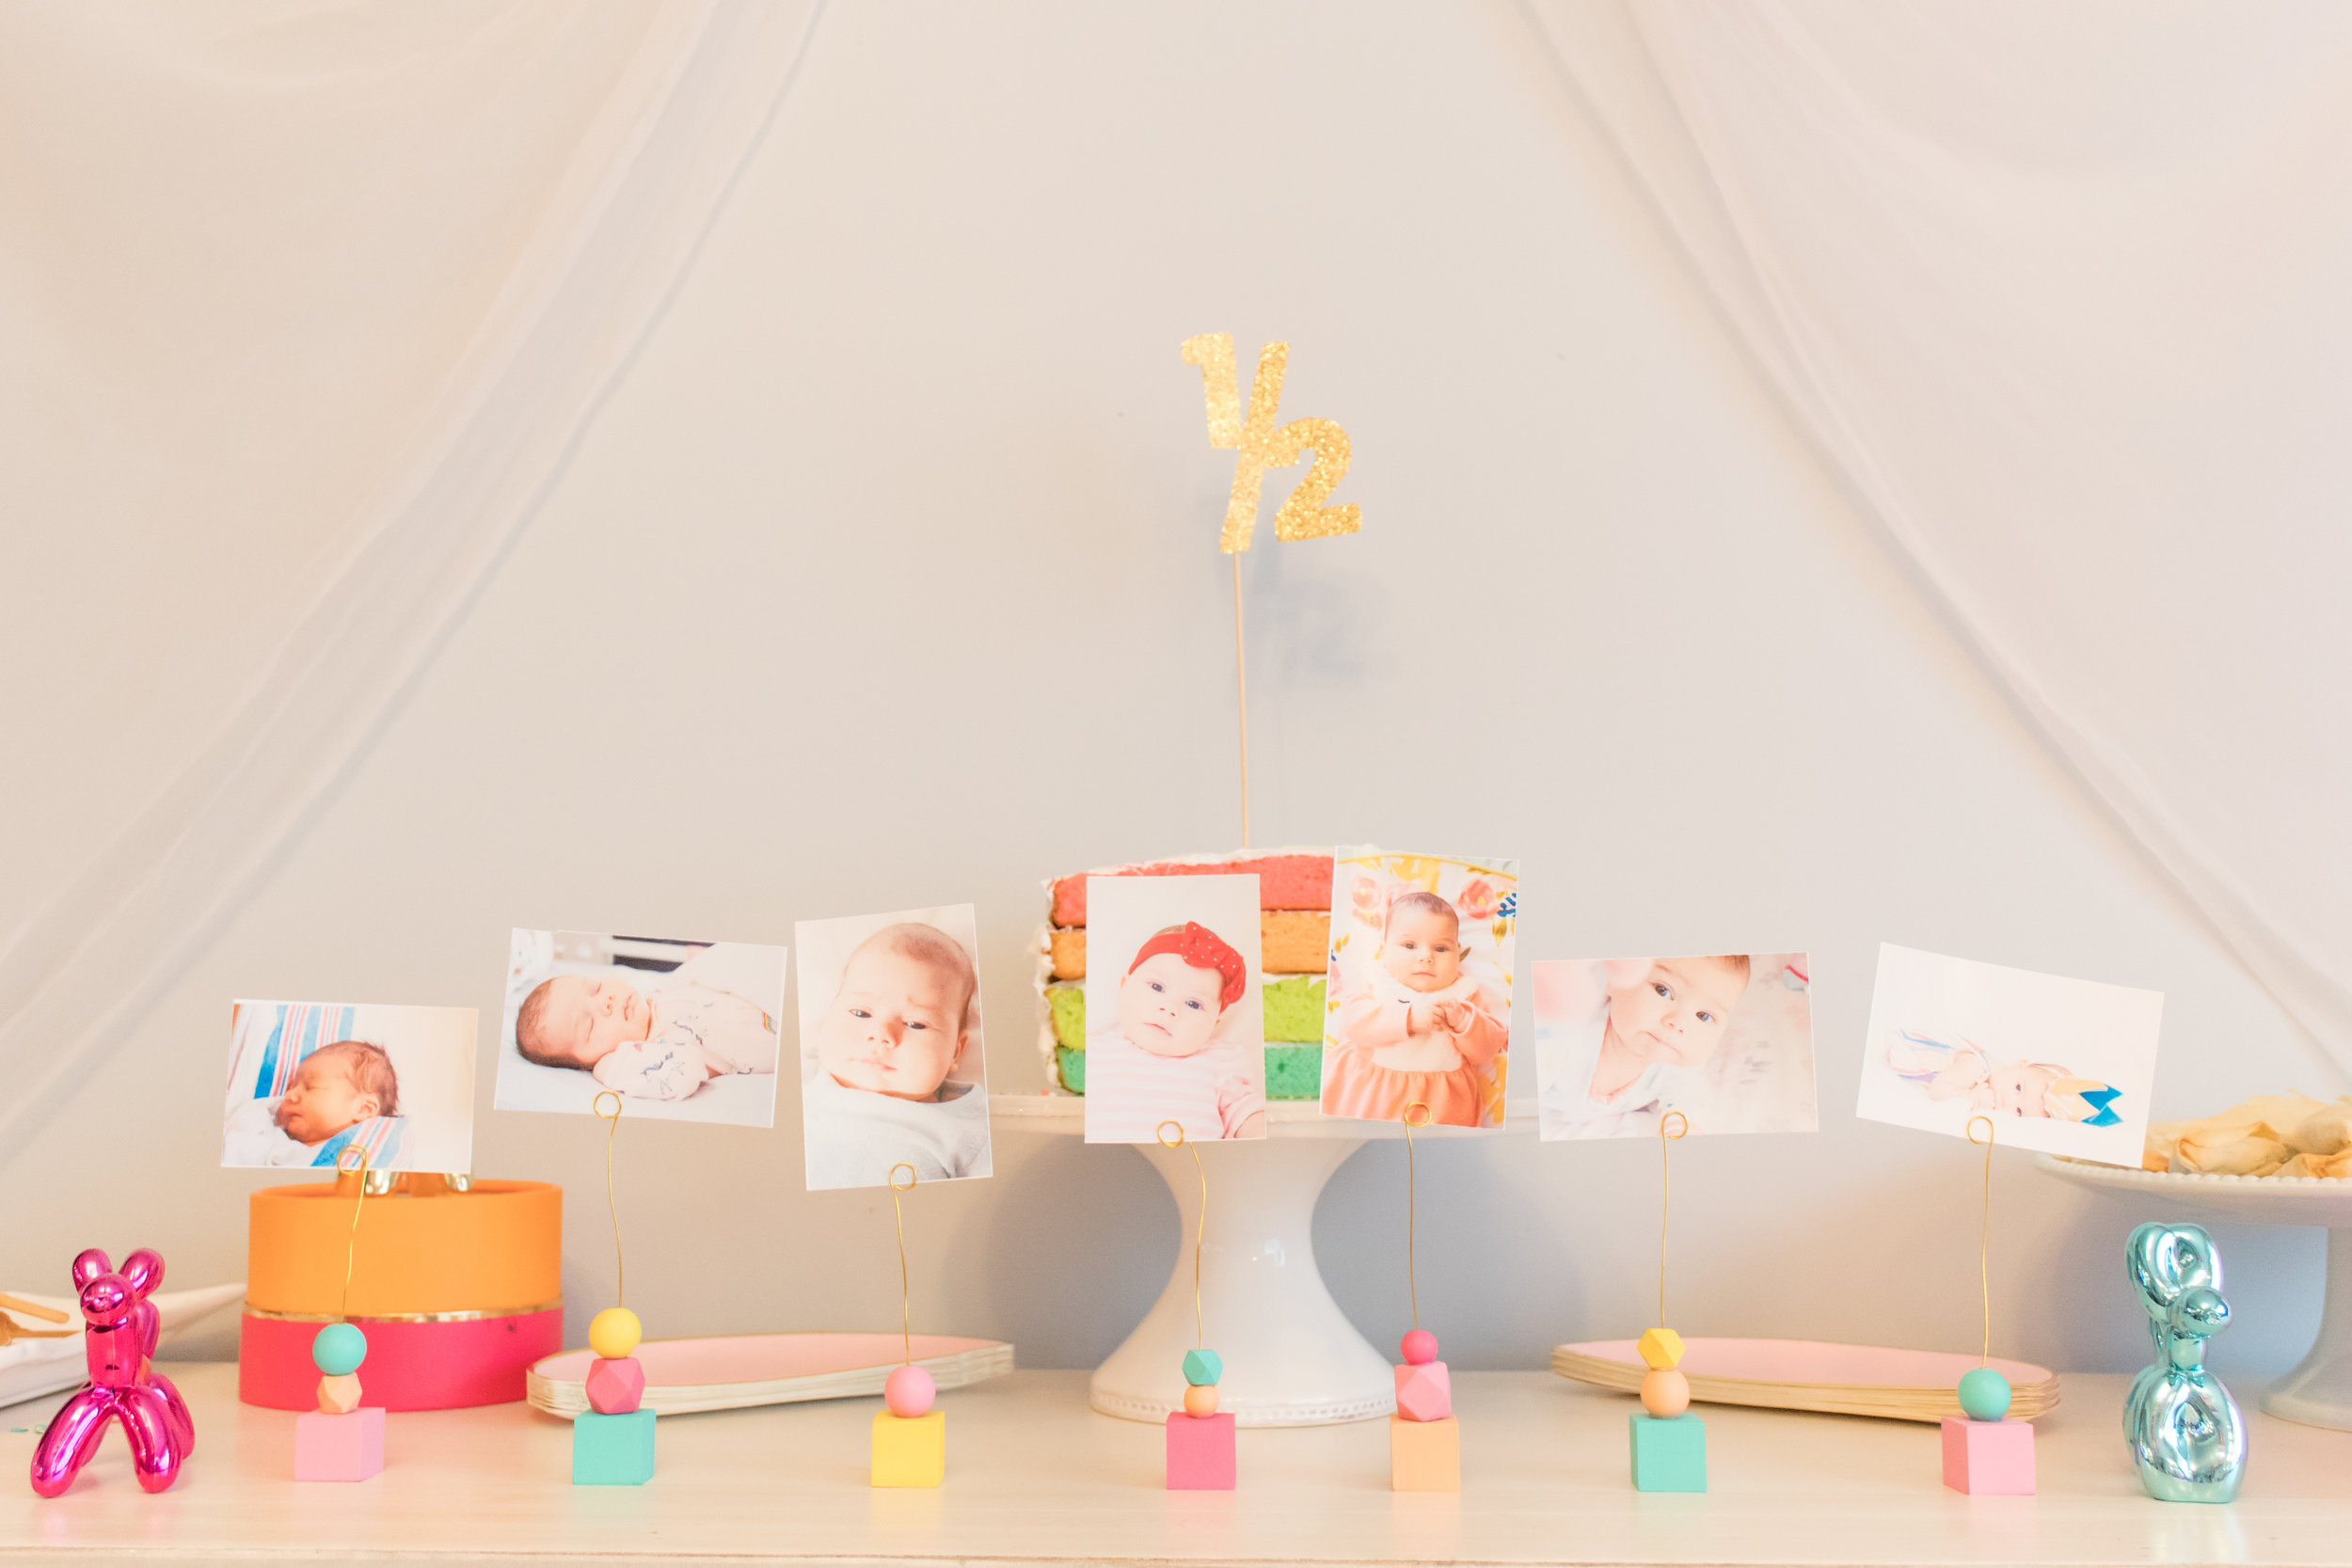
The good news is that all the fun DIYs that I did will be coming to the blog soon! I wanted to get this party post up before Hailey turned 9 months (or 9 years!) old. Like I said, I kept it simple and only did a few diy projects. I made Hailey a crown to wear with a 1/2 on it which at first seemed a little big but looked pretty cute overall. She wore it comfortably for most of the party! Then, I made a 1/2 cake topper. I had big plans for it with hanging ribbons but it looked funny, and 9pm the night before means you just gotta move on. I kept it simple with just glitter paper and a skewer stick. And lastly, I really wanted to display the photos I’ve been taking of Hailey each month so I made some picture holders! I picked my favorite photo from each month plus one from when she was first born.  It was really amazing being able to capture her growth each month because I can’t believe how big she’s gotten already and it hasn’t even been a year yet! I think I’m going to look back at these with such appreciation.

Psst- I made a baby photography course so that you can learn how to take better baby photos too! Learn more about Dreamy Baby Photography here.

Hailey-Half-Party-16.jpg
Hailey-Half-Party-47.jpg
Hailey-Half-Party-22.jpg

Carnival Party Decor

I knew I wanted to make a tent (even though it’s more circus than carnival) so I raided my fabric stash and found some tulle that I had bought for my veil, but it was too narrow. I would have preferred something bolder but hey, sometimes you just gotta move on! I also knew I wanted to have balloon animals, so I used these figures I had and put them around the house. Finally, I wanted to add some pizzazz to the party area so I purchased a set of tassel garlands and a pack of honeycombs and lanterns. I made some of the garland tassels thicker and some thinner (2 pieces of tissue paper vs 4) so I was able to make a ton of tassels and hang them up around the party area. I also used the tassels and the honeycombs to decorate the tent and give it more of a carnival feel. I also added my DIY cotton candy garland which is so fun and complimented the theme!

Hailey-Half-Party-27.jpg
Hailey-Half-Party-4.jpg
Hailey-Half-Party-8.jpg
Hailey-Half-Party-3.jpg
Hailey-Half-Party-14.jpg
Hailey-Half-Party-1.jpg

Carnival Party Menu

You can’t have a party without food! Well, you can but it wouldn’t be as good haha. We decided to keep the menu really simple (and cheap!) with traditional carnival fare. 

Popcorn chicken
Corn dogs
Mexican street corn (elote)
Loaded tot kabobs (recipe here)
Cotton candy
Cake pops
Popcorn
Buffalo wings (brought by family)
Spinach pies (common at Greek fairs!)

Hailey-Half-Party-13.jpg

Rainbow Layer Cake 

I decided that I wanted to do a layer cake and make it rainbow. I’ve never made a layer cake before nor a rainbow cake so I was a little worried. But it came out soooo cute! Since it was her half birthday I cut the cake in half, which left the layers out for everyone to see. The cake was actually really easy to make but in case you want a “tutorial”, here’s what I did. I used 2 white cake mix boxes and dyed them using neon McCormick dye. I sprayed the pans with flour spray which helped the cake not to stick to the pan. After they baked and cooled, I took them out of the pans and cut them flat using a long sharp knife. Then, I cut them in half and assembled the cake with a layer of frosting in between. Hailey was too young to eat the cake, but we took some pretty cute photos of her with the cake!

Hailey-Half-Party-32.jpg
Hailey-Half-Party-35.jpg
Hailey-Half-Party-36.jpg
Hailey-Half-Party-40.jpg
Hailey-Half-Party-46.jpg

I mean…. look at that rainbow gorgeous goodness! Not bad for my first attempt at rainbow cake and a layer cake. I served the cake on the half circle plates, because what better to eat half a cake on than half a plate?! Once the cake and dessert was served, Hailey opened a few gifts from my mom. We requested no gifts but she said she had purchased the items months ago and since my parents were moving, she didn’t want to lose them. Fair enough! Most of those toys ended up being some of her favorites.

Hailey-Half-Party-52.jpg
Hailey-Half-Party-62.jpg
Hailey-Half-Party-63.jpg

Such a fun and simple way to celebrate Hailey’s Half Birthday! Most of those decorations are still up, 2 months later. I love how festive the honeycomb balls and lanterns are! Even the circus tent is still up, although that’s probably due to laziness more than anything else. It’s hard to believe that in less than 4 months, we’ll be celebrating her first birthday. Seriously, where has the time gone and how do I stop it?!

Hailey-Half-Party-23.jpg
Hailey-Half-Party-24.jpg

Well, that’s all folks! I’ve got the individual DIY projects for this party (including the crown and photo holders!) coming to the blog soon, as well as Hailey’s monthly updates. It’s been a little busy around here and sadly I’m slacking on those! Part of me was thinking maybe I shouldn’t bother with them anymore but I think someday I’m going to look back at them longingly so I’m going to keep going! Keep an eye out for the DIY projects and don’t forget to follow me on Instagram for more behind-the-scenes plus reminders for new posts!